A gear drying shed is more than extra storage. It is the place where soaked boots stop sitting by the house door, rain shells get air around them, gloves stay paired, helmets have a shelf, and ski or trail gear has a predictable reset zone after a wet day outside.
North Idaho weather makes that workflow matter. Snow, slush, spring mud, lake rain, and shoulder-season freeze-thaw can all move through the same property in a week. North Idaho On Site Sheds can build a practical mudroom-style shed shell with wide access, durable surfaces, ventilation cues, and enough wall space for the gear that needs to dry before the next trip.
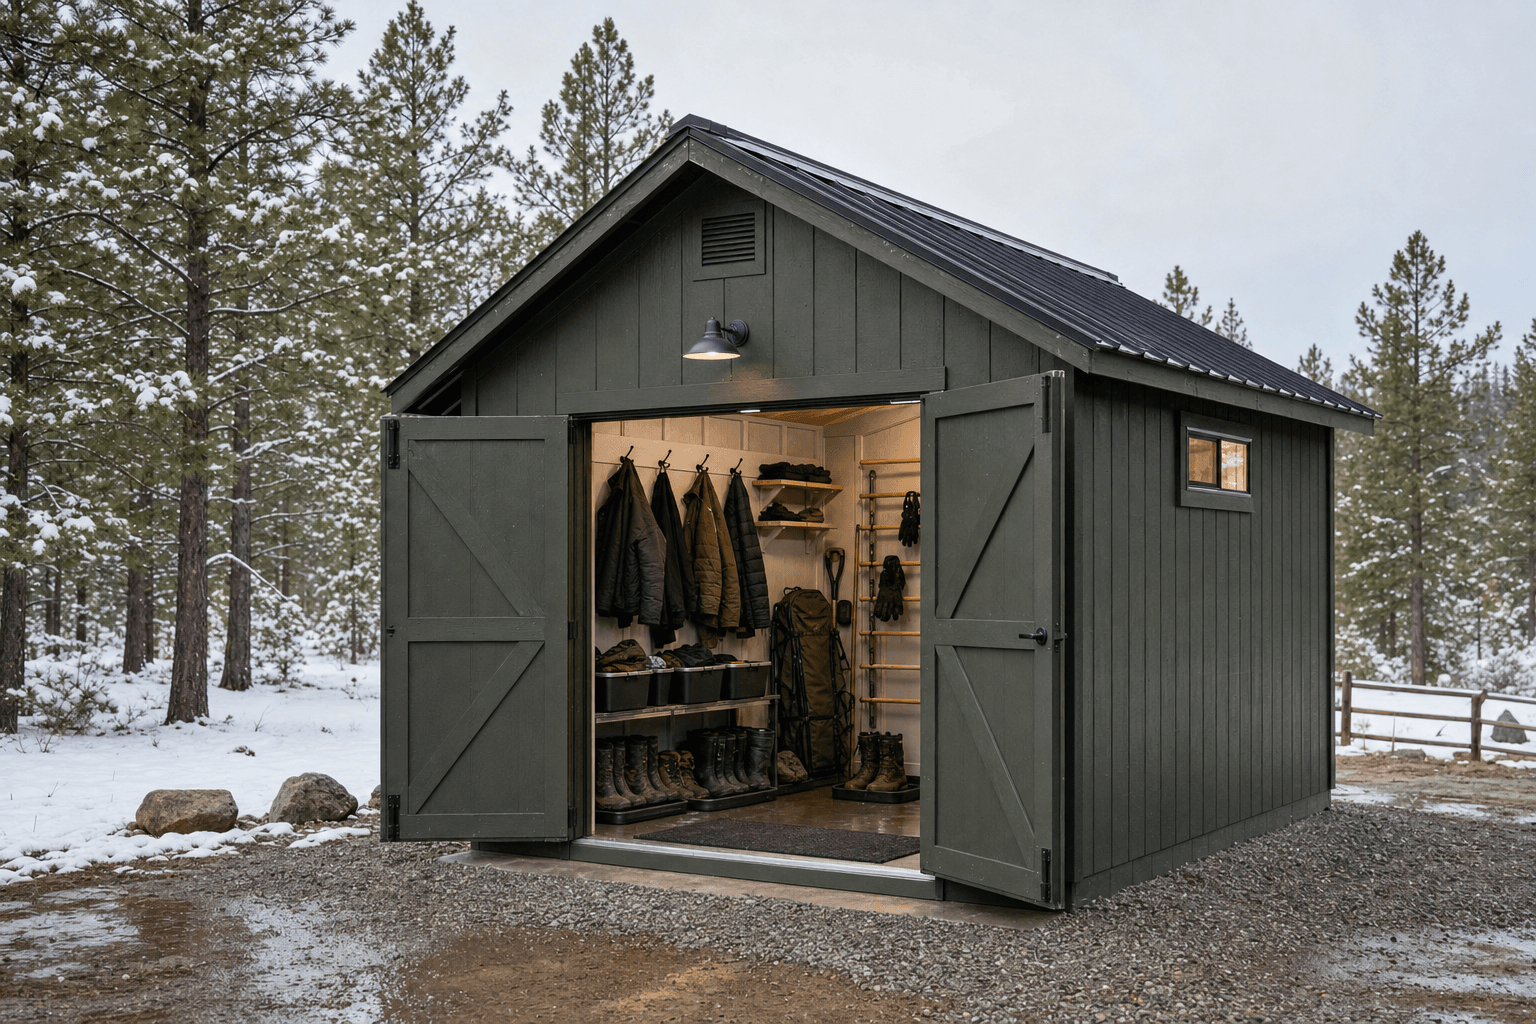
Wide access, ventilation, durable threshold planning, and organized boot and jacket zones help a gear drying shed work through North Idaho mud, snow, and rain.
The best layout starts at the doorway. Wide double doors make it easier to carry skis, snowboards, packs, waders, coolers, and totes without clipping trim. A low threshold, compact entry mat, or removable grate zone keeps the first few feet useful when boots are muddy or packed with snow.
Floor planning should account for wet traffic without pretending the shed is a commercial wash bay. Some properties need only boot trays, washable floor finishes, and an exterior rinse point. Others may need a drain or water-management conversation with a qualified local professional. We treat that as a planning item, not a vague promise.
Plan door width and approach space around skis, boards, packs, fishing waders, and winter totes, not just around one person walking through.
Use vents, high-low airflow cues, and open storage so damp textiles can dry instead of staying sealed in plastic bins.
Separate boot trays and drip-prone gear from helmets, goggles, spare gloves, batteries, and items that need cleaner dry storage.
Think through wall panels, floor surface, bench edges, and shelving materials that can tolerate mud, snowmelt, grit, and repeated cleanup.
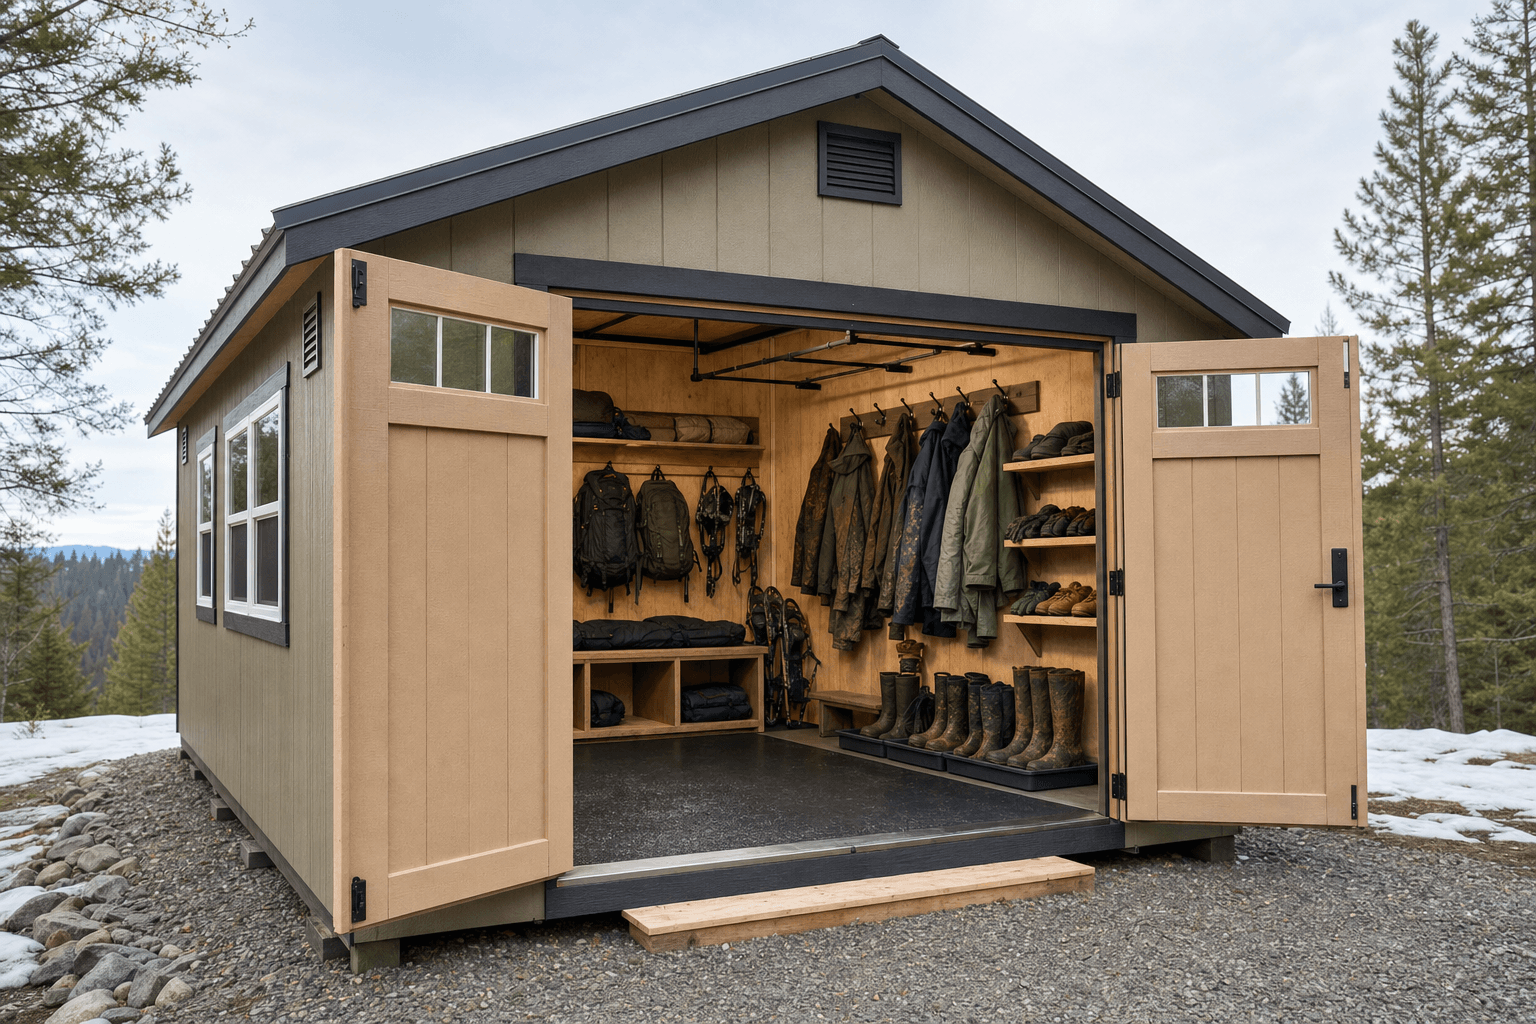
The body image shows a practical dry-off workflow with boot trays, jacket and glove hooks, airflow, shelves, and a durable floor path from the door.
A useful drying shed keeps the mess in the order it arrives. Boots and traction gear belong low, with trays or washable mats. Jackets and bibs need hooks with air space between them. Gloves, balaclavas, goggles, and helmet liners need shelves or cubbies where small items do not disappear.
For ski, snowmobile, hunting, lake, and hiking gear, the layout should also leave a clear center aisle. When every wall is packed to the door, it becomes hard to shake off snow, set a wet pack down, or reach the back shelves. A clean aisle is often more valuable than one more cabinet.
Use vents and open storage so damp air can move instead of sitting behind closed piles of jackets and boots.
Keep helmets, goggles, and electronics above the boot zone and away from puddles, grit, and accidental drips.
Treat the entry as a working surface with a planned transition from gravel, snow, or mud into the shed.
Reserve wall length for skis, poles, snowshoes, fishing rods, packs, or seasonal items that do not fit standard bins.
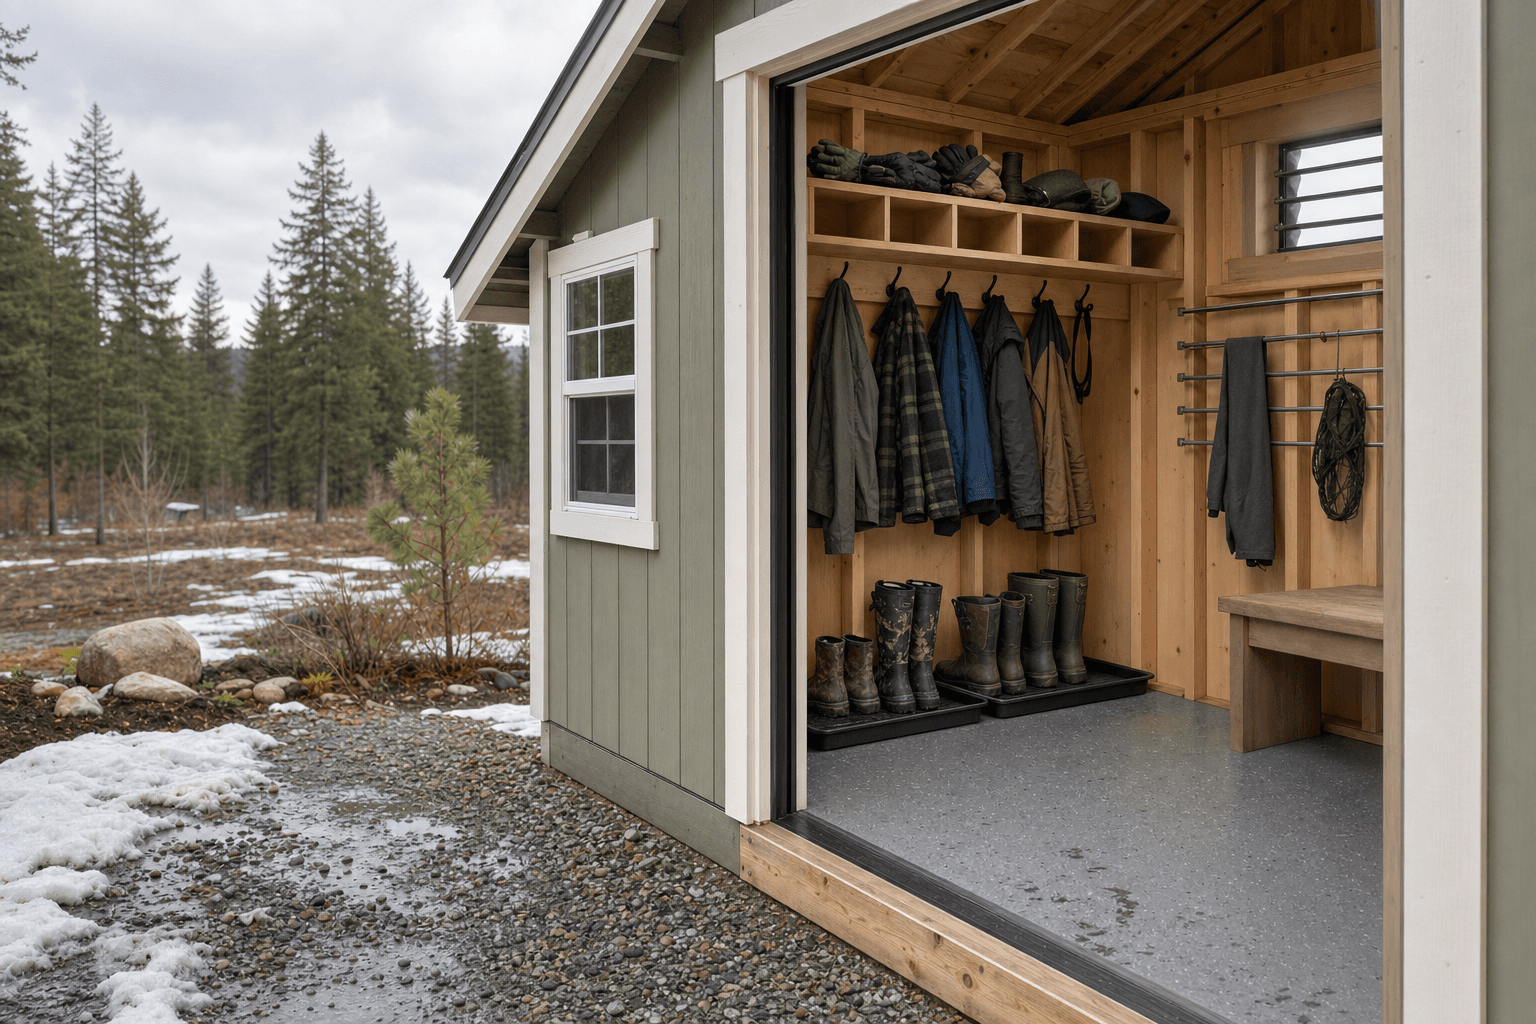
Detail planning matters around the threshold, floor surface, airflow, and storage zones where wet boots, jackets, gloves, and packs come in from the weather.
Most gear problems start with moisture. Damp boots can sour, textiles can mildew, leather can stiffen, and bins can trap odors if wet items get stored too quickly. The shed does not need to be fancy, but it does need a repeatable drying routine: unpack, hang, air out, and keep clean dry items separated.
In North Idaho, winter access matters too. Place the door where snow can be shoveled, watch roof shed and drift zones, and keep runoff moving away from the gravel pad.
| Access | |
|---|---|
| Door style | Wide double doors for bulky winter and lake gear |
| Approach | Gravel pad and shovel-friendly winter path |
| Threshold | Low transition, durable edge, and mud-ready entry zone |
| Interior | |
| Drying wall | Hooks and rails with spacing for jackets and bibs |
| Boot zone | Low trays, mats, or washable floor area |
| Small gear | Shelves and cubbies for gloves, helmets, goggles, and liners |
A gear drying shed should be planned around real wet-weather use, not showroom storage.
Door placement and pad planning should account for shoveling, drifting, and roof runoff.
Ventilation and open storage help jackets, gloves, boots, and packs dry between trips.
Durable floors, trim, and storage edges make muddy cleanup easier.
The wall plan can fit ski gear, helmets, boots, packs, and seasonal totes.
The first mistake is treating wet gear like ordinary storage. Closed cabinets can hide damp items and worsen odor. Open shelves, spaced hooks, and trays usually work better.
The second mistake is underestimating floor and entry space. Leave enough clear floor to stand, sort, hang, and turn around while wearing bulky winter layers.
Many gear drying sheds start around 10x12 or 10x16, but families with skis, snowboards, hunting gear, or lake gear often prefer 12x16 or larger. The right size depends on door width, the number of people using the shed, and how much wall length you need for hooks, trays, shelves, and a clear aisle.
Yes. Ventilation is usually one of the first planning topics because damp clothing, boots, gloves, and packs need air movement. We can discuss gable vents, side vents, windows, and open storage layouts, while keeping any powered ventilation or heat source in the proper electrical and code conversation.
Some customers ask about drains, but a drain is not always the right answer. Many sheds work well with boot trays, washable floor finishes, exterior rinse habits, and a gravel approach. If water supply, drains, or plumbing are part of the plan, those details should be reviewed for the site and local requirements before the build.
Keep small dry gear above the boot zone and out of closed damp bins. A shelf or cubby wall for helmets, goggles, glove liners, and batteries helps separate clean dry items from boots, jackets, and snow-covered packs.
Yes, if the wall plan leaves enough vertical and horizontal clearance. Skis, boards, poles, helmets, boots, tuning gear, and winter totes all need different storage zones, so we plan the shed around the longest and bulkiest items before adding shelves.
Place it near the route you already use after trips, but keep drainage, snow removal, roof runoff, and door swing in mind. A shed that is easy to reach in mud season and shovel-friendly in winter will get used far more than one tucked behind deep snow or poor drainage.
Tell us what comes home wet, muddy, or frozen, and we will help map the access, storage, ventilation, and floor plan before the build.
Every shed we make is built on site in North Idaho. Explore other uses we build for.
