An overlanding gear shed is for the part of the trip that happens before the vehicle leaves the driveway. Recovery gear, camp kitchen bins, water containers, tents, dry bags, tools, power stations, and seasonal equipment all need a place where they are visible, dry, and easy to load. For North Idaho forest-road travel, the best shed layout is less about looking rugged and more about making the pre-trip checklist fast, repeatable, and organized.
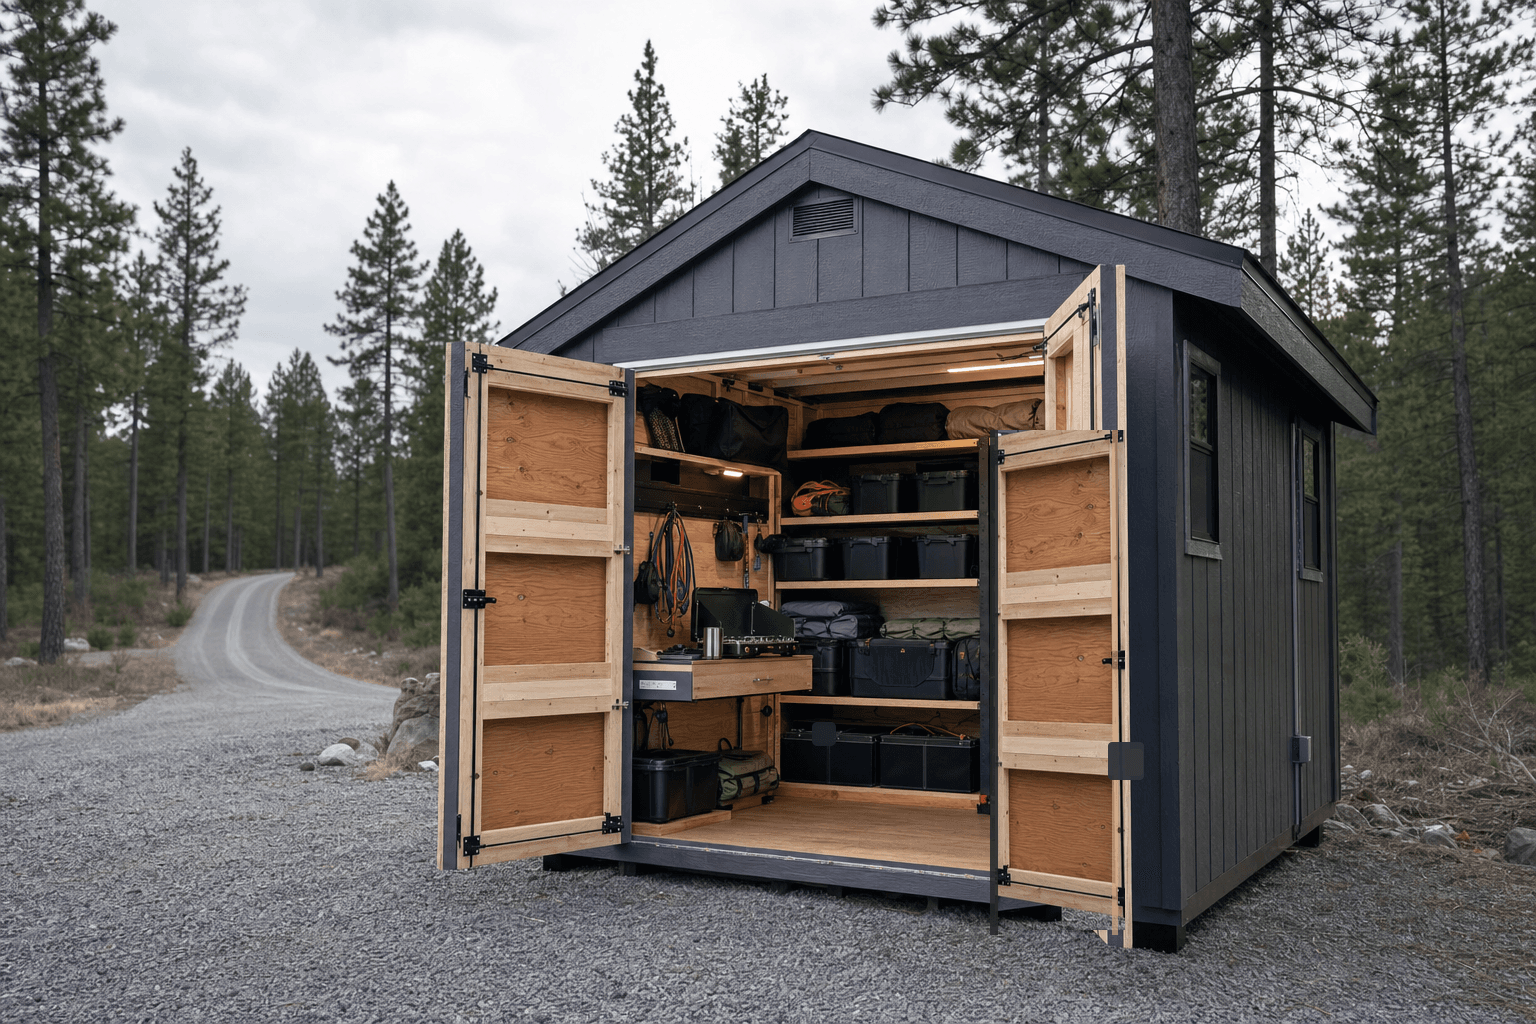
An overlanding gear shed should keep camping, recovery, and trip-prep equipment organized, dry, visible, and easy to load before a forest-road weekend.
The most useful overlanding shed sits where the vehicle can get close without turning the yard into a mud track. Wide double doors, a clean gravel approach, and a dry threshold let you stage bins, recovery bags, chairs, coolers, and cooking gear before they go into the rig. When you come home, the same layout should make it easy to unload wet tents, muddy straps, and dusty totes without leaving everything in the vehicle for a week.
Inside, storage should be grouped by trip sequence. Recovery gear needs to be easy to grab. Camp kitchen items should stay together. Sleep systems, dry bags, and seasonal clothing work best on shelves where they are off the floor and visible. Blank bins, open shelves, and hook rails help you see what is missing without relying on labels that fade, peel, or become outdated as your kit changes.
Plan door width and approach clearance around bins, totes, recovery boards, and the vehicle path.
Keep expensive gear out of weather and out of casual view while preserving quick access before a trip.
Group shelves by recovery, camp kitchen, sleep system, tools, and power-planning needs.
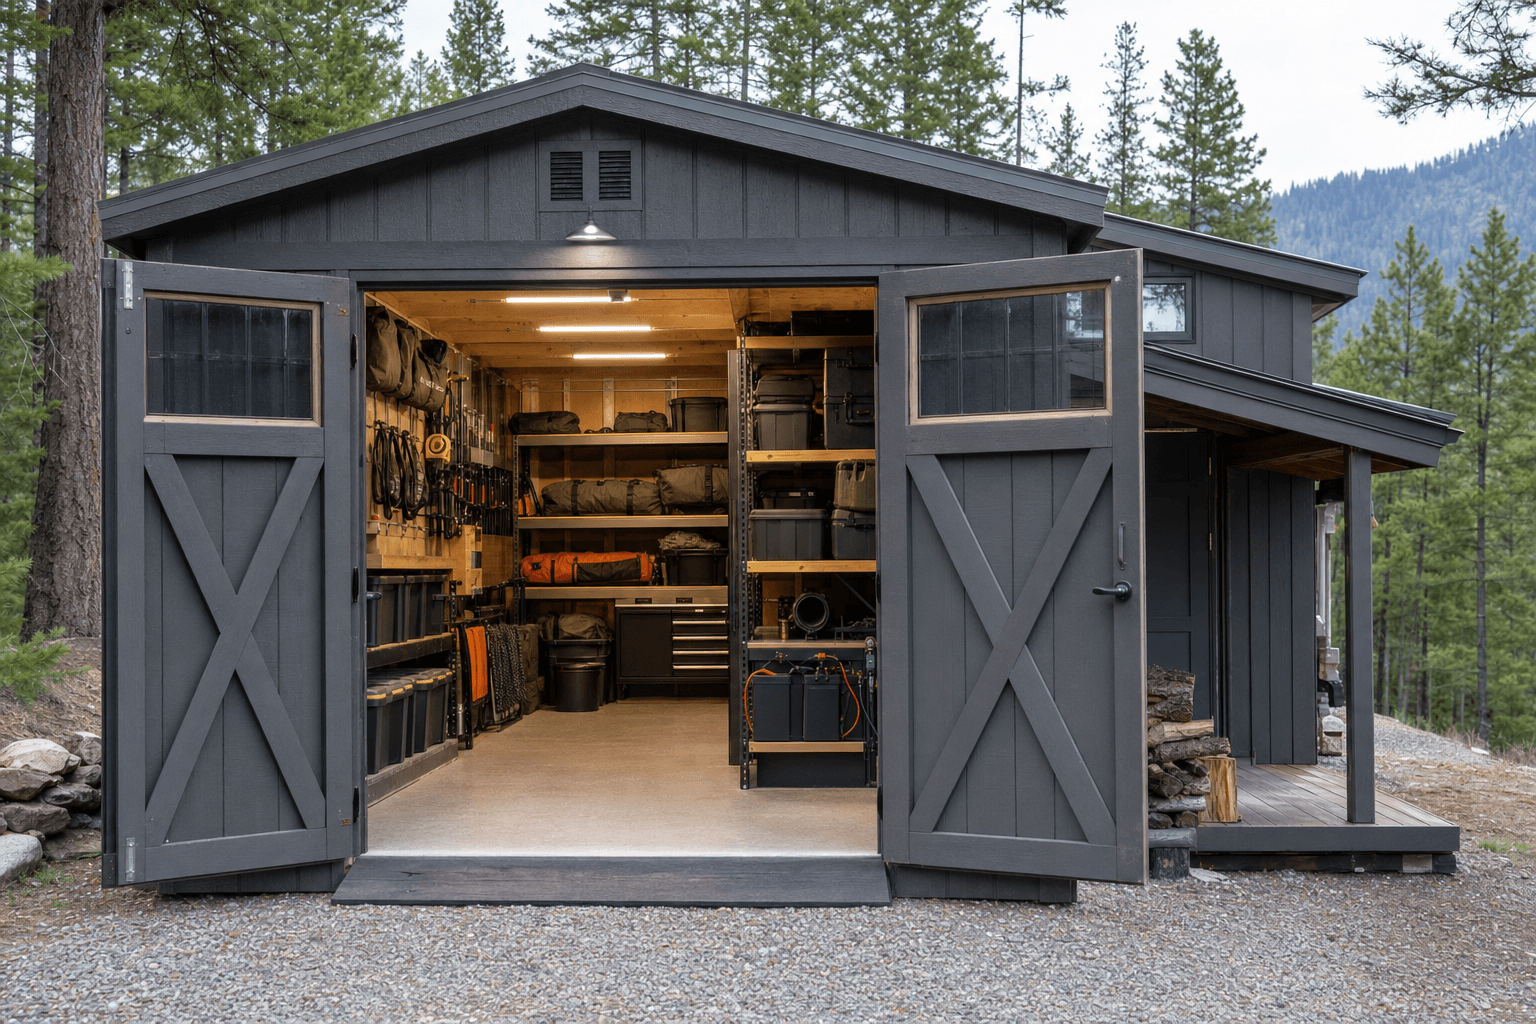
The workflow view shows organized shelves, blank bins, dry aisle space, and trip-prep zones for camping, recovery, and power-planning gear.
A good shelf plan keeps heavy items low and frequently used items in the reach zone. Recovery straps, compressors, traction boards, tool rolls, and water containers should not require unloading half the shed to reach them. Camp kitchen gear and dry food bins can live higher or farther back if they are grouped consistently. The shed should feel like a staging room: one path in, one path out, and enough floor space to pack or sort before the weather changes.
Power-planning deserves careful language and careful placement. Many owners want a place to stage a portable power station, battery boxes, lights, fridge accessories, or charging cables before a trip. The shed can provide a clean, organized zone for those items, but electrical work should be planned with a qualified professional and matched to the equipment. Leave spacing, ventilation, and clear walking paths so power gear is organized without being crowded into soft goods or fuel-related storage.
Use lower shelves, hooks, and open floor clearance for straps, boards, shovels, compressors, tire gear, and dirty return items.
Keep cooking totes, tables, bins, and water containers together so resupply is visible before the vehicle is packed.
Use a dry, ventilated shelf near the loading aisle for portable power stations, fridge leads, camp lights, and chargers so battery checks, cable routing, and fridge prep happen before the vehicle is packed.
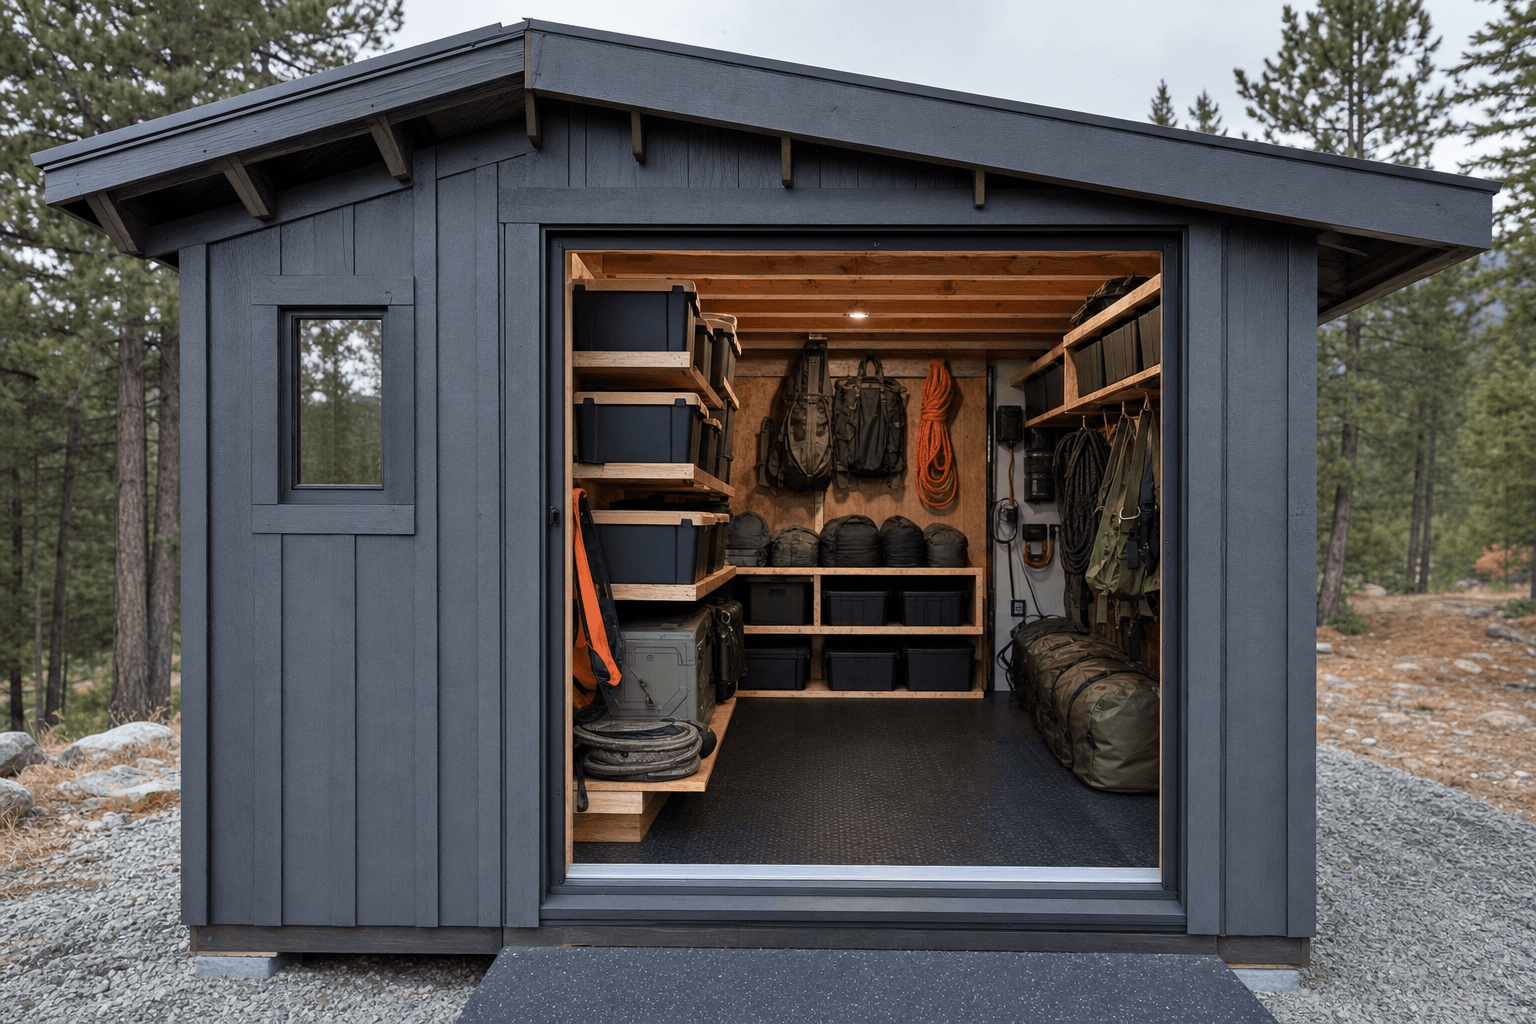
Detail planning matters around dry access, shelf depth, blank bin organization, recovery gear storage, cable routing, and durable floor space.
North Idaho trips can mean dusty summer roads, cold shoulder-season nights, sudden rain, and gear that comes home wetter than expected. That is why the shell matters. A buildable gable or modern roofline, reliable siding and trim, a gravel pad that drains, and a door setup that protects the opening all help keep the shed useful between trips. Ventilation matters too, especially when damp tents, sleeping bags, or clothing are unloaded after a wet weekend.
Size depends on how much of the kit lives outside the vehicle. A 10x16 can handle a disciplined set of shelves and loading floor space. A 12x16 or 12x20 gives more comfort for family camping, seasonal totes, recovery boards, and workbench-style trip prep. Larger footprints make sense when the shed also stores roof-rack accessories, spare wheels, winter gear, or property tools. The main mistake is undersizing the aisle until every trip starts with moving bins just to find the one item you need.
Plan the shed shell around wet shoulder seasons, snow load conversations, freeze-thaw cycles, and the access path you will use when the weather is not clean.
Plan a place for wet tents, straps, tarps, and boots to land without soaking the rest of the gear.
Door swing, roof runoff, and plow or shovel access matter when gear is loaded in cold months.
Keep high-value gear organized behind lockable doors while still making the loadout routine quick.
A 10x16 can work for organized shelves and a clear loading aisle. If you store recovery boards, water containers, family camping bins, spare wheels, or seasonal totes, a 12x16, 12x20, or larger footprint is easier to live with.
Keep recovery straps, boards, compressors, and tire gear low, visible, and close to the loading path. Gear that may be needed first should not be buried behind camp chairs or dry food totes.
Yes, the shed can include a clean, ventilated planning area for portable power gear, lights, and cable routing. Any permanent electrical work should be planned by a qualified professional and matched to the equipment.
Labels can help, but the shed should still work without relying on them. Open shelves, consistent bin sizes, and category zones make it easier to see what is packed, missing, wet, or ready for resupply.
Place it where the vehicle can load without blocking daily traffic or dragging mud across finished areas. A gravel approach, wide doors, and a dry threshold matter more than hiding the shed in a far corner.
Use a shed shell with weather protection, a drained pad, ventilation, and dedicated drying space for tents, bags, and straps. Wet gear should be separated before it goes back into sealed bins.
Tell us what you pack, what stays in the vehicle, and where loading happens. We will help plan the shed footprint, doors, shelves, and dry access around your routine.
Every shed we make is built on site in North Idaho. Explore other uses we build for.
