A detached garage is the building that finally gets the truck out of the weather, the trailer off the side yard, and the snow blower somewhere you can reach it in January without digging. It is more than covered parking. Done right, it is a vehicle bay, a seasonal-toy locker, an overhead storage attic, and a small work corner all under one roof — sized so you can actually walk around what you park. The difference between a garage you grow into and one you outgrow in a season is almost entirely in the plan: the footprint, the door height, the floor, and how you stage everything inside. This guide walks through how to plan a detached garage for a North Idaho property, from a tidy one-car to a two-plus-bay build with room left over to work.
North Idaho On Site Sheds builds every garage on your property, so the plan answers to your real driveway, your grade, and the way snow actually moves across your lot. That matters more for a garage than almost any other building, because you are driving a heavy vehicle in and out of it year-round. Start with what has to fit inside and how tall it stands, then size the building, the door, and the floor around that — not the other way around. If you want a true heated shop alongside the parking, read this together with the workshops build, because a few decisions change when fabrication is part of the picture.
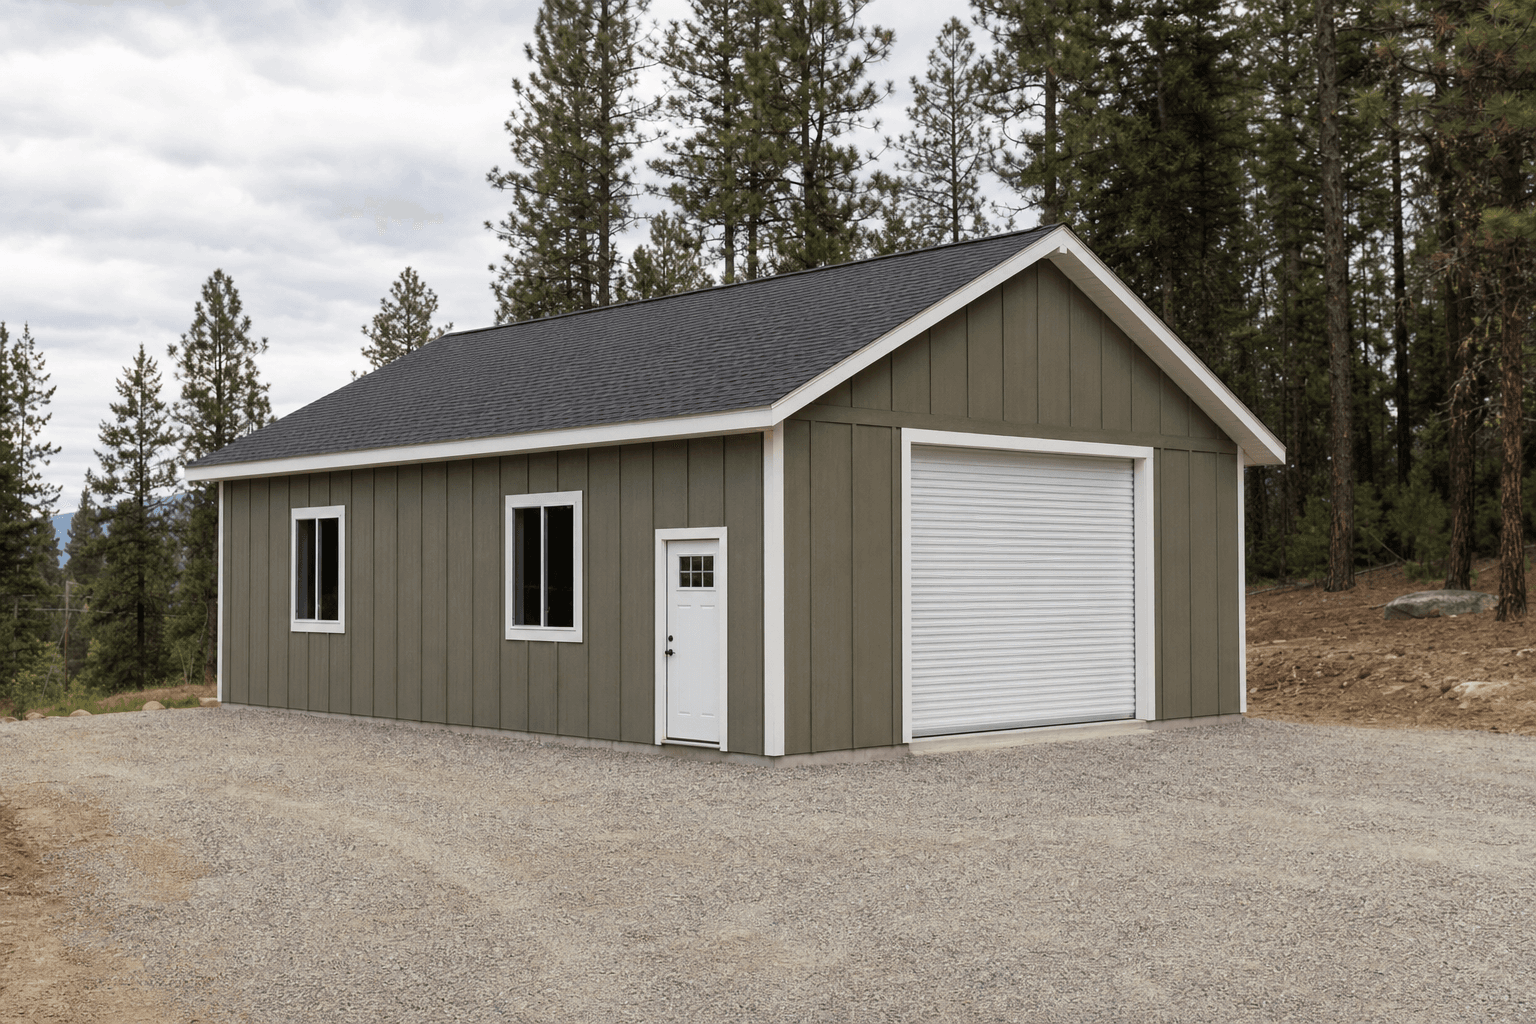
A real detached garage plan: a tall door, a slab that takes vehicle weight, and a cleared approach for winter.
Most detached garages start from one of a few shells, and the right one depends on what you park and how much overhead room you want. A standard gable is the workhorse — clean lines, a strong roof for snow, and enough ridge height to add a storage loft or hang a few racks over the bays. A lofted barn (gambrel) trades a little wall height for a genuinely usable upper level, which is gold when you want overhead storage for tires, totes, kayaks, and seasonal gear without giving up floor space below. A lean-to or modern single-slope sheds snow predictably to one side and tucks neatly along a property line, though you give up the symmetric loft.
If the garage will double as a place to work on vehicles, prioritize wall and door height over raw floor area. A taller wall lets you run cabinets and shelving above the hood line, swing a hood, and someday add a lift; a taller door lets a lifted truck, a raised-roof van, or a trailer with a rooftop load clear the opening. Pair this guide with the garages service page for the full build options, and look at the workshops build if real fabrication, welding, or a lift is on the wish list. If most of what you are storing is recreational — quads, a side-by-side, a snowmobile or two — the ATV and UTV shed layout shows how to plan ramps, tie-downs, and fuel staging that apply just as well inside a garage bay.
A 20x20 holds a single truck or SUV with real walking space on three sides, a work corner, and a wall of storage — not the tight box an attached single-car bay usually is.
Step up to a 24x24 or 24x30 for two vehicles parked side by side with door space between them, plus a bench, cabinets, and a spot for the snow blower.
A 24x30 or 24x36 fits two vehicles and a trailer or third toy, a true work bay, and overhead storage — the build people stop outgrowing.
Footprints feel abstract until you stand a vehicle inside one, so compare the real dimensions before you commit. A 20x20 garage is the honest one-car-plus build: a truck fits with about three feet to spare on each side, which is what you need to open doors, walk a tire to the bench, and not turn parking into a daily game of inches. Move to a 20x24 garage when one vehicle shares the space with a workbench, a tire rack, and the snow blower, or when a long-bed truck needs the extra depth up front. For two vehicles, a 24x24 garage is the floor — two bays side by side with door clearance between them — and a 24x30 garage is the sweet spot, adding a full work aisle along the back wall. When a trailer, a side-by-side, or a dedicated shop bay has to fit alongside two vehicles, step up to a 24x36 garage and stop worrying about it. Size up if anything heavy has to live inside through winter; you never regret the extra depth, and you always regret the missing foot.
These three overlap, and the right call comes down to what leads. A detached garage leads with vehicles — getting trucks, SUVs, and trailers parked, protected, and easy to back out — with storage and a little work space built around the bays. A workshop leads with the work: more wall height, brighter task lighting, insulation, dedicated circuits, and a lift, with vehicle parking as a bonus rather than the point. A storage shed or toy-focused ATV and UTV shed leads with gear — quads, snowmobiles, mowers, totes — and favors open floor, ramps, and deep shelving over a heated bench.
Plenty of buyers want one building that covers two jobs, and that works well — you just have to decide which job leads so the build can follow. If parking and a bit of wrenching lead, build a garage with a work corner: two clean bays, one wall of cabinets, and a single circuit you can grow. If projects and fabrication lead, build a shop with a parking bay, and plan the wall height, lighting, and power for the tools first. Naming the priority up front keeps you from buying a building that parks poorly and works poorly, and it quietly drives the door size, the slab thickness, and how much electrical you run on day one.
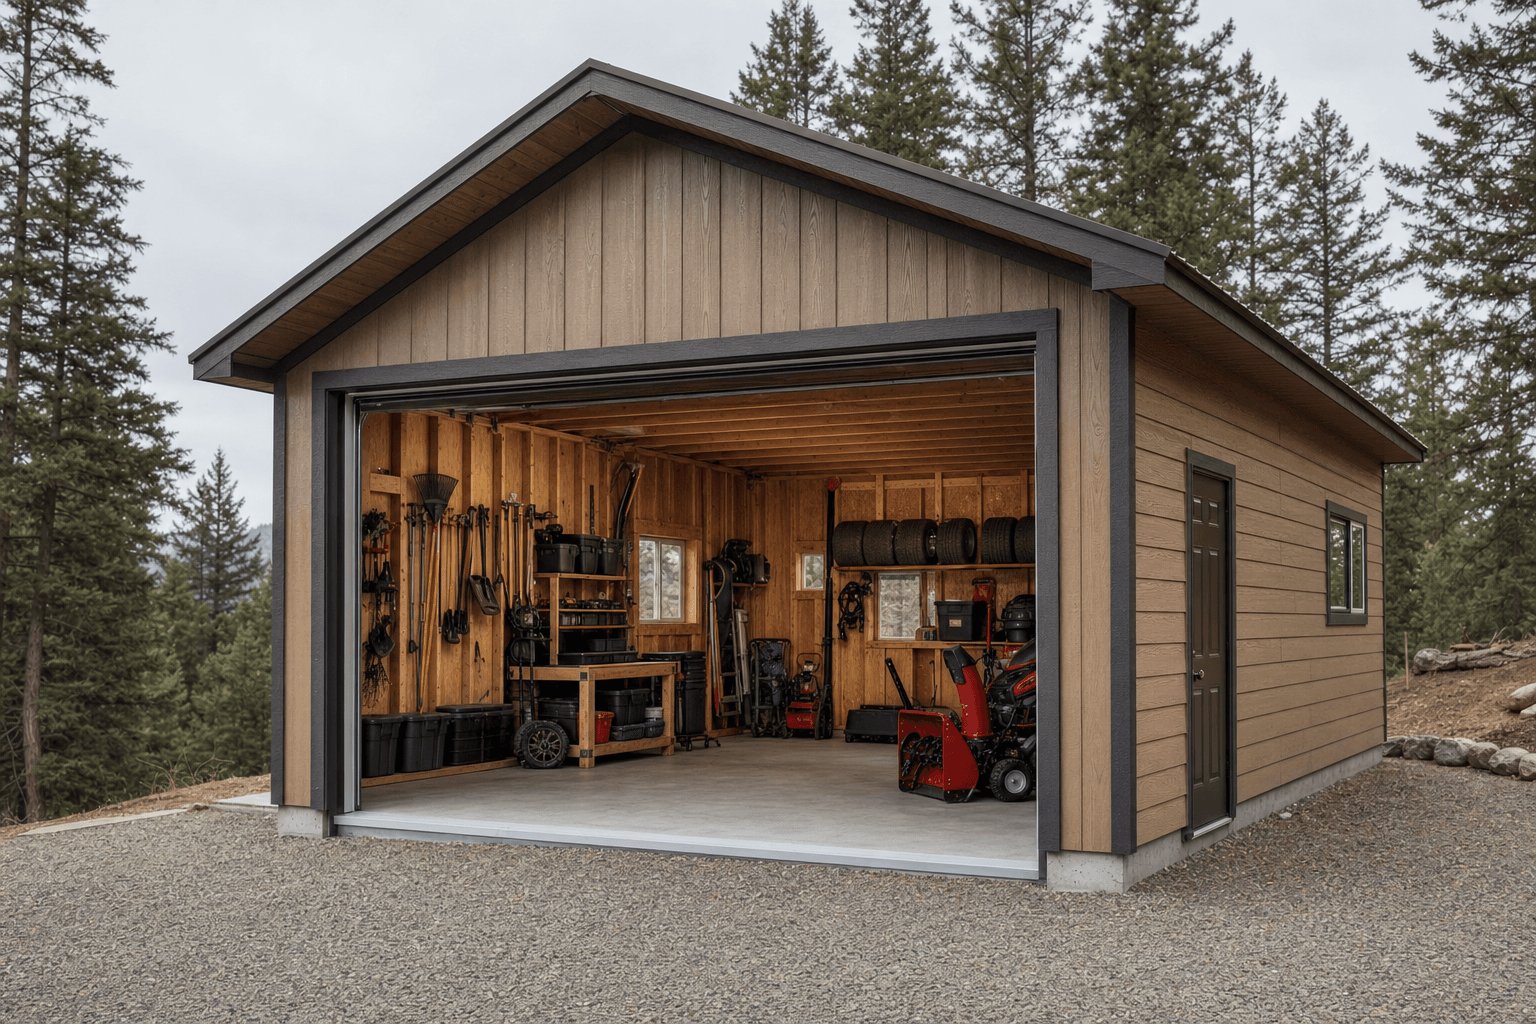
Two bays, an overhead storage loft, and a work corner along the back wall — the layout most garages settle into.
Think of the garage as a few zones rather than one open box, and the whole thing parks and works better. The drive-in bay is the floor a vehicle occupies plus the door swing and walk-around space on each side; protect it and keep it clear, because everything that creeps into it makes parking harder. A work corner along one end or the back wall holds a bench, a wall of tools, and a spot to charge or wrench, set far enough from the bay that an open hood and an open toolbox can coexist. A seasonal and tall-storage zone lives where vehicles do not — overhead in a loft or on ceiling racks, on a deep shelf wall, or in the back corner for the snow blower, mower, tires, and bins you reach a few times a season.
Zoning keeps the parking lanes clear so you are never shifting a wheelbarrow to back the truck out, and it puts the snow blower and shovels by the door where you grab them on the way out, not buried behind the lawn gear in June. It also keeps the work corner usable in winter, when the open floor near the door is wet with snowmelt and road salt and you want the bench, the cabinets, and anything that rusts pulled back from it.
Ceiling-mounted racks and a gable or barn loft swallow tires, totes, coolers, kayaks, and car-top carriers, keeping the floor open for vehicles and the bench clear to work.
Slatwall, pegboard, or French-cleat rails plus a sturdy workbench give every wrench, cordless tool, and fluid bottle a home above the floor and out of the damp.
Lockable base and upper cabinets corral parts and power tools, while a high, vented shelf keeps oil, fuel cans, and chemicals away from anything that sparks.
Epoxy coating or interlocking floor tiles, a drip mat under each vehicle, and a boot tray by the door keep snowmelt, mud, and road salt from soaking into the slab and your storage.
This is where a plain pole-barn shell becomes a real garage, and it is all about giving each specific thing a place. None of it is exotic — it is matching the rack to what you own:
Vehicles park on the protected slab with a drip mat under the engine and a wheel stop or hung tennis ball so you stop in the same spot every time. A trailer — utility, boat, or enclosed — needs a straight pull-in lane and a tongue jack with a chock so it parks square. Quads, a side-by-side, dirt bikes, and snowmobiles ride in on a ramp threshold and tie down to floor or wall anchors, with sleds parked on a ski-friendly mat or a dedicated dolly so they slide in square. Tires stack on a wall-mounted tire rack, off the floor and out of the way. The snow blower stages by the door with the shovels, the ice scraper, and a jug of fuel mix on a nearby shelf so it is the first thing you reach in a storm. A floor jack, jack stands, and a creeper tuck under the bench; the bench itself carries a vise, a charging strip for cordless tools, and pegboard above for hand tools. Fuel cans, oil, and chemicals go on a high vented shelf away from any heater. Hoses, extension cords, and a battery tender hang on the wall by the only outlet. Add a fire extinguisher within reach of the work corner and a bright light over the bench, and the building stops being storage and starts being a garage you want to be in.

Tire rack and cabinets along the wall, a charging bench, and overhead racks that keep the bays clear.
| Detached garage planning checklist | |
|---|---|
| Footprint | 20x20 for one vehicle plus room; 24x24 to 24x36 for two-plus bays with work and storage space |
| Overhead door | 8 ft tall covers most trucks and SUVs; 9 to 10 ft for lifted trucks, raised vans, trailers, or a future lift |
| Floor | A poured concrete slab thick enough for the heaviest vehicle and any jack or lift loads |
| Wall height | Taller sidewalls so cabinets, shelving, and a loft clear the hood line and the door opening |
| Power & heat | A dedicated subpanel or circuits for lighting, charging, a heater, and a future EV charger |
| Winter access | A cleared, draining approach plus storage by the door for the snow blower, shovels, and salt |
A detached garage gets used before dawn and after dark, in the cold, so plan power, heat, and light even if you phase them in. Because the building is separate from the house, the clean approach is a small subpanel fed from the main service: it gives you headroom for ceiling lights, outlets along the bench, a heater, and a dedicated EV-charger circuit without overloading anything. Bright LED fixtures over each bay and the bench mean you are never working off a flashlight, and a switched light right by the walk-in door keeps you from feeling along a cold wall. Run a weatherproof exterior outlet too, for a block-heater or trickle charger you would rather not trail a cord to.
Heat is what makes a North Idaho garage usable in winter rather than just covered parking. A detached, uninsulated metal box holds almost no warmth, so if you want to wrench in January or keep fluids and batteries from freezing, insulate the walls and ceiling and add a heat source sized to the space — a gas or electric unit heater for a working shop, or a smaller plug-in heater for a parking-and-storage build you only warm up occasionally. Insulation also cuts the condensation that drips off a cold metal roof onto your tools and slab. Keep a roof rake or a clear path to the eaves, store salt and a snow shovel just inside the door, and lift anything moisture-sensitive off the cold slab onto a shelf so road salt and snowmelt do not find it.
A garage is only as good as the pad under it, and a garage demands more than a storage shed because you are driving weight onto it daily. A poured concrete slab is the right call for nearly every detached garage — it carries the vehicles, takes a floor jack or a lift, and gives you a clean, sealable surface that handles oil and snowmelt. Pour it level, thick enough for your heaviest vehicle, and pitched or planned so meltwater drains away from where you work. Plan the approach so you are not climbing a muddy grade or fighting a drift to reach the door; a compacted gravel apron in front of a concrete slab keeps the transition clean. Read how to prep a shed site before build day so the pad and the access are ready.
North Idaho winters drive several choices: a roof and anchoring rated for local snow load, an overhead door and threshold that still open after a storm, and insulation that keeps condensation off your steel. Garages are also more likely than small sheds to need a building permit — the larger footprint, the slab, and the electrical service often trigger it, and setbacks and HOA rules can dictate where the building sits and how tall it stands. Confirm the rules for your town on the service areas pages before you finalize the size, the door height, and the placement, so the plan you fall in love with is the plan you can actually build.
For a single vehicle with genuine room to walk around and a small work corner, plan a 20x20 — that gives a truck or SUV about three feet of clearance on each side, which a tight attached single-car bay rarely does. Add a long-bed truck, a bench, and the snow blower and a 20x24 buys the depth you need. For two vehicles side by side with door clearance between them, a 24x24 is the floor and a 24x30 is the comfortable two-car build, adding a full work aisle along the back wall.
A standard 7-foot door is fine for most cars but tight for trucks and SUVs. An 8-foot overhead door clears nearly every stock pickup, SUV, and cargo van with margin. Go to 9 or 10 feet if you run a lifted truck, a raised-roof van, a trailer with a rooftop load, or if you ever want to install a two-post lift and raise a vehicle inside. Plan the sidewall height to match — the wall has to be tall enough to carry the door header and the tracks above the opening.
For a building you drive vehicles into, a poured concrete slab is the right floor. It carries the weight of a loaded truck or trailer, handles the point loads from a floor jack or a lift, and gives you a surface you can seal against oil and snowmelt. Gravel or a wood floor is fine for a storage shed but is not built for daily vehicle weight or jacking. Pour the slab thick enough for your heaviest vehicle, level it, and plan drainage so meltwater runs away from your work area rather than pooling under the bays.
Yes, and it is the upgrade that turns a cold metal box into a usable shop. Because the building is detached and uninsulated by default, start by insulating the walls and ceiling so any heat you add actually stays. Then size the heat to the use: a gas or electric unit heater for a working shop you spend hours in, or a smaller plug-in heater to keep fluids, batteries, and the slab above freezing in a parking-and-storage build. Insulation also cuts the condensation that drips off a cold roof onto your tools.
A Level 2 EV charger needs its own dedicated 240-volt circuit, typically 40 to 60 amps depending on the charger. Because a detached garage is separate from the house, the cleanest approach is to feed a subpanel from the main service and run the EV circuit from there, which also leaves room for lights, outlets, and a heater. The single most valuable thing you can do early is plan the circuit and panel capacity into the build even if you install the charger later — running the wire and reserving the breaker space up front is far cheaper than retrofitting it.
Stage the snow blower right by the walk-in or overhead door, not buried in a back corner, so it is the first thing you reach when a storm hits — and keep the shovels, ice scraper, roof rake, and a jug of fuel mix on a shelf next to it. In the off-season, move it to its winter spot and swap the mower and summer gear forward. Plan the approach so the door clears after a storm and meltwater drains away, and lift anything that rusts off the cold, salty slab near the door onto a shelf.
A detached garage built on site in Coeur d'Alene or Post Falls isn't constrained by what a crane can set down or a street can deliver. The structure is framed directly on your property, which means the width, depth, door height, and interior ceiling can all be sized for your vehicles and your lot — not trimmed to fit transport limits. That matters when you're fitting a true two-car garage on an older residential lot or building to a specific setback in Kootenai County.
North Idaho winters put garages to work in a way that mild-climate designs don't anticipate. A roof framed for our snow loads — which can run well over 50 pounds per square foot in higher-elevation parcels near Sandpoint or Bonners Ferry — uses more material than a roof built for Seattle or Spokane weather. On a detached garage, getting that spec right from the framing stage is far less expensive than reinforcing it later. An unheated garage can still benefit from a well-insulated wall between the garage bay and any finished space above.
For EV charging, a 240V circuit rough-in during construction is straightforward. Adding it to a finished building is a more involved electrical job. The same principle applies to floor drains, gas lines, and sub-panel placement — decisions made during framing that are expensive to revisit. In Coeur d'Alene city limits, detached garages over a certain square footage require a building permit; unincorporated Kootenai County thresholds differ.
On tight or wooded lots in Hayden, Rathdrum, and Athol, a crew building in place can work around obstacles a delivered structure can't navigate. Get a free estimate or see current garage pricing to start the footprint conversation.
Tell us what you need to park and where the garage should sit, and we will help size the building, the door height, the slab, and the winter access around your property — then you can build and price it online.
Keep planning your build with related North Idaho shed guides.