Living in North Idaho means accepting that the power goes out, the road snows shut, and help can be an hour away on a good day. A bad windstorm, an ice storm, a wildfire evacuation, or a hard winter week with the grid down is not a question of if but when, and the households that come through those weeks calmly are the ones who planned ahead instead of scrambling. The trouble is that emergency supplies, bought a little at a time, end up scattered: water jugs in the garage, a first-aid kit under a bathroom sink, batteries in a kitchen drawer, the generator behind the lawnmower, freeze-dried food in a closet, and the radio nobody can find when the lights go out. When something actually happens, you waste the worst hour digging through five rooms. A dedicated emergency preparedness shed fixes that by giving your whole readiness plan one organized, climate-stable home — water, food, medical, communications, power, and tools laid out in clear zones you can reach fast and resupply on a schedule.
North Idaho On Site Sheds builds every preparedness building right on your property, so the shelving, the insulation, the power, and the layout get specified around your actual plan and your actual household rather than a generic kit. This is not about fear — it is about the same quiet self-reliance that already has you stacking firewood, keeping a full pantry, and running a generator. This guide walks the real planning decisions: which roofline suits a supply building, what footprint matches the size of your plan, how to lay the interior out in zones for water, food, medical, comms, and power, how to fit it with shelving and a workbench, how to hold a stable temperature so stored supplies do not cook in summer or freeze in winter, and how to keep it secure and reachable in an emergency. If deep food storage or grid-down power is the heart of your plan, you will see where this overlaps with a bulk food storage shed and a generator shed.
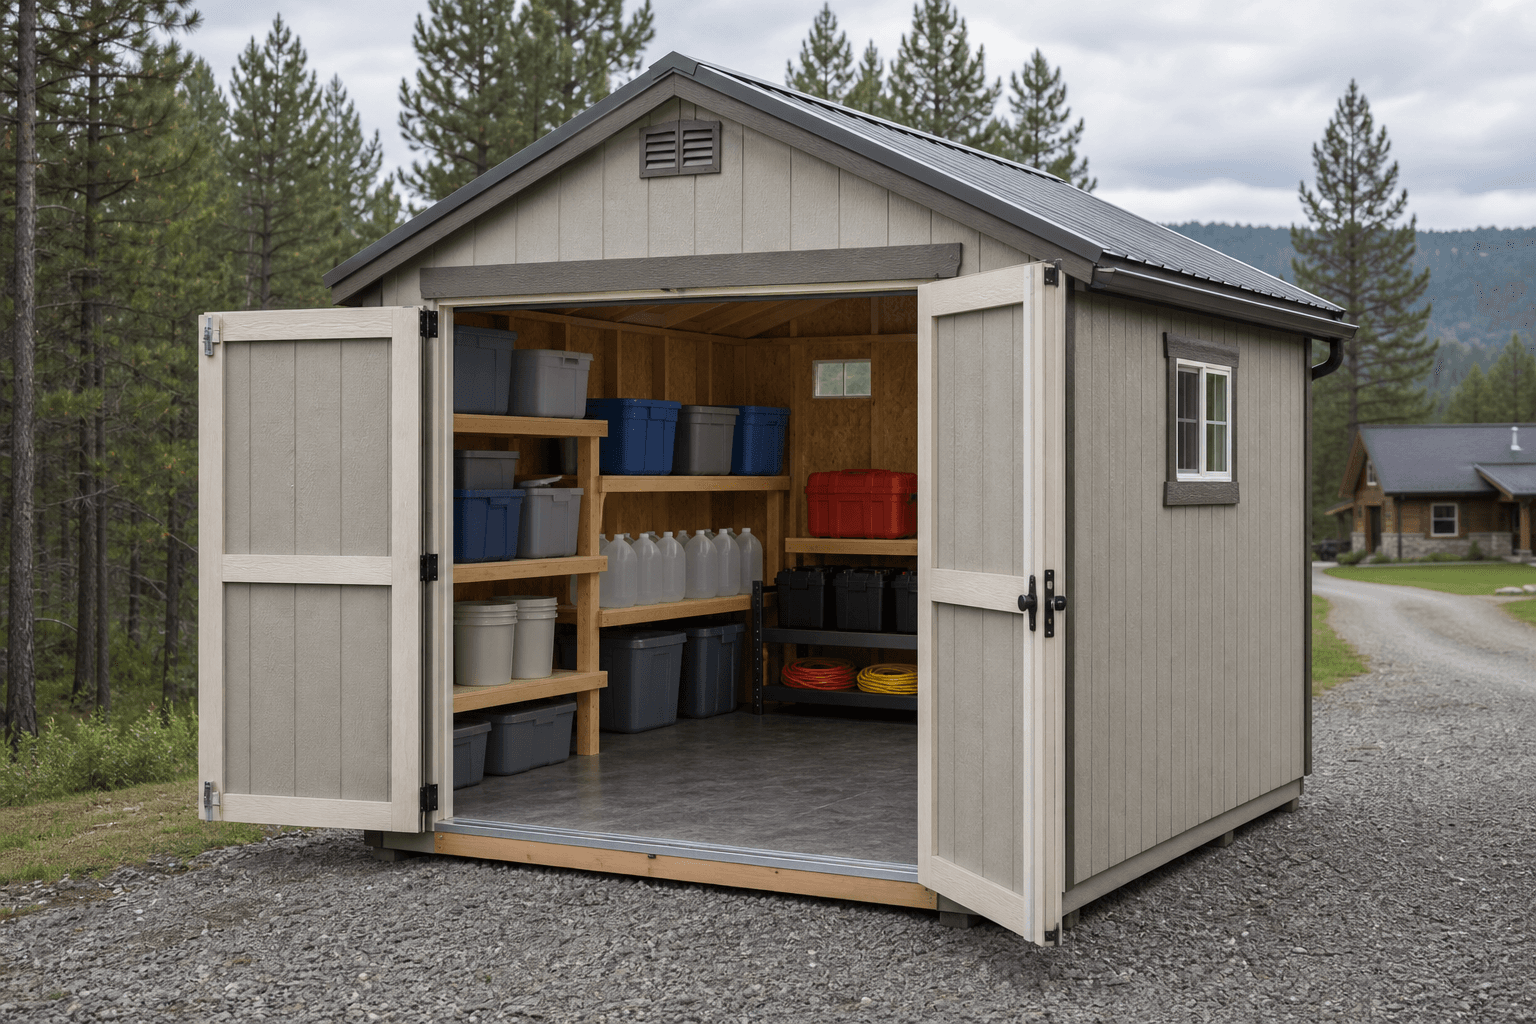
One home for the whole plan: zoned shelving for water, food, medical, and comms, a power corner for the generator, and tools by the door — ready to grab fast.
A preparedness shed is less about a showy roofline than about wall space, a stable interior, and quick, unobstructed access, because the whole job is lining the walls with organized supplies and being able to grab what you need in the dark when it counts. That makes the standard gable the natural starting point: the straight sidewalls take floor-to-ceiling shelving on every run, the peaked roof gives headroom to stack lightweight bins up top, and a simple, well-built box is easy to insulate and seal so stored food, water, and medical supplies hold a steady temperature. Order taller sidewalls for an extra shelf of bins and water containers, and add a wide door or double doors so a generator, fuel cans, and bulky totes move in and out without a fight. A lofted barn (gambrel) raises the center and adds a loft, which is a smart spot for the lightweight, seldom-touched gear — sleeping bags, tents, spare clothing, off-season supplies — while the floor stays clear for the heavy water and the power equipment you reach for first.
If you want a square room you can walk and work in, with shelving down both long walls and a bench at the end, a stick-built shop style gives straight walls to the eave and the room to set up a charging station and a small workspace. A lean-to or modern single-slope sheds North Idaho snow predictably to one side and tucks against a house or garage, which can help you reach a power feed and keep the building close to the door you would evacuate from. Whatever the roofline, the parts to spec up are insulation, security, and power: a preparedness shed has to hold a stable temperature so supplies last, lock securely so a year of provisions is not an easy target, and run or stage power for the grid-down days that are the whole reason it exists. A preparedness shed sits right next to a generator shed when standby power is central to your plan, and it shares a wall's worth of needs with a wildfire-readiness shed the moment evacuation and defensible-space gear become part of the picture.
An 8x12 lines three walls with shelving for water, food, medical, and comms, with floor space for a generator and fuel and a clear lane to grab and go for a household ready to ride out two weeks.
A 10x12 or 10x16 adds aisle space, a charging and comms bench, and room for months of water and food, so a family can stage a complete plan and still walk the shelves to inventory and rotate it.
A 12x16 holds a deep water reserve, long-term food, a full medical and sanitation supply, fuel, a standby generator, and a work area — a true readiness room you walk into and operate from.
Footprint here is about how long you plan to be self-sufficient and how many people you are providing for, so size to your real plan, not a single tote of gear. An 8x12 is a strong starting point for a household aiming at a two-week-plus window: line three walls with adjustable shelving for water, food, a medical kit, and communications gear, stand a row of stackable water containers along the floor, leave a corner for a generator and fuel, and keep a clear grab-and-go lane down the middle. A 10x12 adds the width to walk between shelving runs with a loaded tote and to set up a small charging and comms bench, which is the size most families building a complete plan land on. Step up to a 10x16 when you are providing for a larger household or planning a longer horizon: there is room for a deep water reserve, months of food, a full medical and sanitation zone, fuel storage, and a workspace, all in a building you walk into and operate from. If self-reliance runs deep — you garden, heat with wood, and want to hold out for the long term the way many North Idaho homesteads do — a 12x16 gives you a genuine readiness room with space for everything and a clear path to all of it. Depth and shelving height matter as much as floor area: water is heavy and belongs low, lightweight bins ride high, and a longer wall means more linear feet of organized, labeled storage.
These buildings all support self-reliance, but they lead with different jobs, and naming the lead use keeps you from a room that does several things poorly. An emergency preparedness shed leads with breadth — it holds the whole plan in balance: water, food, medical, communications, power, sanitation, and tools, organized so any one of them is reachable in the first minutes of a crisis. A bulk food storage shed leads with depth of provisions: it is tuned to hold months or a year of bucketed staples, #10 cans, canned goods, and a freezer or two of meat in a cool, dry, pest-proof room. The two overlap heavily — a preparedness shed always carries food, and a serious food storage shed is already a deep emergency larder — but a preparedness shed spreads its space across all the categories while a food shed concentrates on the pantry. If food is the heart of your readiness, lead with the food building and fold the rest in; if balance across water, power, medical, and comms is the point, lead with the preparedness building and keep a deep but not dominant food zone inside it.
Power deserves its own decision. A generator shed leads with standby electricity — it is built around a generator, safe fuel storage, ventilation and exhaust, and a transfer setup so you can power the house when the grid drops, which in North Idaho is a regular winter event. A preparedness shed often stages a portable generator and fuel as part of the plan, but if backup power is central and you run a large standby unit, a dedicated generator building handles the ventilation and exhaust properly rather than asking a supply room to do both. A solar battery shed is the off-grid cousin, housing a battery bank and inverter for quiet, fuel-free power. And when wildfire is the specific threat, a wildfire-readiness shed leans toward evacuation kits, defensible-space tools, pumps, and hose — gear you grab on the way out rather than hunker down with. Decide which job leads — balanced readiness, deep food, standby power, or wildfire response — and build the shelving, the climate, and the power around that first, then fit the neighboring uses into the same plan.
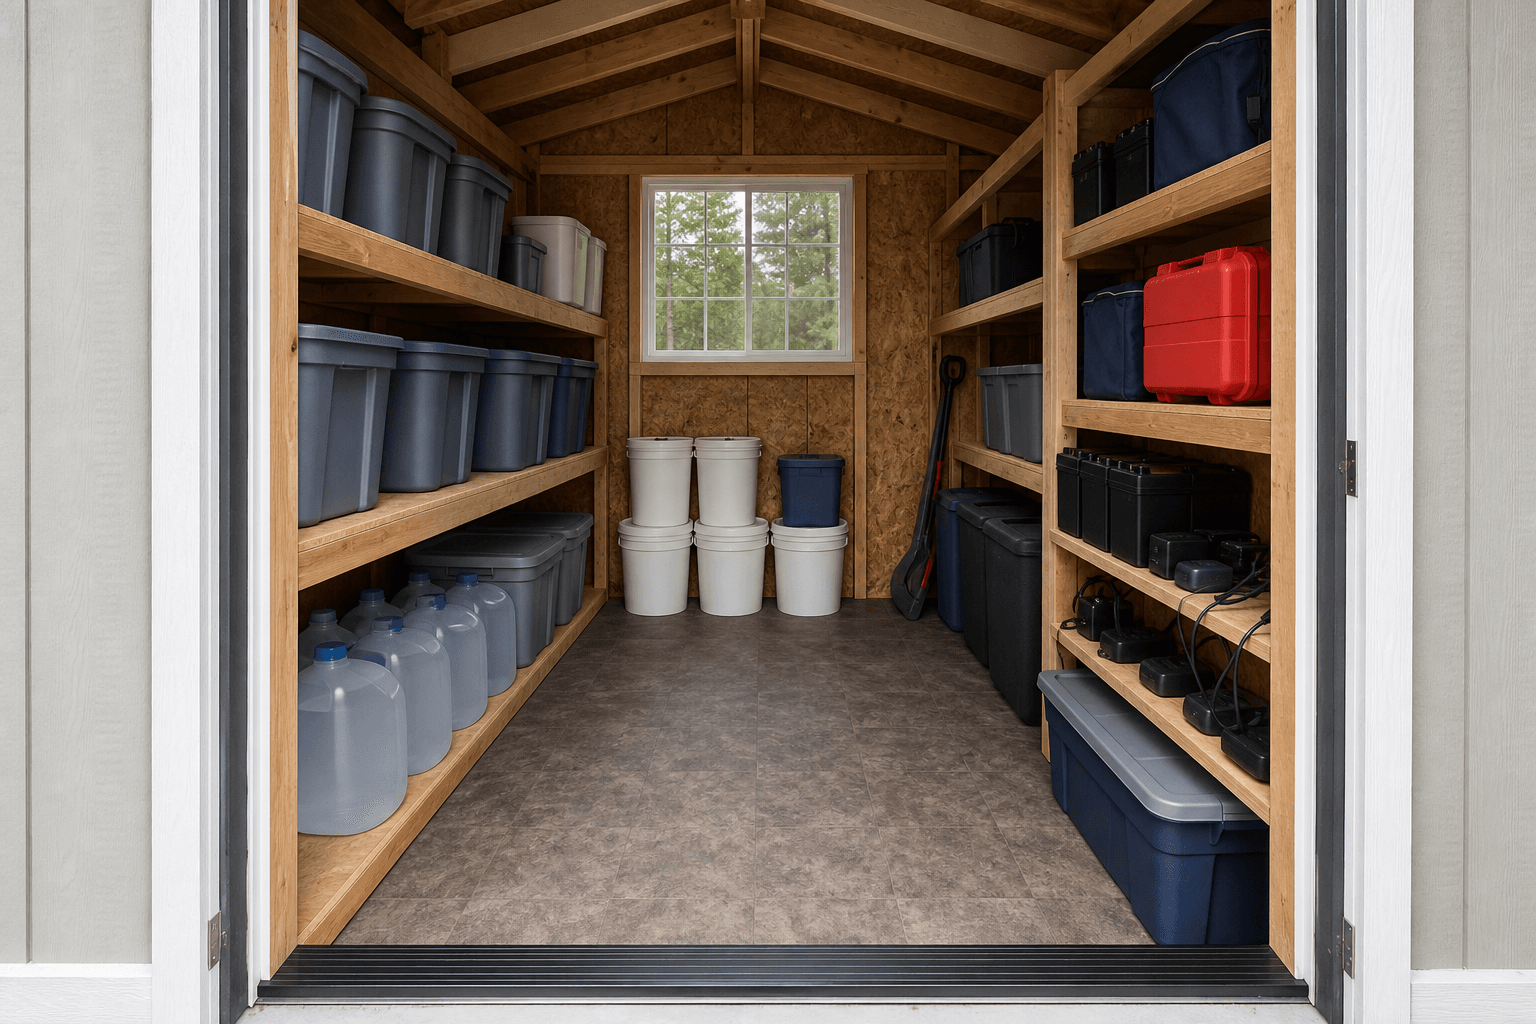
Zone it: water low along the floor, food and medical on labeled shelving, a comms and charging bench, and the power equipment by the door for fast access.
Think of a preparedness shed as a plan you can walk, laid out by category so that under stress you go straight to what you need instead of searching. A water zone anchors the floor along one wall, because water is the heaviest and most essential supply: stackable containers, a few larger barrels, a filter and purification setup, and the means to move it. A food zone takes a run of adjustable shelving for canned goods, bucketed staples, #10 cans, and ready meals, loaded so the newest stock goes in back and the oldest comes off the front. A medical and sanitation zone gets its own labeled, easy-to-reach shelf or cabinet: a stocked first-aid and trauma kit, prescription and over-the-counter supplies, hygiene and sanitation gear, and the things you never want to dig for when someone is hurt. A communications zone centers on a small shelf or bench for radios, a weather radio, spare batteries, chargers, and the documents and contact lists you would need if phones are down. And a power zone sits near the door and the power feed for a generator, fuel, batteries, lanterns, and cords.
Good zoning is what makes a preparedness shed actually work when it matters, not just look organized on a calm afternoon. Keep a clear central lane wide enough to carry a loaded tote and to grab a heavy item without moving three others, and put a grab-and-go staging spot right by the door for the kits and gear you would take if you had to leave fast. Stage the things you reach for first — water, light, power, the medical kit, the radio — nearest the entrance, and push the deep, long-term reserves to the back. Label every shelf and bin by category and keep like with like, so a glance tells you what is running low and anyone in the household can find the bandages or the batteries without you. Mount a clear, simple map of the layout and a current inventory list inside the door, and keep a flashlight or headlamp hung right at the entrance, because the first thing you will need in a real outage is light to find everything else. A room laid out in clear zones is one you can work in the dark, under stress, and still find exactly what you reach for.
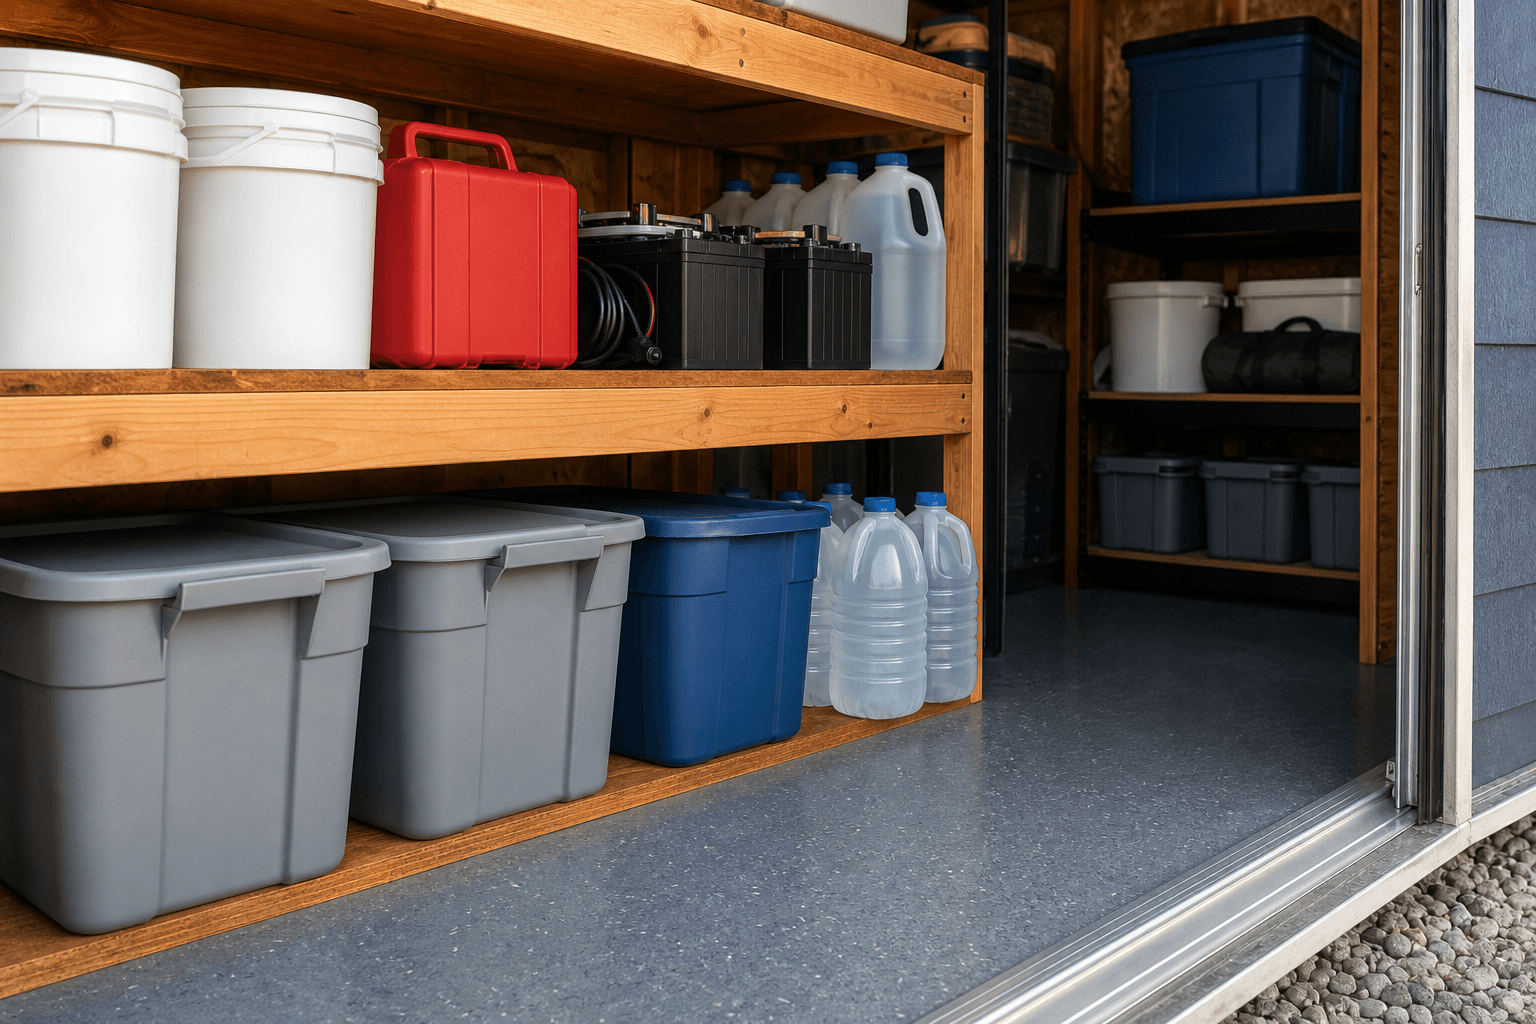
Rated steel or sealed wood shelving run by category — water, food, medical, comms, power — with the heaviest loads low and light bins high, every shelf labeled so anyone can find a supply fast and you can inventory the room at a glance.
Stackable water containers and barrels along the floor on a level base, plus a safe, ventilated spot for fuel cans away from living areas, so the heaviest and most critical supplies sit where they belong and stay reachable.
A bench or shelf for radios, a weather radio, battery chargers, power banks, lanterns, and cords near a dedicated outlet, with a staged generator and fuel by the door so light and power come online fast when the grid drops.
A staging spot by the door for go-bags and evacuation kits, plus a labeling, rotation, and inventory system on a clipboard or whiteboard so supplies get used in date order and nothing expires unnoticed.
This is where an organized, stable shell becomes a real readiness room, and it is worth naming exactly what goes in it so you size the shelving, the water base, and the power around your plan. Water is the backbone: stackable five- to seven-gallon containers and larger fifty-five-gallon barrels, a gravity or pump filter, purification tablets or drops, and a way to dispense and carry it. Food fills a run of shelving: canned vegetables, beans, soups, and meat, bucketed wheat, rice, beans, and oats sealed with gamma lids, #10 cans of freeze-dried meals and dehydrated produce, comfort and ready-to-eat foods, plus a camp stove and fuel to cook without the grid. The medical and sanitation layer earns its own cabinet: a stocked first-aid and trauma kit, prescription medications, over-the-counter basics, hygiene supplies, a portable toilet or sanitation kit, garbage bags, and disinfectant.
Around the basics, you plan power, light, comms, and tools. Power and light means a portable generator and stabilized fuel, power banks and rechargeable batteries, lanterns, headlamps, flashlights, candles, and a stock of every battery size — if standby power is central, a generator shed or a solar battery shed handles it on a larger scale. Communications covers a battery or crank weather radio, two-way radios, spare batteries, a printed contact list, paper maps, and copies of key documents in a waterproof case. The tools and warmth layer rounds it out: a multi-tool, hand tools, work gloves, duct tape, tarps, paracord, fire extinguishers, wool blankets and sleeping bags, spare clothing, hand warmers, and a way to heat at least one space — important through a North Idaho winter outage. Add the rotation and odd-lots layer — a printed inventory, a rotation schedule, spare batteries and filters, and a few totes for go-bags — and the room becomes the single place your whole plan lives. That full fit-out is what turns a storage shed into a building your household can actually rely on when the lights go out and the road is closed.
Labeled, dated, and zoned: water and sealed food low, a stocked medical kit and weather radio within reach — the detail that makes the plan work under stress.
| Emergency preparedness shed planning checklist | |
|---|---|
| Organized supply zones | Distinct, labeled zones for water, food, medical, comms, and power, laid out by category with the things you reach for first nearest the door and deep reserves toward the back |
| Stable temperature | Insulated walls and roof so stored water, food, medical supplies, and batteries do not cook in summer heat or freeze and burst in winter, with a small heat source to hold above the freeze line in a cold snap |
| Rotation & inventory | A first-in, first-out layout loaded back to front, dated labels on food, water, medicine, and batteries, and a running inventory so supplies get used and replaced on schedule before they expire |
| Power & light readiness | A dedicated outlet and bench for charging and comms, a staged generator and stabilized fuel or a battery setup, and headlamps and lanterns hung by the door so light comes first in an outage |
| Security & access | A solid, lockable door and frame, secure windows or few of them, and a clear, plowed path so a year of provisions stays protected yet reachable in seconds when you actually need it |
| Quick grab-and-go | A staging spot by the entrance for go-bags and evacuation kits, a posted layout map and inventory, and an unobstructed lane so you can load the vehicle and leave fast if you must evacuate |
A preparedness shed exists for the days the grid is down, so plan power and light first, because the whole point is functioning when the house cannot. Run a proper circuit from the house for everyday use — a dedicated outlet for the charging and comms bench keeps radios, power banks, and batteries topped up so they are ready when you need them — and then plan the grid-down power that defines the building. Stage a portable generator and a supply of stabilized fuel near the door and the feed, keep cords and a safe connection method with it, and never run a generator inside the closed shed: site it to run outside or in a properly ventilated space, with exhaust directed away from people. If standby power is central to your plan, a generator shed handles the ventilation, exhaust, and transfer setup properly; a solar battery shed gives quiet, fuel-free backup from a battery bank. Inside, mount good LED light over the shelving and the bench, and hang a headlamp or lantern right at the door, because the first thing you will reach for in an outage is light to find everything else by.
North Idaho's swing from hot summers to hard winters is exactly what a preparedness shed has to ride out, and insulation is what makes that possible. Summer heat in an uninsulated shed degrades stored food, shortens the life of medications and batteries, and can split bottled water left in the sun; hard winter cold freezes and bursts water containers, cracks canned goods, and ruins medicine and batteries left below freezing. Insulate the walls and roof well, keep the window count and size modest, and add a vapor barrier so the insulation does not trap condensation — a steady, even temperature is the single biggest factor in how long your supplies stay good. Protect anything that freezes and bursts: store water, liquids, medications, and batteries where the room holds above freezing, and plan a small thermostatted heat source to carry the room through a cold snap, which is also when you are most likely to be relying on it. Keep a plowed path to the door so the building stays reachable after a storm, and keep light and power staged so a winter outage finds you ready rather than digging in the cold and dark.
A preparedness shed earns a proper base, and because it carries a lot of concentrated weight — full water barrels, loaded shelving, fuel, and a generator — and has to stay dry and stable, the foundation matters more than it does under a light garden shed. A compacted gravel pad drains well and keeps a framed floor dry from below, but for a heavy, walk-in readiness room many buyers step up to a concrete slab: it gives a dead-flat, sealable floor, takes the weight of water barrels and a generator without flex, and leaves no gap underneath for rodents to nest near stored food. Whichever you choose, seal the floor and add a vapor barrier so ground moisture never wicks up into the bottom layer of supplies, and grade the pad so rain and snowmelt drain away from the building rather than pooling at the threshold. Set the shed where you can reach it fast from the house and from the vehicle you would evacuate in, on a spot with a clear, all-weather approach. Read how to prep a shed site before delivery so the pad, the drainage, and the access are squared away first.
North Idaho's four seasons and its real hazards drive the rest of the spec. Plan a roof and anchoring rated for local snow load, and seal the building tight so it holds an even temperature and does not draw condensation onto stored supplies. Because the whole purpose is security in a crisis, detail the shell to lock down properly: a solid, well-framed door with a strong lock and hinges, few or secured windows, and a building sited where you can see it — a deep store of provisions is worth protecting from both weather and opportunists. Detail it rodent-tight as well, since mice are relentless around stored food: tight construction, metal flashing or hardware cloth at the base, fine screening on every vent, and sealed utility penetrations. If wildfire is part of your risk picture, keep defensible space around the building and consider how it ties into a wildfire-readiness shed and your evacuation route. Most small sheds skip a building permit, but a slab, added electrical, fuel storage, and setback or HOA rules can apply — confirm what your town and county require on the service areas pages, and factor any electrical or foundation permit into the plan before you finalize the size and placement.
Lay the room out by category so that under stress you go straight to what you need instead of searching, and stage the things you reach for first nearest the door. Give water its own floor zone along one wall, because it is the heaviest and most essential supply — stackable containers and barrels low and on a level base, with a filter and dispensing setup beside them. Run food along a wall of adjustable shelving loaded so the oldest stock comes off the front. Give medical and sanitation a dedicated, clearly labeled cabinet or shelf within easy reach, because a first-aid or trauma kit is the last thing you want to dig for when someone is hurt. Put communications — a weather radio, two-way radios, spare batteries, chargers, and key documents — on a small bench, and place the power zone with the generator, fuel, and lanterns by the door. Label every shelf by category, keep like with like, hang a headlamp at the entrance, and post a simple layout map and inventory inside the door so anyone in the household can find a supply in the dark. Building the shed on-site lets you size each zone to your real plan rather than forcing the categories into a generic box.
A stable interior temperature is the single biggest factor in how long your supplies stay good, and you build it into the shell. North Idaho summers cook an uninsulated shed, degrading stored food, shortening the life of medications and batteries, and splitting bottled water in the sun; hard winters freeze and burst water containers, crack canned goods, and ruin medicine and batteries left below freezing. Insulate the walls and the roof well — the roof especially, since summer heat builds at the top of the room — so the building holds an even temperature instead of tracking the outdoor swing, and keep the window count and size modest because windows are weak points for both heat gain and heat loss. Add a vapor barrier so the insulation does not trap condensation against a cold shell. For winter, the same insulation slows the freeze, but anything that bursts when frozen — water, liquids, medications, batteries — needs the room held above freezing, so plan a small thermostatted electric heater to carry it through a cold snap, which is also exactly when you are most likely to be relying on the building. A well-insulated, sealed, temperature-stable shed is what keeps your water, food, medicine, and power gear in usable shape through a full North Idaho year.
Stored supplies are only useful if they actually work when you need them, so plan rotation and inventory from the start rather than discovering expired water and dead batteries mid-crisis. Use a first-in, first-out layout: load new stock from the back or one side of each shelf and pull from the front, so food, water, and other dated items physically move toward you as they age and nothing hides in a corner past its date. Label and date every container — food, water, medications, batteries, filters — the day it goes in, so a glance tells you what is oldest. Keep a running inventory on a whiteboard or clipboard inside the door that lists what you have and what is running low, and set a rotation schedule tied to dates you already remember, like the change of seasons, to use and replace water, swap stored fuel and batteries, refresh medications, and check expiration dates. Group like with like so counts are obvious, and shop your own shelves first so the rotation happens naturally. A labeling and inventory station kept right where you restock turns rotation from a chore you forget into the routine way the room works, so the supplies are genuinely ready the day you reach for them.
Plan power on two levels: everyday charging to keep gear ready, and grid-down power for the outages the shed exists for. For everyday use, run a circuit from the house and put a dedicated outlet at the charging and comms bench so radios, power banks, and rechargeable batteries stay topped up. For grid-down power, stage a portable generator and a supply of stabilized fuel near the door, keep cords and a safe connection method with it, and rotate the fuel on a schedule so it is fresh. The critical safety rule is ventilation: never run a generator inside a closed shed, because exhaust is deadly — site the generator to run outside or in a properly ventilated space with exhaust directed well away from people and openings. If standby power is central to your plan or you run a larger unit, a dedicated generator shed is built around the ventilation, exhaust, and transfer setup and handles it properly, while a solar battery shed gives quiet, fuel-free backup from a battery bank and inverter with no exhaust at all. Whichever route you take, keep lanterns and headlamps staged at the door so light comes online first, and spec the electrical and fuel storage up front so the building can power your essentials the moment the grid drops.
A shed holding a year of provisions, fuel, and gear is worth securing, but security cannot come at the cost of fast access when seconds matter, so plan for both. Start with a solid, well-framed door fitted with a strong lock and sturdy hinges, since the door is the weak point most break-ins exploit; keep windows few, small, or secured, since every window is a way in and a way to see what you store. Site the building where you can see it from the house rather than tucked out of sight, and keep the surrounding area clear so it offers no easy cover. For access, balance the lock against the reality that you may need in fast and possibly in the dark: use a lock you and your household can open quickly and reliably under stress — a keypad or a well-placed, known key beats fumbling for the right key on a crowded ring — and keep a clear, plowed, unobstructed path to the door so a winter storm does not seal you out of your own supplies. Stage a grab-and-go spot just inside the entrance for go-bags so you can load and leave fast. Building on-site lets you spec the door, frame, and window placement for genuine security without turning the building into something you cannot get into quickly when it counts.
Size to two things: how many people you are providing for, and how long you plan to be self-sufficient — a two-week window for a couple needs far less room than a months-long plan for a family of six. A good rule is to start from your water and food, which are the bulkiest essentials, then add space for medical, comms, power, fuel, and tools, plus a clear lane to reach it all. An 8x12 suits a household building a solid two-week-plus kit: shelving for water, food, medical, and comms on three walls, a corner for a generator and fuel, and a grab-and-go lane. A 10x12 adds the width to walk the shelves with a loaded tote and run a charging and comms bench, which is where most families building a complete plan land. A 10x16 fits a larger household or a longer horizon, with a deep water reserve, months of food, a full medical and sanitation zone, and a workspace. For deep, long-term self-reliance — a big family, a long horizon, full provisions — a 12x16 gives a genuine readiness room with space for everything and a path to all of it. Because we build on-site, you can size the shelving and zones to your exact plan; the configurator lets you compare footprints and price them, and a free estimate helps match the size to your household.
North Idaho's combination of winter storm isolation, wildfire-season road closures, and occasional grid outages makes an emergency preparedness shed more than a novelty — it's practical infrastructure. The planning challenge is building a structure whose interior stays within a usable temperature range year-round without active heating, because the scenarios you're preparing for often involve power loss. That means envelope performance: insulation, air sealing, and a tight door that doesn't lose heat when temperatures in Coeur d'Alene or Post Falls drop into the single digits.
Freeze protection is the first design constraint in North Idaho. Water storage in an unheated shed will freeze hard by January in most of Kootenai County. A shed built on site can be spec'd with enough wall and ceiling insulation to hold above freezing on all but the coldest nights, or roughed in for a small electric panel heater on a dedicated circuit — the utility rough-in is easier to include during framing than to add later.
Lot access matters too. Sandpoint and Bonners Ferry properties in Bonner and Boundary counties sometimes face road closures that last days. A shed positioned close to the house and accessible through a covered path or overhang means your supplies are reachable without crossing an open yard in a storm — something that factors into placement decisions made during the on-site build.
When you're ready to size it out, design your shed in the configurator or get a free estimate for your property in Coeur d'Alene or elsewhere in North Idaho.
Tell us what your plan covers — water, food, medical, comms, power, and tools — and how many people and how long you are planning for, and we will help spec the zoned shelving, the insulation, the power, and the security around your property, then you can build and price it online.
Keep planning your build with related North Idaho shed guides.