A solar battery and inverter shed is a planning envelope for equipment, service access, and weather protection. It is not a shortcut around electrical design, code, manufacturer instructions, or licensed-trade work. The shed builder can help create a dry, organized, ventilated structure with practical wall space and clean routing paths, while solar, battery, inverter, and electrical decisions stay with the qualified installers responsible for the system.
For North Idaho homes, the shed has to work through snow, cold starts, shoulder-season temperature swings, and muddy service access. That means the pad, doors, wall clearances, passive airflow cues, and cable-routing paths should be discussed before equipment is mounted. The goal is a utility space that is easy to inspect, easy to keep clean, and flexible enough for future service without crowding batteries, inverters, storage shelves, and conduit paths into the same corner.
The important boundary is simple: the shed can support the system, but it should not promise electrical performance, code compliance, fire rating, battery compatibility, or off-grid reliability by itself. Those details belong in manufacturer documentation, permits, and licensed electrical or solar installation scope.
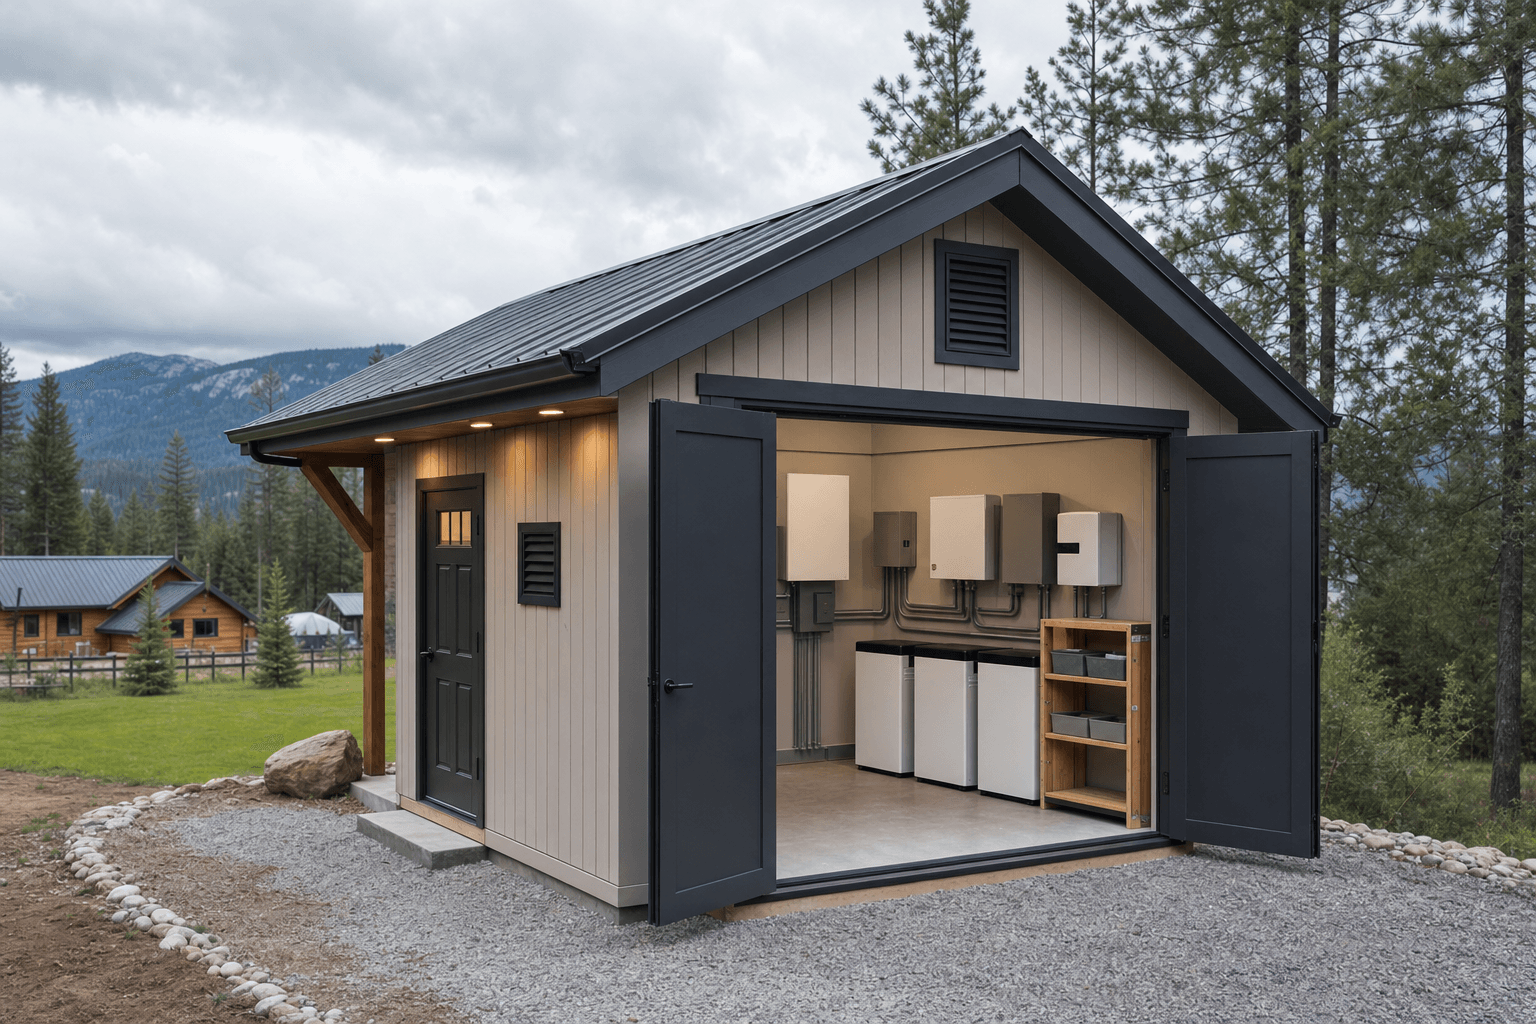
A solar battery shed should be planned as a protected utility space with ventilation cues, service access, and trade-ready routing without unsafe wiring claims.
Plan a straight, dry wall for generic equipment boxes with room for installer-specified clearances, service access, and future replacement work.
Leave predictable paths for conduit-like routing and cable management so wiring decisions can be handled cleanly by licensed trades.
Passive louvers, open floor area, and non-crowded storage zones support airflow planning without claiming a one-size-fits-all battery room design.
The most useful solar battery shed starts with a layout conversation. Which wall gets the equipment? Where can an installer work without kneeling in a doorway? How far does the service path need to stay clear? Where can shelves, spare parts, and utility items live without crowding the battery or inverter zone? These choices affect the door location, interior wall framing, ventilation placement, and the amount of open floor you should protect.
North Idaho weather adds another layer. A shed that protects equipment from blowing rain and snow still needs service access when the ground is icy. The pad should give installers a stable place to stand, and the roofline should shed water away from the door and service side. If the property may add panels, batteries, a generator interface, or EV charging later, leaving a clean wall and accessible routing chase can save rework.
Avoid treating a small battery shed like general storage. Camping gear, tools, and spare parts can have a shelf, but they should not block equipment clearances, air movement, cable paths, or service panels. The layout should feel calm and maintainable, not packed to the door.
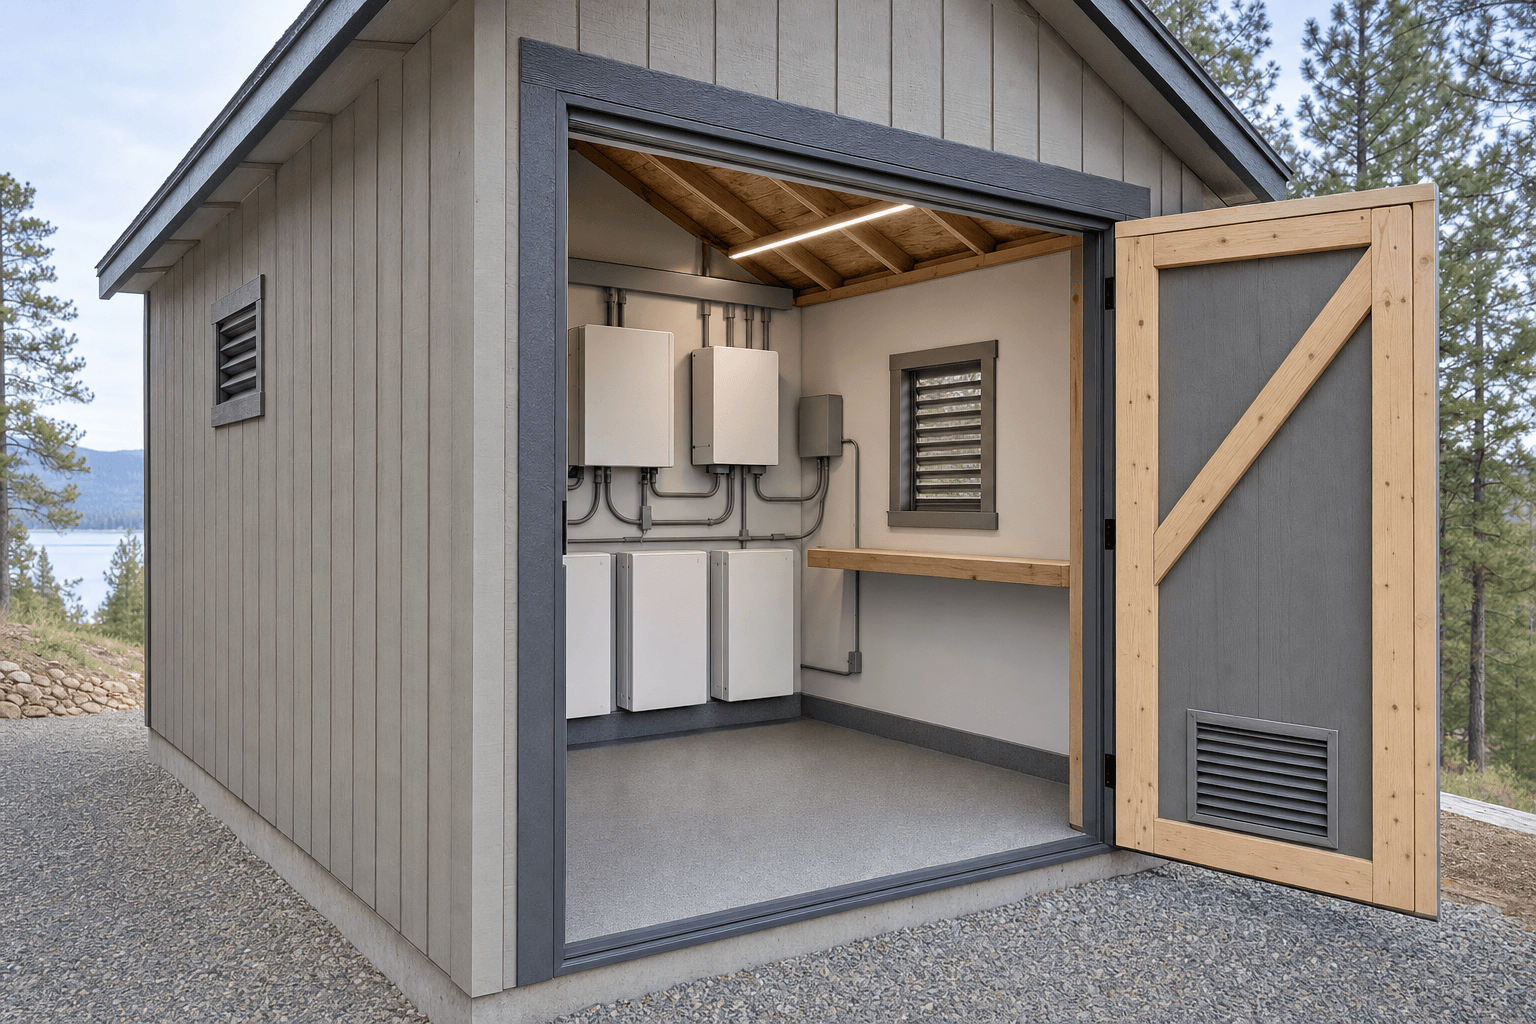
Clear service space, generic wall-mounted equipment boxes, passive ventilation cues, and clean routing paths keep the utility area organized for installer-led planning.
| Feature | Shed planning scope | Installer and code scope |
|---|---|---|
| Structure | Weather-protected shell, doors, pad approach, wall layout, shelving zones, and ventilation openings. | Equipment mounting requirements, code pathways, fire separation, and manufacturer-specific installation details. |
| Routing | Clean paths and access points for conduit-like routing without cluttering the service wall. | Wire sizing, conduit type, disconnects, grounding, permits, inspections, and final electrical connections. |
| Storage | Non-crowded utility shelves for dry parts, manuals, and tools away from equipment clearances. | Battery chemistry, temperature requirements, spacing rules, shutoff locations, and system commissioning. |
Keep the primary wall clear, dry, and reachable so installers can maintain required working space and service access.
Reserve a clean side or corner for conduit paths and cable turns instead of forcing runs around shelving after the shed is finished.
Use separate shelves for dry parts and maintenance items so batteries, inverters, and access panels are not crowded by general storage.
| Shed shell | |
|---|---|
| Door placement | Position doors so installers can carry equipment in, work safely, and keep the service aisle open. |
| Pad and drainage | Use stable site prep and positive drainage so snowmelt and mud do not collect at the utility wall. |
| Ventilation cues | Plan passive airflow openings and clear zones, then confirm equipment-specific needs with the installer. |
| Utility layout | |
| Wall clearance | Leave space for manufacturer-required service areas, heat considerations, and future replacement work. |
| Routing paths | Keep conduit-like routes simple, visible, and separate from shelving or stored gear. |
| Future expansion | Reserve clean wall area and accessible routes if later batteries, EV charging, or generator integration may be considered. |
A solar battery shed in North Idaho needs to be easy to service when the weather is bad, while staying clear about what belongs to the shed build and what belongs to licensed electrical work.
Plan the pad and door side so winter access stays realistic after plowing and freeze-thaw cycles.
Use ventilation cues and open space as a starting point for installer-specific battery and inverter requirements.
The shed supports equipment organization, while electrical design, permits, and system safety stay with qualified trades.
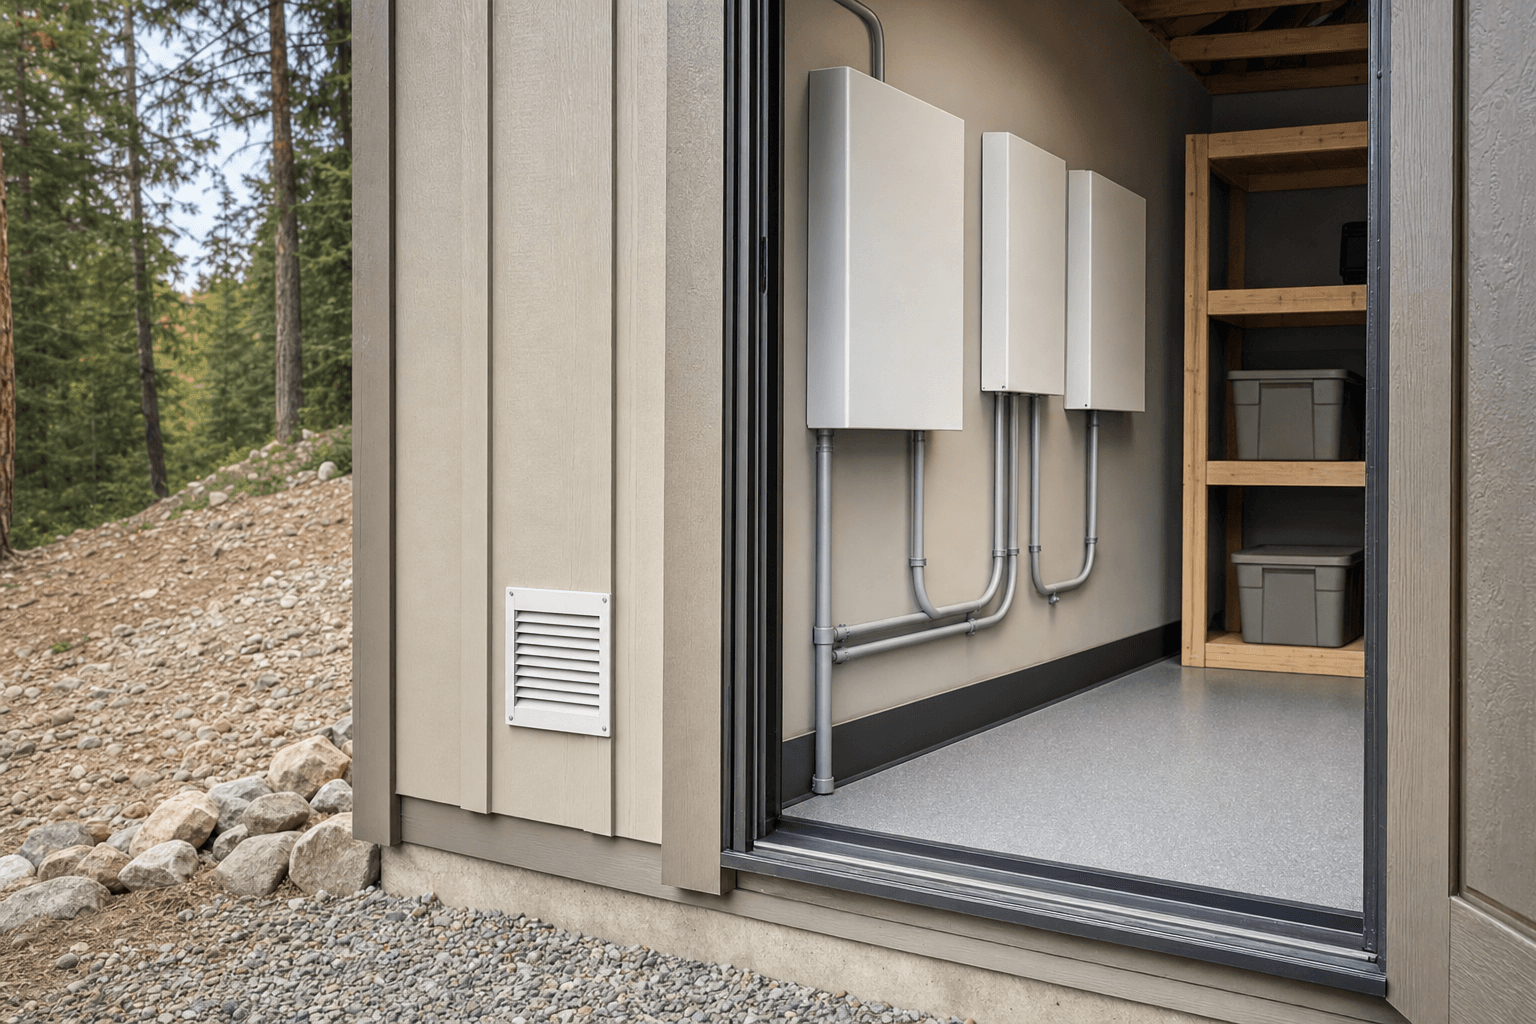
A clean equipment wall, conduit-like routing paths, passive ventilation cues, and open service space help installers plan without unsafe DIY wiring.
A shed can be planned as a protected utility space, but the equipment, battery chemistry, clearances, ventilation, electrical work, permits, and code requirements must be confirmed by the manufacturer documentation and qualified solar or electrical trades.
Decide the service wall, door location, pad approach, routing side, storage shelves, and future expansion space before construction. These choices help the installer keep equipment accessible instead of working around a finished storage layout.
Ventilation planning is important, but the exact need depends on the battery system, inverter, manufacturer instructions, and local code. The shed can include passive ventilation cues and clear space while the installer confirms final requirements.
Yes, if the layout keeps utility storage away from equipment clearances and service areas. Dry shelves for parts, manuals, and tools are useful, but general storage should not crowd batteries, inverters, disconnects, or cable paths.
Many projects can start with compact footprints such as 8x10, 8x12, or 10x12, but the final size depends on required wall clearance, equipment count, door access, future expansion, and installer service space.
No. A shed can support weather protection, organization, and access, but code compliance, electrical design, equipment selection, installation, and inspection are determined by licensed professionals, local requirements, and manufacturer guidance.
Bring the equipment goals, site location, and future expansion questions. We will help plan the shed shell, doors, pad, ventilation cues, and storage zones around a clean licensed-trade workflow.
Every shed we make is built on site in North Idaho. Explore other uses we build for.
