If you heat with wood in North Idaho, the firewood is only as good as the way you store it. Green rounds split in spring need a full summer of dry air moving through the stack before they will burn clean in a December stove, and seasoned wood left out under a tarp soaks up snowmelt, grows punky on the bottom, and hisses instead of crackling when the cold sets in. A tarp slides off in the wind, traps moisture against the wood it is supposed to protect, and turns the bottom row to rot by February. A real firewood shed solves all of that at once: open or slatted sides that let air sweep through the cords, a roof that keeps rain and snow off the top, and a raised floor that lifts the wood off the wet ground so it dries from every direction instead of wicking moisture up from below.
North Idaho On Site Sheds builds every woodshed right on your property, so the size, the side openings, the roof pitch, and the access can be matched to how much wood you burn and where the snow piles up on your lot. This guide walks the real decisions behind a woodshed that seasons green wood and keeps dry wood dry through a long heating season — which roofline sheds snow best, how many cords your footprint needs to hold, how to stack for airflow, how to keep the stack reachable after a storm, and how to keep rot and pests out of the bottom row. Whether you are seasoning your own rounds or just want a dry, snow-free place to pull a few armloads from on a cold night, the goal is the same: dry wood, easy to reach, all winter long. If you also need a dry, vented spot for a storage shed full of yard tools nearby, the same airflow-first thinking carries over.
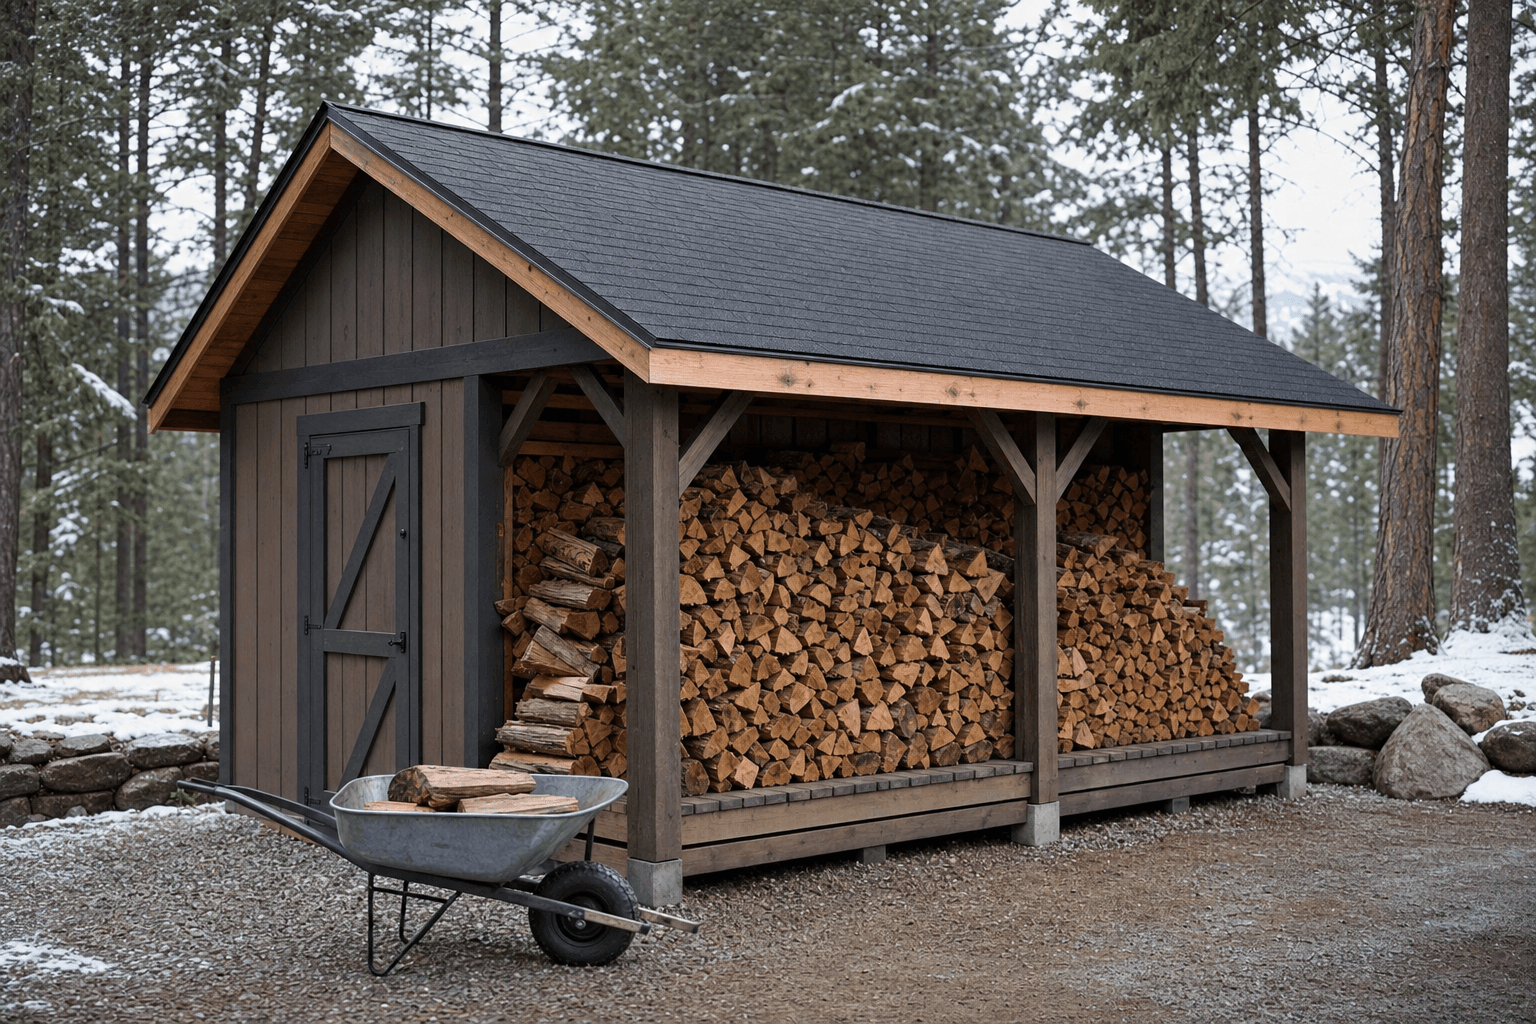
Open sides move air through the stack, the sloped roof sheds snow and keeps the top dry, and a raised floor lifts the wood off the wet ground so it seasons evenly.
A woodshed is the rare shed where you want the walls open, not closed, so the styles that suit it best are the ones that throw a roof over the wood while leaving the sides free to breathe. A lean-to or single-slope is the classic firewood roofline: the high wall faces the prevailing wind so air drives straight through the open front, the slope sheds North Idaho snow predictably to the back, and the simple one-way pitch keeps the build economical and the wood easy to reach across the open face. A standard gable works well when you want two open ends and a peak that sheds snow to both sides — air runs the length of the stack from end to end, and the height under the ridge lets you stack tall without the wood touching the roof. Both can be built with slatted or louvered sides instead of fully open walls when you want a little more weather protection and a tidier look while still letting air pass between the boards.
The key spec on any woodshed roofline is overhang and pitch, because the roof has one job: keep rain and snow off the top of the stack while the open sides do the drying. A generous eave overhang on the open face keeps blowing snow and rain from reaching the front row, and a pitch steep enough to shed North Idaho's wet snow keeps a heavy load from sitting on the roof all winter. Skip insulation and finished walls entirely — a firewood shed is not a heated room, it is a covered, ventilated rack, and sealing it up would trap the very moisture you are trying to drive out. If you want the woodshed to share a footprint or a wall with another building, it pairs naturally with a generator shed for backup power or a snow-equipment bay, since wood heat and a backup generator are two halves of the same North Idaho winter-readiness plan.
A 6x8 holds roughly one to one and a half cords stacked four to five feet high — enough for a wood stove run on cold nights and weekends, or a shoulder-season supply kept dry by the door.
An 8x8 or 8x12 holds about two to four cords, enough to carry a household that heats mostly with wood through a North Idaho winter with seasoning space to spare.
A 10x12 holds four-plus cords and lets you keep this winter's seasoned wood on one side while next year's green splits season on the other, so you are always a year ahead.
Sizing a woodshed comes down to one number you already know or can estimate: how many cords you burn in a winter. A full cord is a stack four feet wide, four feet high, and eight feet long, so the footprint and the stacking height together set how many cords fit, and you want enough room to hold a full heating season plus a little breathing space so air can move between the rows. A 6x8 is the compact woodshed — stacked four to five feet high it holds roughly a cord to a cord and a half, which suits a household that burns wood on cold nights and weekends, or anyone who wants a dry, handy supply near the door without committing a big footprint. An 8x8 steps up to a square shed that holds around two cords with room to stack on more than one wall, a good fit for a stove that does real work through the cold months. An 8x12 is the primary-heat workhorse: it holds roughly three to four cords depending on stacking height, enough to carry most wood-heated North Idaho homes through a winter, with depth to keep the dry wood at the front and the still-seasoning wood at the back.
If you split your own rounds and want to season ahead, step up to a 10x12 and split the shed into two jobs at once. Firewood needs six months to a year of drying to season properly — longer for dense, slow-drying species — so the only way to always burn dry wood is to stay a year ahead, with this winter's seasoned cords on one side and next year's green splits seasoning on the other. A 10x12 gives you four-plus cords of capacity and the width to run that two-zone system without mixing wet wood into the dry. Remember to size for height as well as floor: stacking five to six feet tall in a taller shed packs far more wood into the same footprint than a low stack, so a peaked roof or a tall sidewall earns its keep. When you are deciding between two sizes, go up — a winter runs long here, a cold snap burns wood fast, and a half-empty woodshed in October is a lot more comforting than a bare rack in February.
A woodshed looks like a small storage shed with the walls left off, but it is built around airflow instead of enclosure, and naming that difference keeps you from a building that stores wood poorly. A storage shed is a closed, weather-tight box meant to keep tools, mowers, and gear dry and secure behind solid walls and a door — exactly the wrong thing for firewood, which needs open sides and moving air to season and to stay dry. Wood stacked in a sealed shed sweats, holds its moisture, and turns musty, because the same closed walls that protect a lawnmower trap the water the wood is trying to shed. If you need both — and most wood-heating households do — plan the woodshed as the open, ventilated rack and keep a separate storage shed for the chainsaw, the splitting maul, the wedges, and the bar oil, so the gear stays locked and dry while the wood breathes.
The other natural neighbor is a generator shed, because wood heat and backup power are the two pillars of getting through a North Idaho winter when a storm knocks out the lines. A generator shed is a vented but enclosed building sized to house a standby or portable generator with exhaust routed safely outside, and it shares the woodshed's winter-access priorities — both need a path kept clear after a storm so you can reach them in the cold and dark. Some properties build the two side by side, a covered woodshed next to a generator bay, so the whole winter-readiness kit sits in one spot near the house. And if your lot fills in deep, a snow removal shed for the plow, the blower, and the shovels rounds out the set — the same machine that clears your driveway clears the path to the woodpile. Decide which job each building does, build the firewood shed open and the others closed, and you end up with a winter setup where the wood is dry, the gear is secure, and everything stays reachable when the snow comes down.
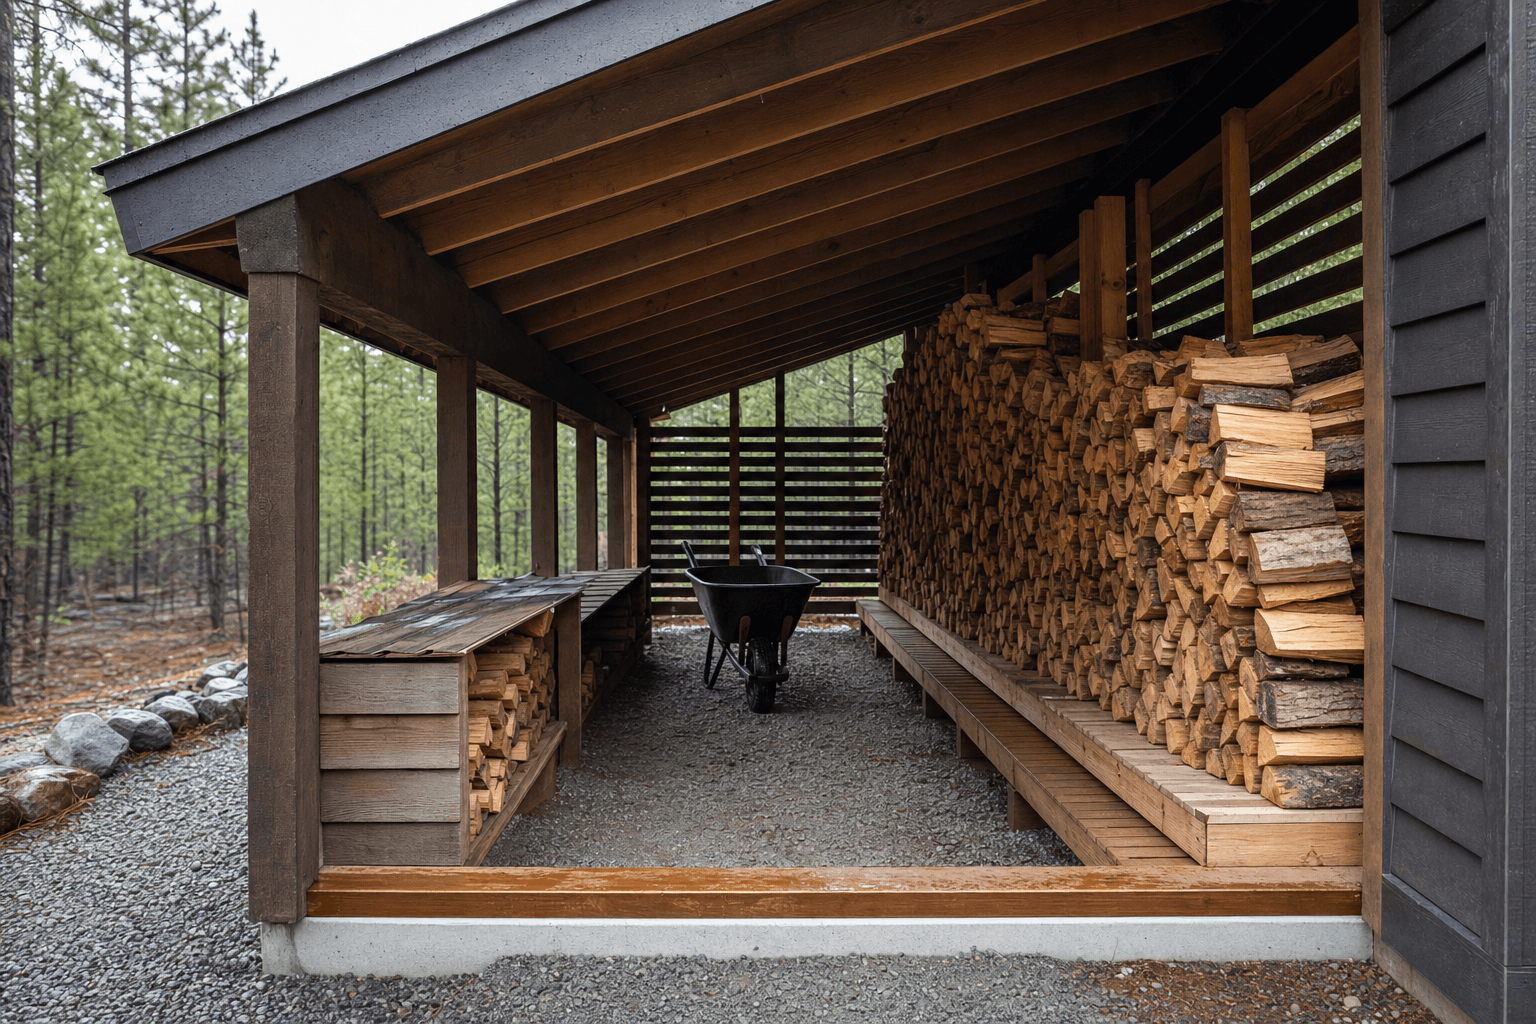
Stack in rows with gaps for air, keep the wood off the floor on a raised deck, and leave the front open so you can pull dry splits without digging.
A woodshed runs best when you lay it out as a one-way path the wood travels: green in at the back, seasoned out at the front. Set up a seasoning zone along the back or one side where freshly split, green wood goes to dry — this is the wood you will not burn until next year, so it sits where it gets the most air and the least foot traffic. Stack it in single or double rows with a hand's width of gap between rows so air can move through, and leave the top open under the roof so the heat that collects under the ridge draws moisture up and out. As that wood seasons over the summer, it migrates forward into the ready zone near the open front, where the dry, burn-now cords sit within easy reach of the door so you can grab an armload without climbing over the green stack. Keeping the two zones separate is what lets you stay a year ahead and never reach for wet wood on a cold night.
Leave an access lane down the open face so you can load a wheelbarrow or a wood cart right up to the stack and pull from the front row without disturbing the rest. Stack with the split faces and bark to shed water — bark side up on the top row helps the rain run off, and the cut ends facing the open sides let the wood breathe through its most porous surface. Keep the bottom row up off the floor on the raised deck or on runners so air gets underneath, and leave a small gap between the back of the stack and the wall so the rows are not pressed against a surface that holds damp. If the shed is deep, you can run the seasoning zone as a full back wall and keep the front two or three feet as the ready zone, rotating wood forward as it dries — a simple system that turns the woodshed into a self-managing pipeline of always-dry firewood.
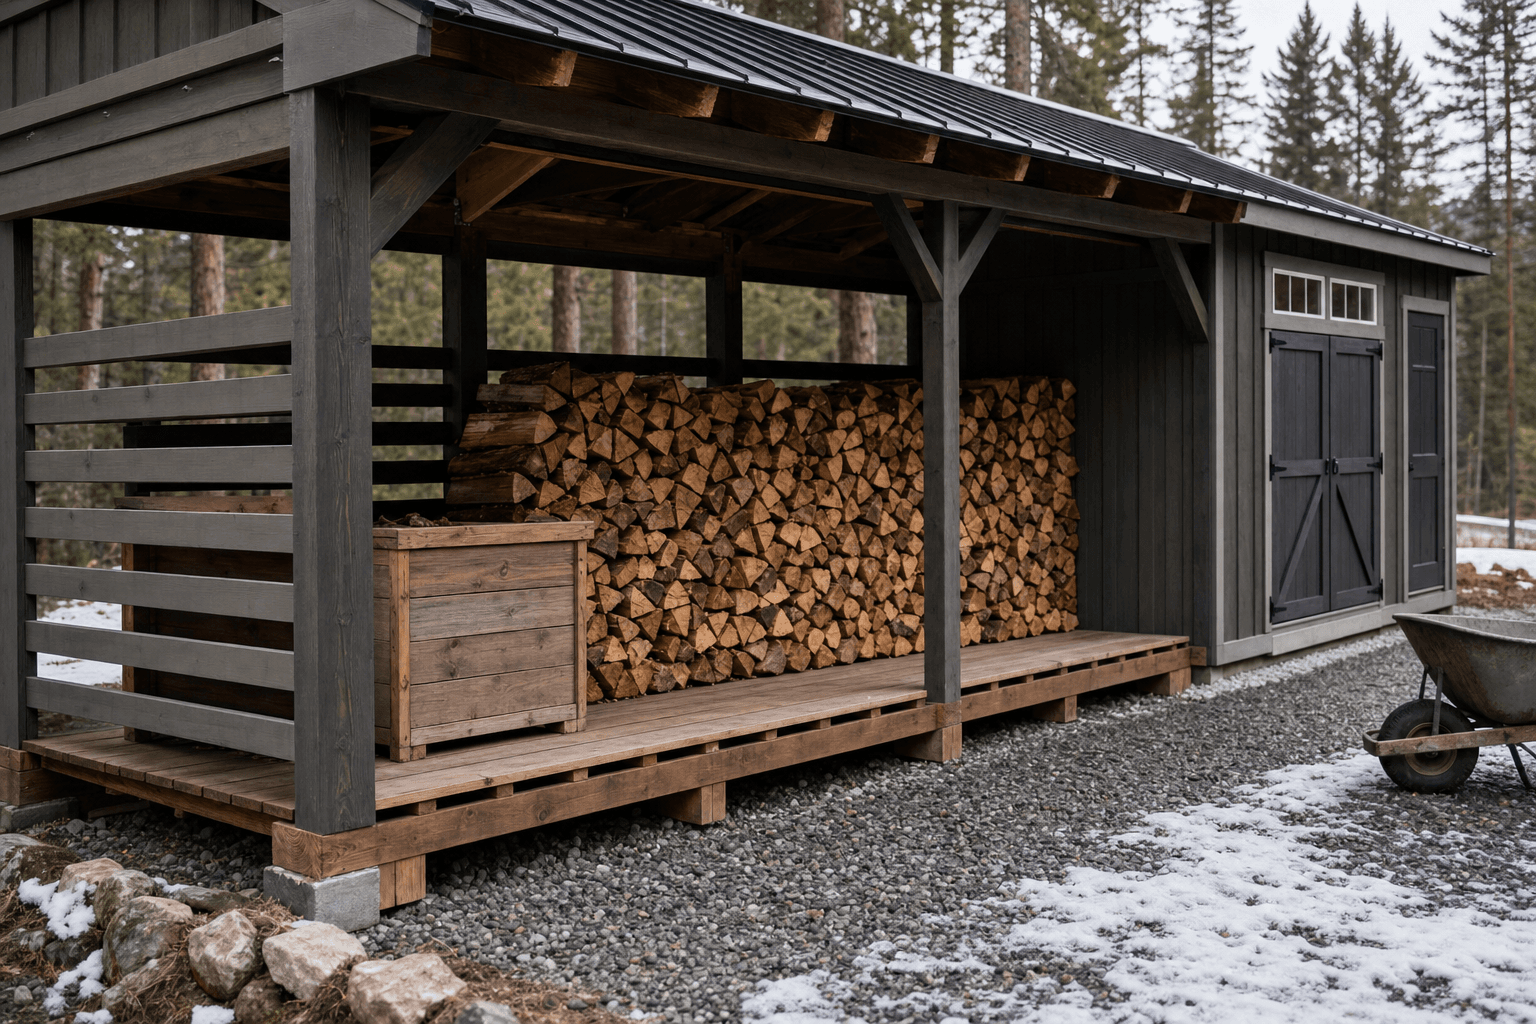
Fully open faces or louvered, slatted walls that let air sweep through the cords from every direction, so green wood seasons over a summer and seasoned wood never sits in trapped, humid air.
A sloped, snow-shedding roof with a wide eave on the open face that keeps rain and blowing snow off the top of the stack and away from the front row while the sides stay open to breathe.
A framed, slatted deck or runner system that holds the bottom row up off wet, snowy ground so air reaches underneath and the wood dries from below instead of wicking up moisture and rotting.
A small shelf or bin near the open front for kindling, fire starters, a hatchet, and gloves, so you can grab everything you need for a fire in one trip without digging through the stack.
A woodshed is mostly cordwood, but exactly what you stack and what you keep alongside it shapes the size and the layout. The bulk is split firewood — and the species matters for how long it takes to season and how it stacks: dense hardwoods like maple, birch, and oak burn long and hot but need a full year or more to dry, while the softwoods common in North Idaho — pine, fir, larch (tamarack), and lodgepole — season faster but burn through quicker, so most local stacks mix a fast-seasoning softwood for easy starts and a denser piece for a long overnight burn. Stack rounds waiting to be split in their own spot if you process wood as you go, and keep kindling — small split pieces, branches, and offcuts — in a bin or on a low shelf near the door where you reach for it first. A few fire starters or a stack of seasoned scrap fill out the start-a-fire kit.
Around the wood, a woodshed earns its keep as the staging spot for the gear that goes with heating. A wood cart or wheelbarrow parks in the access lane to haul armloads to the house; a moisture meter hangs on a nail so you can check that a split reads under twenty percent before it goes in the stove; and a small wall holds the splitting tools if you split right at the shed — a maul, a couple of wedges, and a sledge — though many people keep those in a closed storage shed and bring them out. A canvas log carrier, a pair of work gloves, and a tarp for the wheelbarrow run round out the kit. The point of naming all this is to size the shed for the wood plus the way you handle it: leave room for the cart to roll in, the kindling bin to sit by the door, and the meter and gloves to live where you grab them, and the woodshed becomes the whole heating operation in one tidy, dry, open-sided building.
Cut ends to the open air and the bottom row up off the deck: this is the detail that lets a stack season over a summer and stay dry all winter.
| Firewood shed planning checklist | |
|---|---|
| Side openings | Fully open faces or slatted, louvered walls that let air sweep through the cords from multiple directions, so green wood seasons and seasoned wood never sits in trapped humidity |
| Roof and overhang | A sloped, snow-shedding roof with a generous eave on the open face to keep rain and blowing snow off the top of the stack and away from the front row |
| Raised floor | A framed slatted deck or runners that hold the bottom row up off wet, snowy ground so air reaches underneath and the wood dries from below instead of rotting |
| Capacity by the cord | Footprint and stacking height sized to a full heating season plus seasoning space — roughly a cord in a 6x8 up to four-plus cords in a 10x12 |
| Snow-season access | An open face oriented away from where snow slides off the roof and a path you can keep plowed or shoveled, so the stack stays reachable after a storm |
| Pest and rot control | Wood kept off the ground and a small gap behind the stack, so mice and insects do not nest under it and the bottom row does not sit in standing damp |
A woodshed only works if you can get to it on the coldest, snowiest nights of the year, so plan the access before you plan anything else — a stack you cannot reach in a storm is a stack you do not have. Place the shed close to the house, within a short carry of the door you use, so an armload of wood is a quick trip in the cold and dark rather than a trek across a buried yard. Orient the open face away from where snow slides off the roof: a single-slope roof dumps its load off the low edge, so face the open front toward the high side or an end, not into the path of the avalanche coming off the pitch, or you will be digging the stack out after every thaw. Keep a path from the house to the open face that you can plow or shovel quickly, and make it wide enough to roll a wood cart or wheelbarrow through, because hauling wood by the cartload beats carrying it stick by stick when the snow is deep.
Think about how the snow moves on your particular lot, too. Snow blowing off a nearby roofline or drifting against a wall can bury an open face you sited wrong, so put the firewood shed where the wind and the roof shed snow away from the access, not into it. A wide eave overhang on the open front does double duty here: it keeps blowing snow off the wood and gives you a few sheltered feet to stand and load out of the weather. If you run a plow or a blower to clear the driveway, the same machine and the gear in a snow removal shed keep the woodshed path open, so plan the two together — clearing a short, straight run to the woodpile when you clear the drive takes seconds and means dry wood is always an easy reach away, no matter how the winter piles up.
A firewood shed is light, but it carries a heavy, concentrated load — a few cords of wood is thousands of pounds packed onto a small floor — so it earns a solid, well-drained base. A compacted gravel pad is the right foundation under a woodshed: it drains snowmelt away instead of letting water pool under the stack, it keeps the raised floor and the bottom row dry from below, and it gives the loaded shed a firm, level footing that will not settle under the weight. Site the shed on a spot that drains, not in a low pocket where runoff collects, and set it close to the house with the open face positioned for both airflow and snow-free access. Read how to prep a shed site before delivery so the pad, the drainage, and the approach are squared away before the building arrives.
North Idaho's winters drive the rest of the spec. The roof and anchoring should be rated for local snow load, since a wet snow load sitting on the pitch all winter is real weight, and a steep enough slope keeps that load shedding off rather than building up. The whole point of the open sides and the dry roof is to handle the freeze-and-thaw cycle that ruins tarped woodpiles — wood that stays dry and ventilated does not freeze into a soggy block or rot from trapped melt. Most small firewood sheds do not need a building permit because they are open, unheated, accessory structures with no electrical, but setback rules and HOA covenants can still apply to where it sits and how it looks — confirm what your town and county require on the service areas pages before you finalize the size and placement. Because there is no power, no insulation, and no plumbing to worry about, a woodshed is one of the simpler buildings to site and permit — the real planning is all about airflow, a dry roof, off-ground stacking, and a path you can keep open through the snow.
More than a closed shed can ever give it, which is why a woodshed has open or slatted sides instead of solid walls. Freshly split, green wood holds a lot of water — often forty to fifty percent moisture by weight — and the only way to drive that down to the under-twenty percent a stove needs is to let dry air move through the stack steadily over months. Plan the shed so air can reach the wood from at least two directions: fully open faces are best, and slatted or louvered walls work nearly as well while adding a little weather protection and a tidier look. Orient the most open face toward the prevailing wind so the breeze drives straight through the cords, leave the top open under the roof so the warm air that collects there draws moisture up and out, and stack the wood in single or double rows with gaps so the air passes between the pieces rather than around a solid wall of wood. Cut ends are the most porous surface, so face them to the open sides. With good airflow, a summer of drying turns green softwood into burnable firewood; dense hardwoods take a full year or more.
Start from how many cords you burn in a season and add a little room for air between the rows. A full cord is a stack four feet wide, four feet high, and eight feet long, so footprint and stacking height together set the capacity. A 6x8 stacked four to five feet high holds roughly a cord to a cord and a half — enough for a stove run on cold nights and weekends. An 8x8 holds about two cords, and an 8x12 holds roughly three to four cords stacked tall, which carries most North Idaho homes that heat mostly with wood through a full winter. If you split your own and want to stay a year ahead, a 10x12 holds four-plus cords and gives you room to keep this winter's seasoned wood on one side while next year's green splits season on the other. Remember to size for height, not just floor area: stacking five to six feet in a taller shed packs far more wood into the same footprint. When you are between two sizes, go up — winters run long here, a cold snap burns wood fast, and a half-full woodshed in fall beats a bare rack in February.
Wood sitting directly on the ground wicks moisture up from the soil and snowmelt, so the bottom row never dries, turns punky and rotten, and grows mold — and it invites insects and mice to nest underneath in the damp. Storing wood off the ground fixes all of that by letting air circulate under the stack so it dries from below as well as from the open sides. In a firewood shed, the cleanest way to do this is a framed, slatted floor or a deck raised a few inches above the ground, so the whole bottom row sits on a ventilated surface with air moving underneath. If the shed has an open ground floor on a gravel pad, you can run pressure-treated runners, pallets, or rails across it and stack on top of those, which lifts the wood off the gravel and keeps the bottom row up out of any standing snowmelt. Either way, leave a small gap between the back of the stack and the wall so the rows are not pressed against a damp surface. Combined with the dry roof and open sides, an off-ground floor is what keeps the entire stack — top, sides, and bottom — drying evenly and staying sound through the winter.
Two things keep a stack usable all winter: a roof that sheds snow and an access path you can keep clear. The roof should have a pitch steep enough to shed North Idaho's wet snow rather than letting a heavy load sit on it, and a generous eave overhang on the open face so blowing snow stays off the top and front of the stack while the sides breathe. The bigger planning move is orienting and siting the shed for access: face the open front away from where snow slides off the roof — a single-slope roof dumps its load off the low edge, so do not put the front in that path — and place the shed within a short, straight carry of the door you use. Keep a path from the house to the open face that you can plow or shovel quickly and wide enough to roll a wood cart through, since hauling by the cartload beats carrying stick by stick when the snow is deep. Watch how snow drifts and blows on your lot, too, so a nearby roofline or wind-driven drift does not bury the face you load from. Clear the woodshed path when you clear the driveway and dry wood stays an easy reach away no matter how the winter piles up.
Both work because both let air through; the choice is about how much weather protection and visual tidiness you want versus maximum airflow. Fully open sides give the wood the most air and the fastest seasoning, which is ideal if your main job is drying green rounds over a summer, and they keep the build simple and the cost down. The trade-off is that wind-driven rain and blowing snow can reach the outer rows, though a good roof overhang and smart orientation handle most of that. Slatted or louvered sides — horizontal boards with gaps between them — still let air pass freely while blocking more of the blowing weather and giving the shed a finished, less utilitarian look, which many people prefer when the woodshed sits in view of the house. Slats also keep the stack a little more contained and tidy. For most North Idaho properties, a practical setup is an open or slatted front facing the prevailing wind for airflow and access, with slatted sides and back for weather protection — you get strong drying through the open face plus shelter from the driving snow on the exposed sides. The one thing to avoid is solid, sealed walls, which trap moisture and defeat the entire purpose of a woodshed.
Firewood naturally attracts insects and rodents, and damp wood rots, so the woodshed is built to deny both the conditions they need. The single most important move is keeping the wood off the ground on a raised floor or runners, because a stack sitting in soil and snowmelt stays wet enough to rot and gives mice and insects a dark, damp place to nest underneath — lift it up, get air moving below, and you remove that habitat. Good airflow through the open or slatted sides keeps the whole stack dry, and dry wood does not rot or grow the fungus that punky wood gets; it also makes the stack a far less appealing home for the bugs that prefer moist, decaying wood. Leave a gap behind the stack so it is not pressed against a damp wall, and do not let leaves, grass, or debris pile up under or around the shed where pests would shelter. Burn from your oldest, driest wood first so nothing sits long enough to break down. It is also wise to keep the woodshed a short distance from the house rather than stacked against it, so any insects in the wood do not have a bridge straight into the walls. A dry, off-ground, well-ventilated stack that you rotate through each season simply does not give rot or pests a foothold.
A firewood shed in North Idaho has one job through October to March: keep wood dry and accessible regardless of what the weather is doing. Rain, snow, and freeze-thaw cycles are guaranteed. A roof with adequate overhang, open or slatted sides for airflow, and a floor that lifts wood off ground contact are what separate a firewood shed that actually seasons and protects wood from one that lets the bottom rows rot.
Snow load is the design constraint most people underestimate. A heavy Kootenai County snowfall can put several hundred pounds on a roof that spans even eight feet. A shed built on site is framed to local design loads — the same loads that govern residential construction in the county — so the roof structure is sized for what it will actually carry, not for a general national average. That matters when 18 inches of wet snow lands in a single storm.
Placement affects usability all winter. A firewood shed that sits 40 feet from the back door, across an unshoveled path, gets visited less than one positioned close to the house or on the route you already walk. On-site construction puts the building where it makes sense for your property — including against a back fence, on a slope, or adjacent to an existing garage — without the access constraints of a crane-delivered structure.
Coeur d'Alene and Post Falls properties often have enough side yard or rear yard to tuck a firewood shed out of the main sightlines while keeping it close. If you are also considering a larger storage or utility building, see current pricing to compare footprints, or get a free estimate on the specific size you need.
Tell us how many cords you burn, whether you season your own wood, and where the snow piles up on your lot, and we will help spec the side openings, the roof, the raised floor, and the access around your property, then you can build and price it online.
Keep planning your build with related North Idaho shed guides.