A tool shed earns its keep when every rake, cordless drill, bag of fasteners, and bottle of two-cycle oil has a home you can reach in seconds. The difference between a shed you love and one you avoid is almost never square footage — it is the plan. This guide walks through how to plan a tool shed for a North Idaho property: which shed types and rooflines fit, what size to build, how to lay out the interior, and the specific shelving, racks, and accessories that turn bare walls into organized, weather-ready storage.
North Idaho On Site Sheds builds every tool shed on your property, so the plan can answer to your real driveway, grade, and equipment access. Start with what goes inside and how often you reach for it, then size and lay out the building around that.
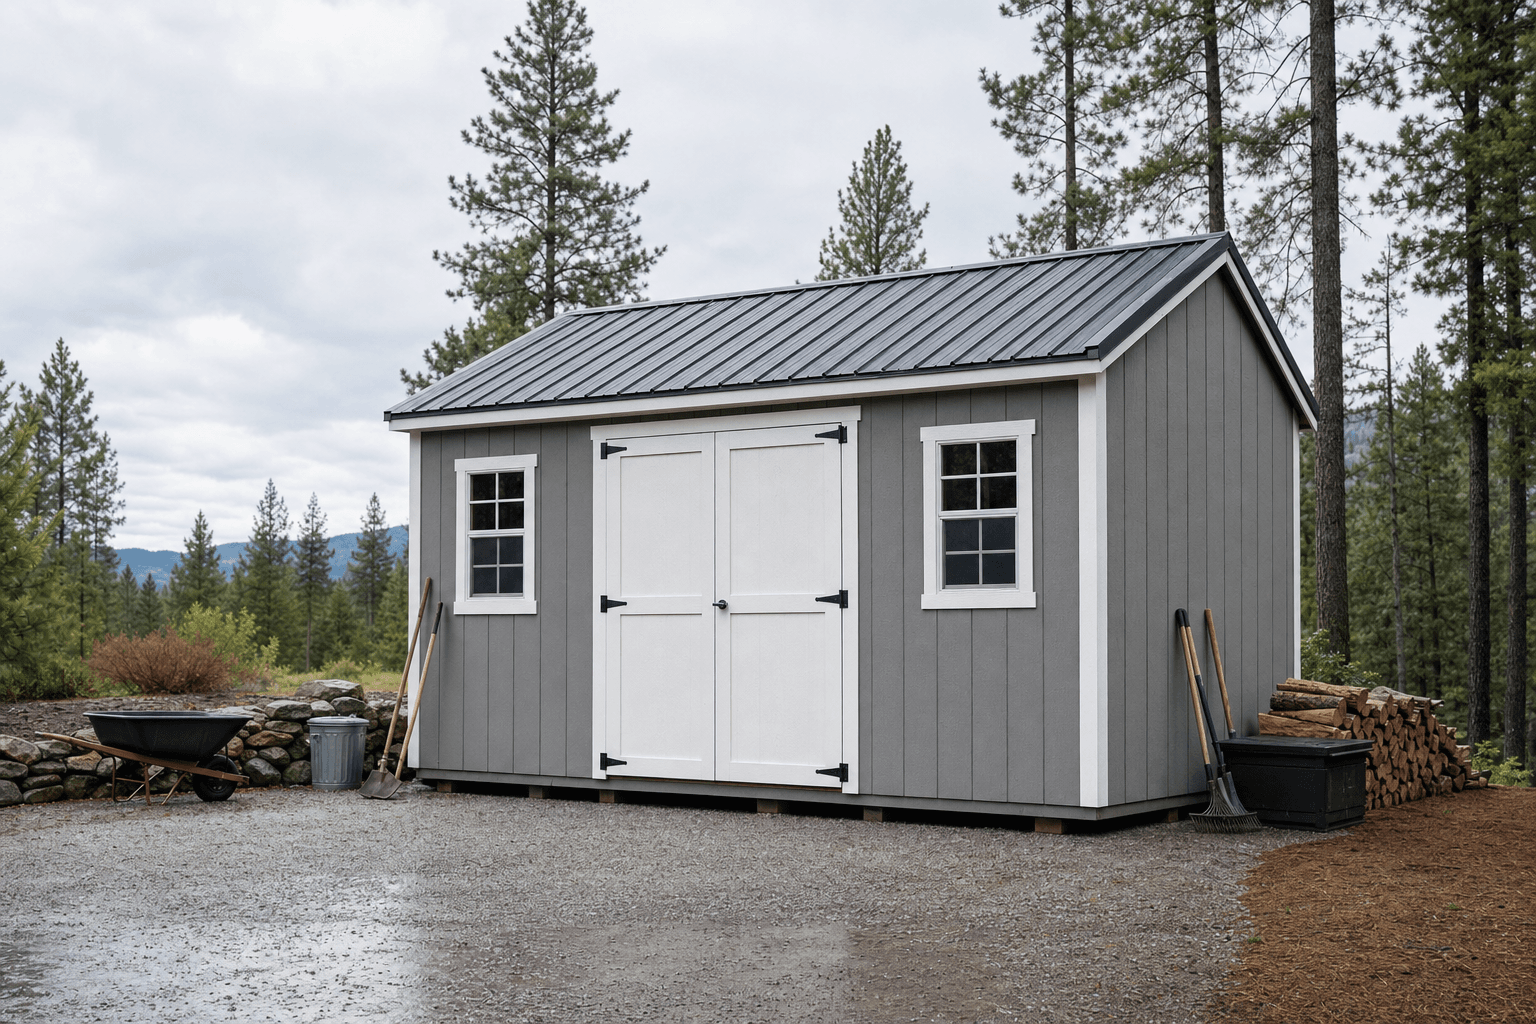
A weather-ready gable tool shed: wide doors, a dry floor, and wall height for vertical storage.
Most tool sheds start from one of three shells. A standard gable is the workhorse: simple, affordable, and tall enough at the ridge for overhead racks. A lofted barn (gambrel) trades a little headroom at the walls for a loft you can use for seasonal and bulky-but-light items like totes, cushions, and car-top carriers. A lean-to or modern shed tucks against a fence or treeline and sheds snow predictably to one side.
If the shed will double as a light workshop, prioritize wall height over floor area — a taller wall lets you stack shelving, hang a folding bench, and keep the floor clear. Pair this guide with the tool sheds service page and the workshops build if you expect to spend real time working inside.
An 8x12 or 10x12 holds wall-hung hand tools, shelving, a push mower, and a small bench without feeling tight.
Step up to a 10x16 or 12x16 so a riding mower can park while ladders, a workbench, and battery tools keep their own zones.
A 12x20 or 12x24 gives a true work aisle, room for a rolling bench, and a parking spot for a wheelbarrow or snow blower.
These three overlap, and the right call depends on how you will use the space. A storage shed is about capacity — totes, seasonal decor, lawn furniture — so it favors open floor and deep shelving over bench space. A tool shed is about access and organization for gear you reach for most weeks, so it favors wall systems, a small bench, and power. A workshop is a place to spend hours building, so it favors wall height, bright lighting, insulation, and dedicated circuits.
Plenty of buyers want one building that does two jobs, and that is fine — just decide which job leads. If tools and a bit of tinkering lead, build a tool shed with a workshop corner. If projects lead, build a workshop with a dedicated tool wall. Naming the priority up front keeps you from buying a building that does neither job well, and it drives the door placement, the wall height, and how much power you run.
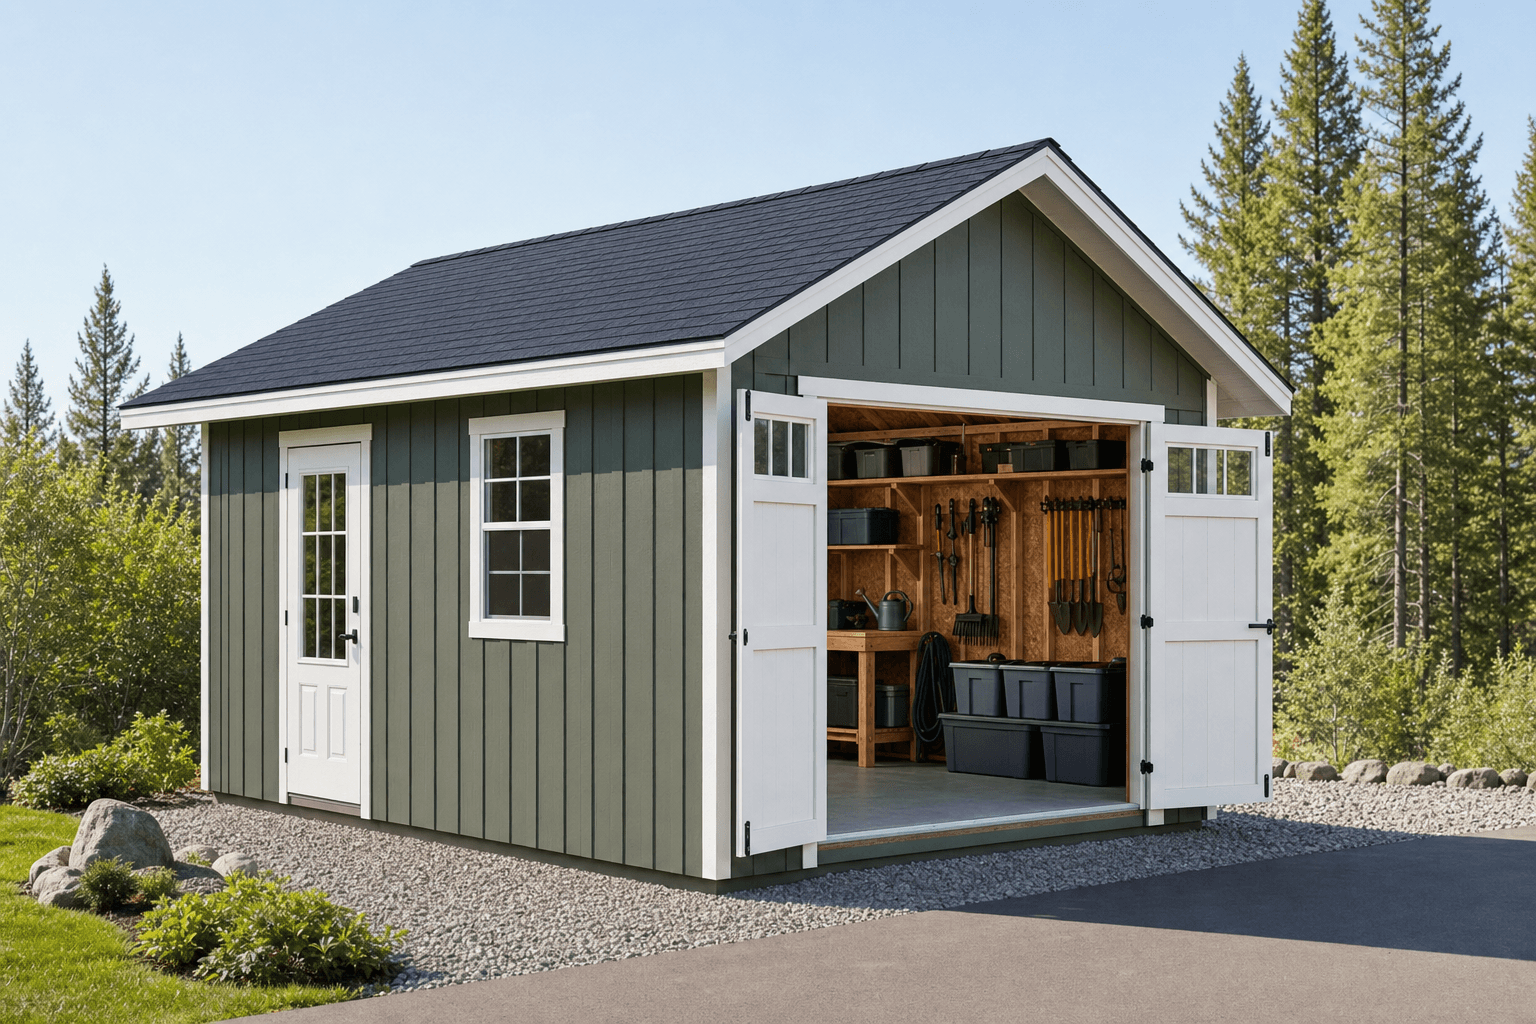
Wall storage first, floor storage second: it keeps the aisle clear and the shed easy to sweep.
Think of the shed as three quick zones instead of one open box. A grab-and-go wall by the door holds the tools you reach for daily. A project zone gives you a bench, light, and power for sharpening, repairs, and charging. A deep-storage zone in the back or overhead holds seasonal and bulky items you touch a few times a year.
Zoning keeps the walk-in path clear and means you are never moving three things to reach a fourth. It also makes the shed safer when the floor is wet from boots and snowmelt.
A continuous slatwall, pegboard, or French-cleat rail lets you move hooks and holders as your tools change — far better than fixed nails.
Adjustable shelf brackets plus labeled bins corral fasteners, chemicals, and parts off the floor and out of the damp.
Ceiling-mounted racks and a loft swallow totes, hoses, and car-top gear, reclaiming the floor for equipment you use.
Even a 4-foot fold-down bench gives you a place to sharpen blades, fix handles, and stage small projects without using the garage.
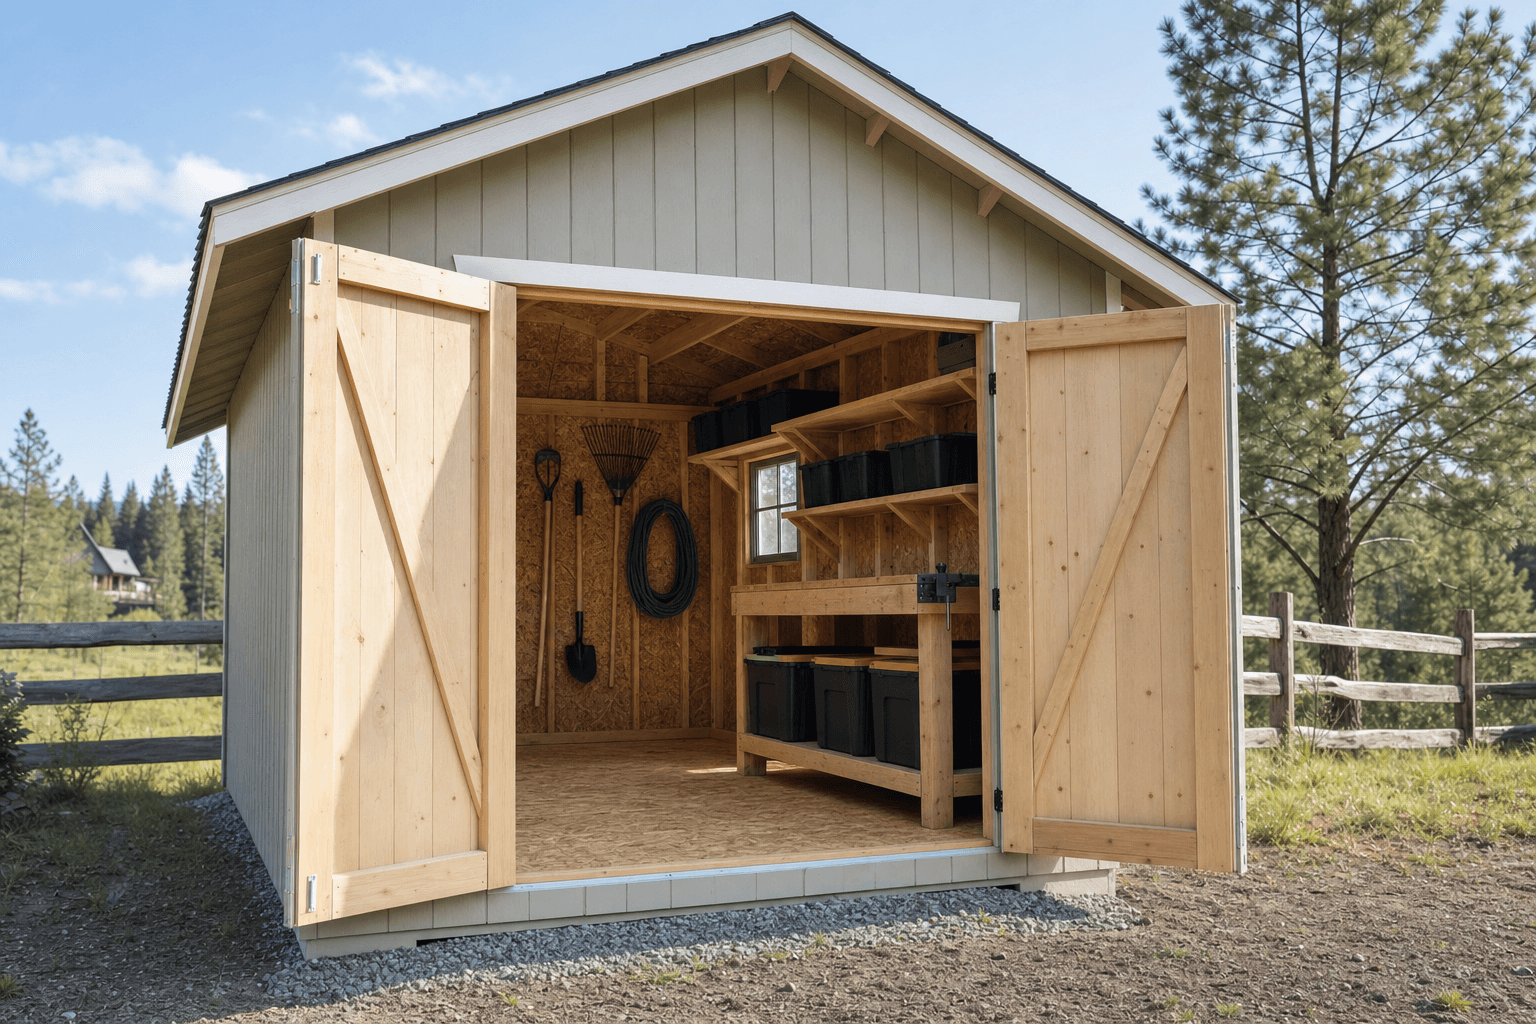
This is where a plain shed becomes a tool shed. None of it is exotic — it is about choosing the right rack for each thing you own:
Long-handled tools (rakes, shovels, brooms) hang on spring-grip clips or a notched rail. String trimmers and pole saws ride on horizontal hooks. Hoses coil on a wide wall reel. Power tools and batteries live on a shelf or cabinet near the only spot with an outlet, with a charging strip mounted to the wall so cords stay off the bench. Hand tools sit on a pegboard or magnetic strip above the bench. Chemicals, paint, and oil go on a high, vented shelf away from anything that sparks. Bulk items — soil, salt, fasteners — drop into stackable totes or a small parts cabinet.
Add a boot tray and a stick-on LED or hardwired light by the door, an anti-fatigue mat at the bench, and a fire extinguisher within reach. A secure charging and battery zone is worth planning early if you run a fleet of cordless tools.
Pegboard above the bench, adjustable shelves below, and a charging strip off to the side.
| Tool shed planning checklist | |
|---|---|
| Doors | Wide double or large single, sited for a straight roll-in from the driveway |
| Wall height | Taller walls (think 8 ft+) for stacked shelving and a folding bench |
| Floor | Dry, level, and rated for the heaviest thing you will roll inside |
| Power & light | At least one circuit for charging, bench light, and a heater on cold days |
| Ventilation | Eave or gable vents to clear fuel fumes and prevent condensation |
| Security | Quality hasp and lock, plus concealed hinges on out-swing doors |
A tool shed gets used at 6 a.m. and after dark, so plan light and power even if you start simple. One circuit covers an LED fixture, a wall-mounted charging strip, and a small heater that keeps batteries and adhesives from freezing. Add a switched light right by the door so you are never feeling for a tool in the dark, and a weatherproof exterior outlet if you will run a mower charger or trickle charger off the wall.
North Idaho winters are the real test of the plan. Keep a roof rake or a clear path to the door, store salt and a snow shovel just inside the entrance, and lift anything moisture-sensitive off a cold slab onto a low shelf. Good eave and ridge ventilation stops the slow condensation that rusts blades and dulls steel over a long, closed-up winter — it is the cheapest upgrade that protects everything else inside.
A tool shed is only as good as the pad under it. A compacted gravel pad keeps the floor dry and lets snowmelt drain; a concrete pad makes sense if you will roll heavy equipment daily. Plan the approach so you are not pushing a mower uphill through mud. Read how to prep a shed site before delivery day.
North Idaho winters drive several choices: a roof and anchoring rated for local snow load, vents that keep condensation off your steel, and a door that still opens after a storm. Many small sheds do not need a permit, but setbacks, HOA rules, and larger footprints can — confirm the rules for your town on the service areas pages before you finalize size and placement.
For hand tools, shelving, and a push mower, an 8x12 or 10x12 is a comfortable start. Add a riding mower, ladders, a workbench, or battery-tool storage and a 10x16 or 12x16 gives each one its own zone without crowding the walk-in path.
Start with a dry, well-drained pad, then add eave or gable ventilation so warm, moist air can escape. Keep chemicals and metal tools off the floor on shelves, and leave an inch of air behind wall-hung items so condensation does not collect.
Yes, if you plan power for it. Run at least one circuit, mount a charging strip to the wall above the bench so cords stay clear, and keep batteries off a cold concrete floor in winter. For a larger fleet, dedicate a vented cabinet or shelf to charging.
Work in zones. Keep a grab-and-go wall by the door for the tools you use weekly, a bench with power for repairs and charging, and deep or overhead storage in the back for seasonal gear. Hang long tools, drop fasteners and parts into labeled bins on adjustable shelves, and keep the floor clear so you are never moving three things to reach a fourth.
Hang them. A notched rail or spring-grip clips along one wall keep rakes, shovels, and brooms visible and off the floor, which clears the aisle and keeps the shed easy to sweep out after a muddy day.
Seal the gaps first: tight door sweeps, screened eave and gable vents, and no open holes where conduit or a hose passes through the wall. Store any seed, feed, or birdseed in sealed metal or hard plastic containers instead of bags, and keep the floor clear so there are fewer hidden nesting spots.
A tool shed is the most common build we do, and across Coeur d'Alene and Post Falls it solves the same problem every time: the garage has quietly turned into storage, and there's nowhere left to actually work. A tool shed built on your property pulls the mowers, trimmers, hand tools, and fertilizer back out of the house and into one organized, weather-tight space.
Building on site is the practical advantage here. We frame and finish the shed where it will stand, so it fits the spot you have — tucked along a fence line, set back in a corner, or placed on a wooded Hayden or Rathdrum lot a delivery truck can't reach. The footprint, door width, and shelving get sized around your equipment instead of a catalog template.
North Idaho weather sets a few rules. The roof is framed for real winter snow load, the building is tight against wind-driven snow and spring rain, and anything that shouldn't freeze — paints, batteries, certain chemicals — can sit behind an insulated wall as an option.
Make the inside work as hard as the footprint: shelving, a loft, a workbench wall, and a ramp turn a modest shed into a real tool room. Design your tool shed in the builder to compare sizes and door layouts with live pricing, then get a free estimate.
Tell us what you need to store and where the shed should sit. We will help size the building, door layout, and site prep around your property — then you can build and price it online.
Keep planning your build with related North Idaho shed guides.