A podcast and content-creator studio is a building you judge with your ears and your camera, not your tape measure. Recording inside the house means fighting the dishwasher, the furnace kicking on, a dog at the door, and a spouse on a call down the hall, and every one of those shows up in the audio after you have already finished talking. A dedicated podcast and creator studio in the backyard solves that by giving you a quiet, treated room you control from the framing out — one where the walls deaden reflections, the climate runs without a roar, the lights are aimed for camera, and the network never drops a stream. Plan it around clean audio and a usable camera frame first, and the desk, the gear, and the backdrop all fall into place around that.
North Idaho On Site Sheds builds every studio right on your property, which matters more for a recording room than for a plain storage shed, because the things that make a room sound good — insulated walls, a solid floor, a sealed envelope, and quiet climate — are framed-in choices you cannot bolt on cheaply afterward. Start with how you record: solo at a mic, two people across a table, a guest on camera, or a full video set with a backdrop and a B-roll corner. That one answer drives the footprint, the acoustic treatment, the lighting plan, and the power and networking. Done right, a creator studio becomes the room you actually publish from week after week, with audio that sounds like a real studio and video that looks like one too.
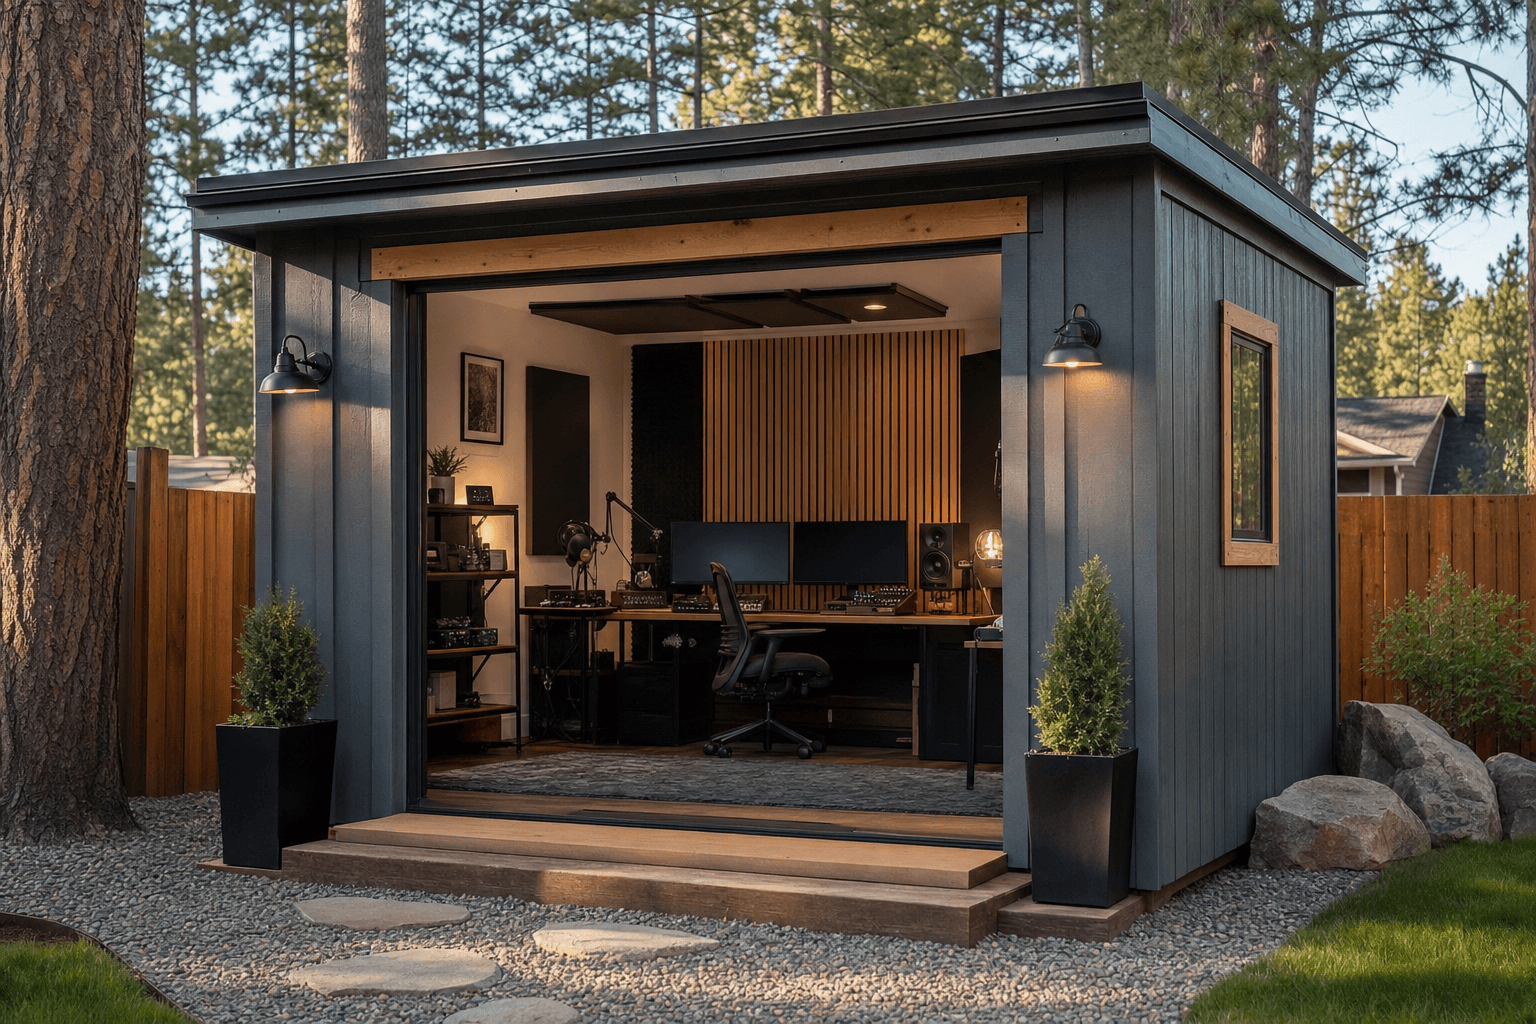
Judge a studio with your ears and your camera: a treated room, quiet climate, aimed lighting, and a network that never drops a stream.
A recording room wants a calm, square-ish space with a finished interior and a sealed, insulated envelope, so the roofline is more about headroom and how you treat the ceiling than about looks. The standard gable is the honest starting point: simple to insulate, easy to line with finished walls and acoustic treatment, and it gives you flat surfaces to mount panels and a ceiling cloud over the desk. A lofted barn or gambrel raises the center and can buy a little extra air volume, which helps a room breathe acoustically and leaves height for a boom arm, a light grid, or a hanging mic — handy if you shoot standing or want a taller backdrop. A lean-to or modern single-slope sheds North Idaho snow predictably and gives a clean, contemporary look that reads well on camera, with one tall wall that makes a natural home for a backdrop or a window you can blackout for video.
Whatever the roofline, treat this as a finished, conditioned room rather than a bare shell, which is why it overlaps so closely with a home recording or music studio where the same isolation, treatment, and quiet-climate thinking apply to a different kind of sound. The desk, the power, the network, and the daily-use comfort also mirror a backyard office shed, and if your channel leans visual — product shots, painting, crafts, or set-building on camera — the lighting and set planning have a lot in common with an art studio. Decide early whether this is an audio-first podcast booth, a video-first set, or a hybrid that does both, because that single call drives the wall treatment, the ceiling height, the lighting, and how the room gets zoned.
A solo voice booth fits in a compact room, but two or three people across a table, plus a guest on camera, need real width — size the footprint to the most people you will ever seat at once.
Video needs distance from the subject to the lens and space for lights on stands, so plan depth for a camera setback and a lighting throw, not just a desk against a wall.
A backdrop, a second shooting corner, or a standing set eats floor fast, so add width and depth if the channel is video-first rather than a microphone and two chairs.
Footprint decides whether the studio records two people cleanly or feels like a closet on camera, so compare real dimensions before you commit. A 10x12 is a strong solo or two-person audio booth: room for a desk, a pair of mics on arms, treatment on the walls, and a single camera for a talking-head shot, without much room to spare. Step up to a 10x14 and the extra length gives you the camera setback a flattering video frame wants, plus space for a light or two on stands and a small guest chair. A 10x16 opens up a real two-zone studio — a recording table at one end and a backdrop or set corner at the other — so you can shoot an interview at the desk and B-roll against a clean wall without rearranging the room. For a full video-first creator space with three people on camera, a standing set, a lighting grid, and an edit corner, a 12x16 gives the room enough width and depth to light a scene properly and still leave a path to walk. In a studio, the people on mic set the width and the camera setback sets the depth — protect both before you trim the size down.
These three overlap more than buyers expect, and the right call comes down to what the room does most. A music studio leads with sound isolation and acoustic accuracy for instruments, amps, and vocals — heavier on bass control and monitoring, and a great reference point because the isolation and treatment principles carry straight over to a podcast room. A home office shed leads with daily desk work, calls, and focus, and a podcast studio shares its power, network, climate, and comfortable-all-day requirements almost exactly — many creators run one building as both an office during the day and a studio at night. An art studio leads with light and a making space, and it shares the video lighting, the set corner, and the messy-creative-zone thinking with a creator studio that shoots visual content.
Plenty of creators want one building that does double duty, and that works well as long as you build to the strictest requirement — which, for recording, is quiet and clean audio. A room that is also an office still needs the acoustic treatment, the quiet HVAC, and the sealed envelope first, because you cannot retrofit silence into a noisy, echoey box, but you can always add a second monitor and a filing cabinet later. If music is part of the picture, lean toward the heavier isolation of a music studio build from the start. Naming the lead use up front keeps you from a building that records poorly and works poorly both — and it locks in your treatment, your climate, and your lighting before the framing is ordered.
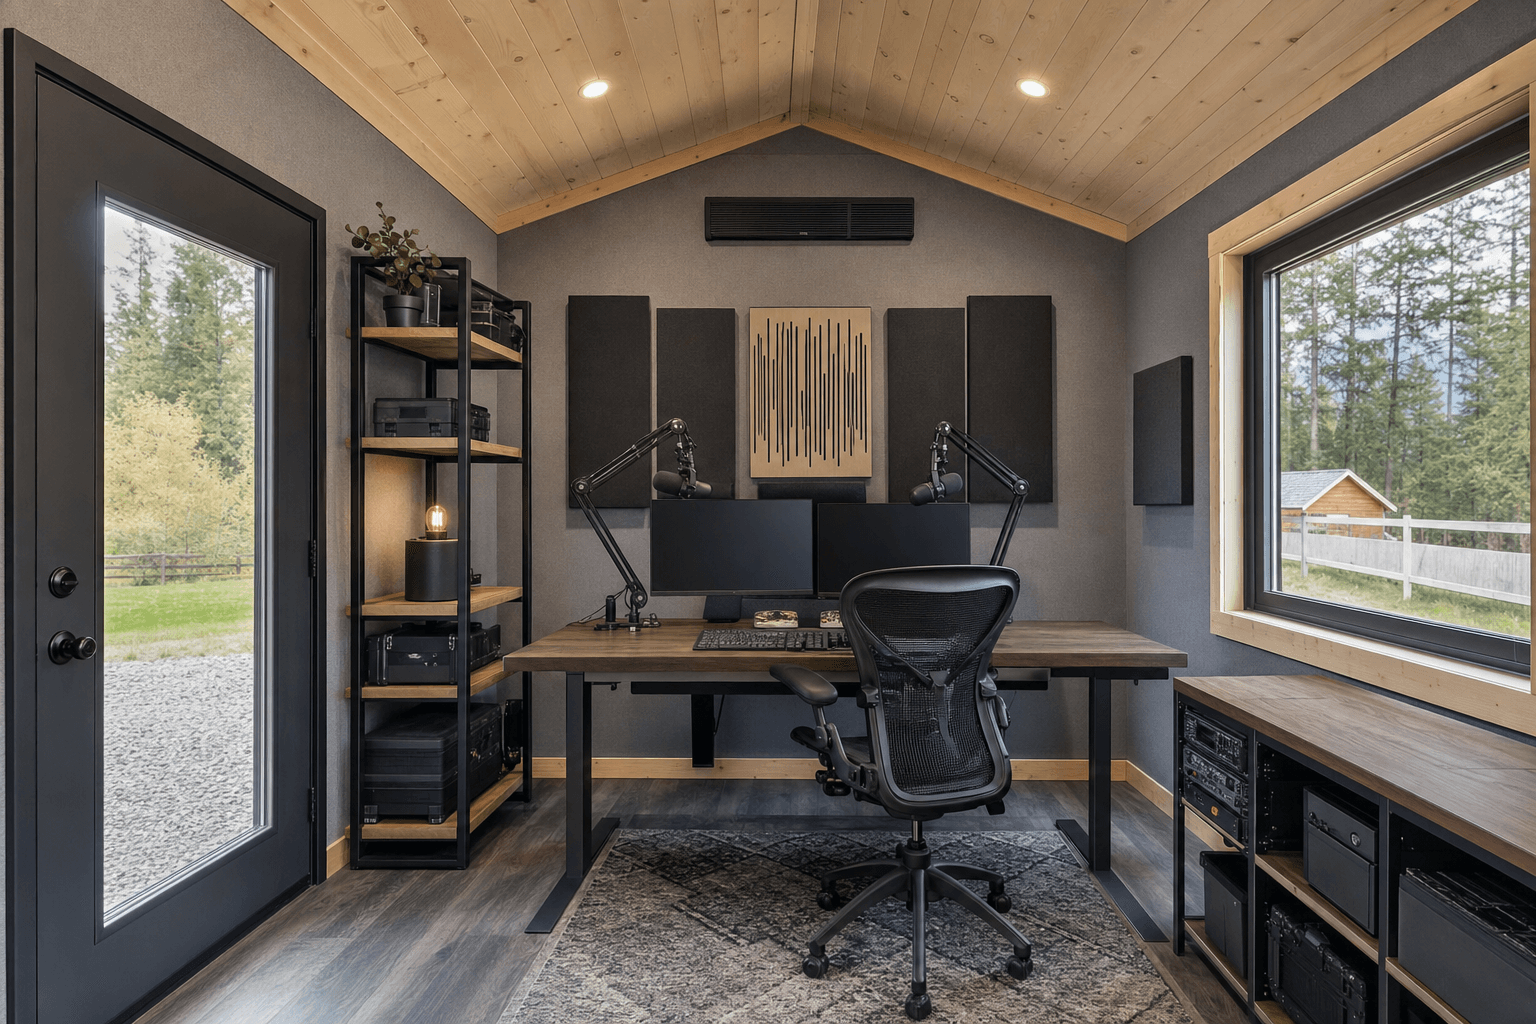
Zone the room: a recording table with treatment around it, a backdrop or set corner, an edit desk, and lights aimed at the subject, not the walls.
Think of the studio as a few working zones instead of one open box, because a podcast room and a video set ask for different things in different corners. The recording zone is the heart of it: a desk or table sized for the number of people on mic, with microphones on boom arms, treatment on the nearby walls and a cloud overhead so voices land clean, and the chairs placed so nobody faces a bare reflective surface. The camera and set zone wants a clear sightline and real setback — the lens needs distance from the subject for a flattering frame, and a backdrop, a bookshelf set, or a painted accent wall gives the video a consistent look. The lighting zone is less a place than a plan: room for a key light, a fill, and a backlight or hair light on stands or mounted, aimed at the subject without spilling into the mic's reflections or blowing out the backdrop.
Then add the support zones that keep a session moving. An edit and control corner holds the computer, the audio interface, the monitor, and a comfortable chair for the editing, which often takes longer than the recording itself. A gear and staging zone along one wall stores cameras, lenses, mics, cables, props, and a backdrop stand on shelving or in a cabinet so the room reads clean on camera. Keep the camera setback honest so faces are not crammed against a wall, keep the lights off the treated surfaces, and run the cables cleanly so nothing crosses a walking path or shows in frame. A studio that flows is one where you sit down, hit record, and the room is already ready.
Broadband absorption panels on the walls at ear height, a ceiling cloud over the desk, bass traps in the corners, and a soft floor so voices land dry and clear instead of boomy and echoey.
A mini-split sized for the room and a tightly sealed, insulated envelope so the building heats and cools nearly silently, with no furnace roar, duct rush, or fan hum bleeding into a take.
A key, fill, and backlight on stands or mounts plus dimmable, daylight-balanced panels and blackout control on any windows, so the look is the same every session regardless of the time of day.
Dedicated 120V circuits for lights and gear, plenty of outlets where the equipment lives, and a hardwired Ethernet drop so livestreams and uploads never stutter on flaky wireless.
This is where a treated shell becomes a working studio, and it is worth naming exactly what lives inside so you size the power, the network, the lighting, and the treatment around it. The audio anchors are the pieces you build the room for: microphones on boom arms, an audio interface or mixer, studio monitors or headphones, a pair of broadband absorption panels behind and beside each talker, a ceiling cloud, and corner bass traps. The video anchors are the camera or cameras, a tripod or two, a key light, a fill, and a backlight, a teleprompter if you read to camera, and a backdrop — a muslin or paper roll on a stand, a painted accent wall, or a styled bookshelf set. Underneath it all is the computer and capture corner: an edit machine, a capture card or recorder, a stream deck, an external drive for the footage, and a comfortable chair for the hours of editing that follow every shoot.
Around the anchors you fit out for the way you actually create: a desk or table sized to your guests, acoustic-friendly seating, a cable-managed power strip and surge protection at the desk, a small sign or on-air light by the door, and storage for lenses, batteries, cables, SD cards, and props so the room stays camera-ready. Add the comfort that keeps a long session pleasant — a water station, a coat hook, dimmable room lighting separate from the camera lights, and a rug that warms the floor and tames reflections. Wire it generously for the lights, the computer, the monitors, and the chargers, and run a hardwired network so a live stream never drops mid-show. These are the touches that turn a quiet room into the creator studio you publish from on schedule, instead of a space you keep apologizing for on camera.
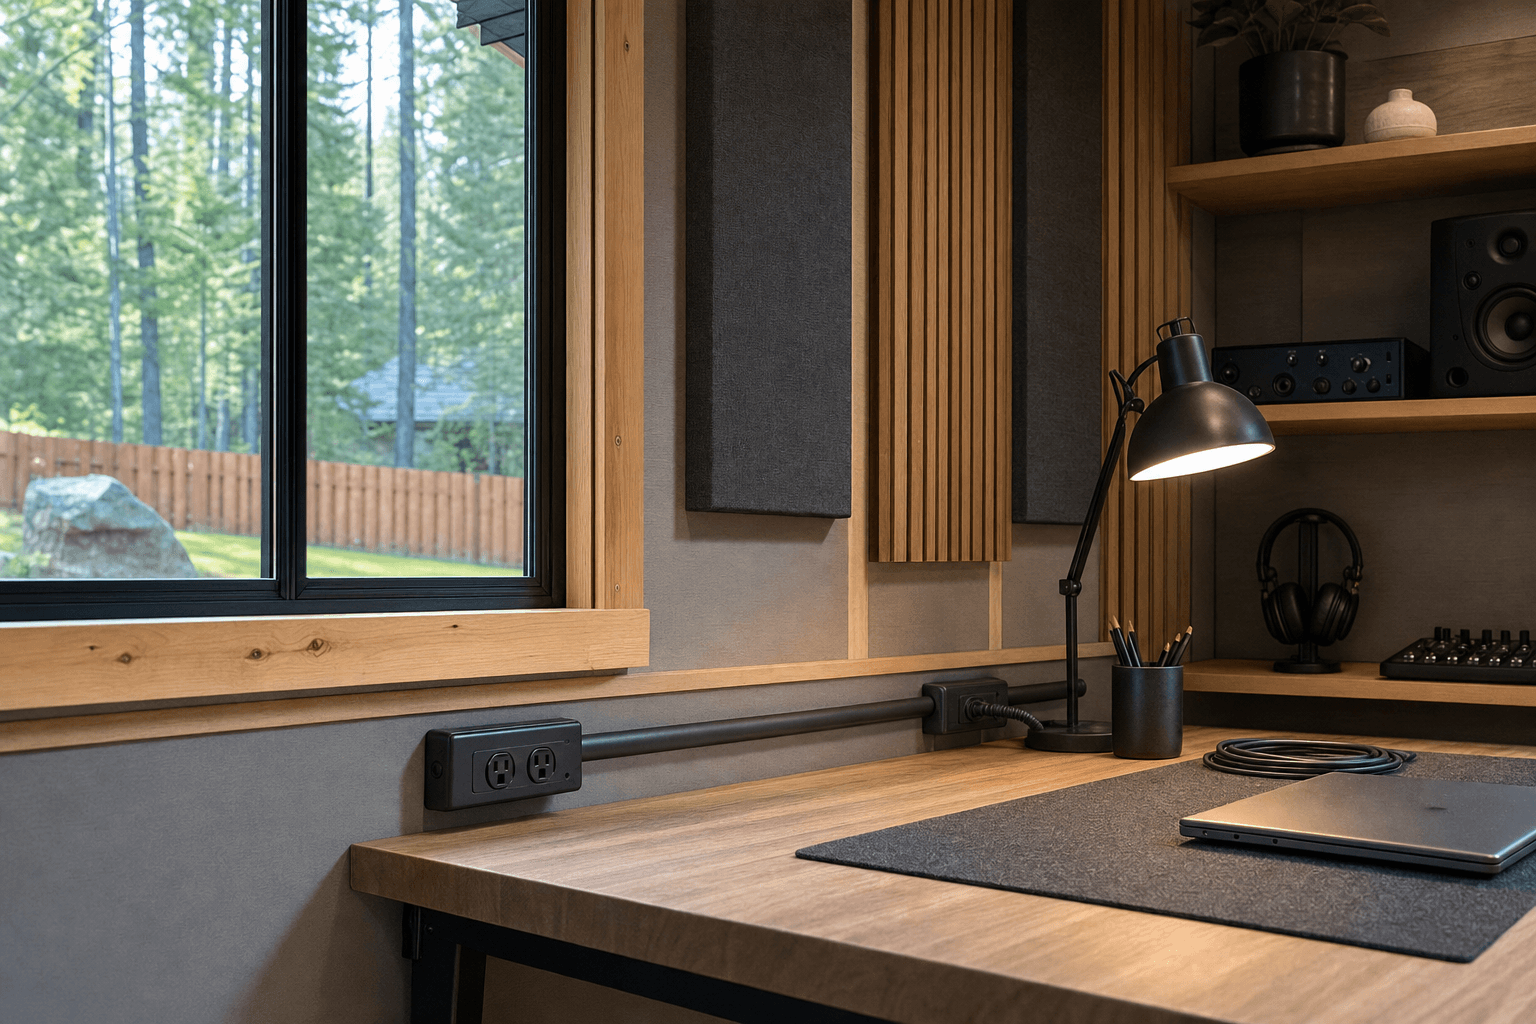
A mic on an arm, a broadband panel right behind the talker, and a daylight-balanced light off to the side — the details that make voices and video read clean.
| Podcast and creator studio planning checklist | |
|---|---|
| People on mic | Size the desk and the room width to the most people you will ever record at once, plus a guest chair on camera, so nobody is crammed against a bare wall |
| Acoustic treatment | Broadband absorption at ear height, a ceiling cloud over the desk, corner bass traps, and a soft floor so voices land dry, clear, and free of echo |
| Quiet climate | A mini-split and a sealed, insulated envelope so heating and cooling run nearly silently, with no furnace, duct, or fan noise bleeding into a take |
| Video lighting | Key, fill, and backlight on stands or mounts, dimmable and daylight-balanced, with blackout control on any windows for a repeatable look |
| Power & network | Dedicated 120V circuits for lights and gear, outlets where the equipment lives, and a hardwired Ethernet drop so streams and uploads never stutter |
| Camera setback | Enough depth from the subject to the lens for a flattering frame, plus room for lights on stands and a backdrop or set corner behind the talent |
Acoustics are the thing most home studios get wrong, because a bare, hard room makes even an expensive mic sound boomy and distant. Treat the room the way the audio actually moves: broadband absorption panels on the walls at seated ear height to kill the first reflections off the surfaces nearest the talkers, a ceiling cloud over the desk to tame the ceiling bounce, bass traps in the corners where low frequencies pile up, and a rug to soften the floor. The goal is a room that sounds dry and controlled — present but not dead — so voices land clean without the boxy echo of an untreated shed. Plan the wall and ceiling surfaces with treatment in mind from the framing, because it is far easier to mount panels on a finished, insulated wall than to fight a hollow, reflective one later. Insulation also does double duty: it deadens outside noise and helps isolate the room so a passing truck or a neighbor's mower does not end up on the recording.
Lighting, power, and climate finish the job. For video lighting, plan a key, a fill, and a backlight that you can repeat exactly — daylight-balanced, dimmable LED panels on stands or mounts, with blackout shades on any windows so the look does not shift with the sun. Wire the room generously: dedicated 120V circuits for the lights and the computer so a full lighting kit and an edit machine do not trip a breaker, outlets placed where the gear actually sits, and a clean power strip with surge protection at the desk. Run the network properly — a hardwired Ethernet drop from the house, or a strong dedicated access point — because a live stream or a large upload that stalls on weak wireless wastes a whole session. Then keep it quiet and comfortable: a mini-split is the favorite because it heats in a North Idaho winter, cools in summer when lights and bodies warm the room, and runs far quieter than a forced-air furnace or a window unit, neither of which you want roaring through a take. A sealed, insulated envelope keeps that climate steady, keeps condensation off the electronics, and keeps the room silent enough to record any hour of the day.
A recording studio earns a solid, level, well-drained base, because a quiet building starts with a tight, stable floor that does not creak, shift, or telegraph outside vibration. A compacted gravel pad drains snowmelt and rain well under a properly built, insulated framed floor, while a concrete slab gives the most solid, permanent feel underfoot and the best base for a fully isolated room — a good choice for a dedicated, finished studio that will not move. Either way, plan the approach so finished wall materials, acoustic panels, lights, a desk, and sensitive electronics can come straight off the truck and through the door without a muddy fight. Read how to prep a shed site before delivery day so the pad, the drainage, and the access are squared away, and place the building where you control its sound environment — away from the road, the AC condenser, and the loudest part of the yard if you can.
North Idaho weather drives several choices for a studio. A roof and anchoring rated for local snow load keeps the building sound through a heavy winter, and good insulation keeps the room workable and quiet through a long freeze while it doubles as sound isolation. Site the studio on well-drained ground so spring melt runs away from the building rather than toward sensitive gear, and keep a clear, plowed path so you can get to a session after a storm — and so the on-air light is the only thing stopping you, not a snowdrift. Because a finished, conditioned studio with added electrical can trip local rules, plan ahead: many small sheds skip a permit, but a finished, wired building, the electrical work itself, and setback or HOA requirements often do not. Confirm what your town and county require on the service areas pages, and factor any electrical or finished-structure permit into the plan before you finalize the size, the wiring, and where the studio will sit.
Treat the room the way the sound actually moves, not by covering every surface. Mount broadband absorption panels on the walls at seated ear height to catch the first reflections off the surfaces nearest each talker, hang a ceiling cloud over the recording desk, and put bass traps in the corners where low frequencies pile up. Add a rug or carpet to soften the floor. The goal is a dry, controlled room that sounds present but not dead, so voices land clean instead of boomy and distant. Plan the walls and ceiling with treatment in mind from the framing, because it is far easier to mount panels on a finished, insulated surface than to fight a hollow, reflective shed later, and the insulation itself helps block outside noise.
The trick is choosing climate equipment that runs nearly silently and sealing the room so outside noise stays out. A ductless mini-split is the favorite for a studio because it has no roaring furnace and no rushing ductwork — the indoor head runs quiet, heats through a North Idaho winter, and cools in summer when lights and people warm the room. Pair it with a tightly sealed, well-insulated envelope so a passing truck, a mower, or wind does not bleed into a take, and so the climate stays steady without cycling loudly. Avoid a window AC unit, which hums and rattles right where you record. A quiet mini-split plus good isolation lets you record any hour without a fan or furnace showing up on the audio.
Plan a repeatable three-point setup so your video looks the same every session regardless of the time of day. Use a key light as your main source, a fill light to soften the shadows, and a backlight or hair light to separate the subject from the backdrop — daylight-balanced, dimmable LED panels on stands or mounts so you can match them shot to shot. Put blackout shades on any windows so daylight does not shift your look mid-recording, and keep the lights aimed at the subject without spilling onto the treated walls or blowing out the backdrop. Wire dedicated circuits and place outlets where the lights live, and leave enough room depth for the lights on stands plus a proper camera setback from the talent.
More than a storage shed, because lights, cameras, a computer, monitors, and chargers add up fast. Plan dedicated 120V circuits run from the house — ideally separate breakers for the lighting kit and the edit computer so a full setup does not trip a breaker — with outlets placed where the gear actually sits and a cable-managed power strip with surge protection at the desk. For internet, run a hardwired Ethernet drop from the house rather than relying on wireless that fades across the yard, because a live stream or a large video upload that stalls can waste a whole session. If a wired run is hard, plan a strong dedicated access point. Reliable power and a wired network are what let you stream and upload without stutters.
Zone the room so recording and shooting do not fight each other. Put the recording desk and microphones at one end with treatment around it, and reserve a clean set zone at the other — a muslin or paper backdrop on a stand, a styled bookshelf, or a painted accent wall that gives your video a consistent look. Leave real depth between the talent and the camera so the lens gives a flattering frame, and leave room behind and beside the subject for the key, fill, and backlight on stands. Keep cameras, lenses, props, and a backdrop stand on shelving or in a cabinet along one wall so the room reads clean on camera. A two-zone layout lets you record an interview at the desk and shoot B-roll against the set without rearranging the room.
It comes down to how many people are on mic and whether you shoot video. A solo or two-person audio booth fits comfortably in a 10x12, with room for a desk, mics on arms, wall treatment, and a single talking-head camera. Add a guest on camera and a bit of lighting, and a 10x14 gives you the camera setback and stand space a good video frame wants. For an interview format with a guest plus a separate backdrop or set corner, a 10x16 lets you record at the desk and shoot against a clean wall without rearranging. A full video-first studio with three people on camera, a standing set, a lighting grid, and an edit corner wants a 12x16 so you can light a scene properly and still walk around it. Size to the most people and the most camera you will ever run at once.
Coeur d'Alene's remote-work population has grown enough that a dedicated creator space in the backyard is a practical investment, not a luxury. A podcast studio shed built on your property separates the recording environment from a house full of HVAC noise, foot traffic, and thin walls. NIOS frames each building on site, which means the wall assembly — including any additional mass or decoupling in the framing — is designed for the actual building, not adapted from a factory template.
Acoustic performance starts at the shell. Exterior mass and air-sealed construction reduce broadband noise transmission before a single panel of treatment goes up inside. A North Idaho winter complicates this because you need insulation for warmth and mass for sound, and those two goals can work together in the same stud bay if the wall is designed around both from the start.
HVAC choice matters for recording spaces. A mini-split with a variable-speed compressor runs quieter than a forced-air system and eliminates duct rumble — a real issue in a small room where background noise is audible at -60 dBFS. Post Falls and Hayden properties with a little more setback room can orient the shed to put the outdoor unit away from the recording wall.
When you're clear on what you need, design the studio in the shed builder to price sizes and options, or get a free estimate. The podcast and creator studio service page covers finish options and build details in more depth.
Tell us how you record — solo at a mic, two across a table, or a full video set with a backdrop — and we will help spec the acoustic treatment, quiet climate, lighting, power, and networking around your property, then you can build and price it online.
Keep planning your build with related North Idaho shed guides.