A cold plunge shed is the building that lets you take a serious cold-water habit outside the house and do it right. Plenty of people start with a stock tank or a chest freezer on the back patio, and it works for a while, until the water freezes solid in January, the chiller cycles in the rain, and there's nowhere dry to stand and dry off afterward. A purpose-built cold plunge shed solves all of that by giving the tub, the chiller, and you a weather-tight room with a real floor drain, waterproof surfaces, and a corner to change, so the whole routine stays year-round instead of shutting down the first hard freeze. For anyone doing contrast therapy, post-workout recovery, or a daily plunge, it's the difference between a setup you fight with and one you actually use every morning.
What separates a cold plunge shed that stays dry and fresh from one that rots out by its second winter is a short list of decisions you make before the first wall goes up. This is a wet room, splashed every single day with water that's deliberately near freezing, so drainage, waterproofing, and ventilation are not finishing touches, they are the entire job. Get the floor slope, the drain, the wall surfaces, and the airflow right and you have a tidy little plunge room that sheds water and dries between sessions; skip any of them and you get standing water, swollen framing, and mold within a season. None of it is complicated, but it has to be planned from the start, because you can't add a floor drain or re-route a vent after the slab is poured. This guide walks through the styles that suit a plunge building, the small footprints that fit a tub plus a chiller plus a changing spot, how to lay out and waterproof the inside, and how we build the shell on your property so it drains, breathes, and lasts. If you'd rather see options priced first, you can build and price a layout in a few minutes and come back to the details.
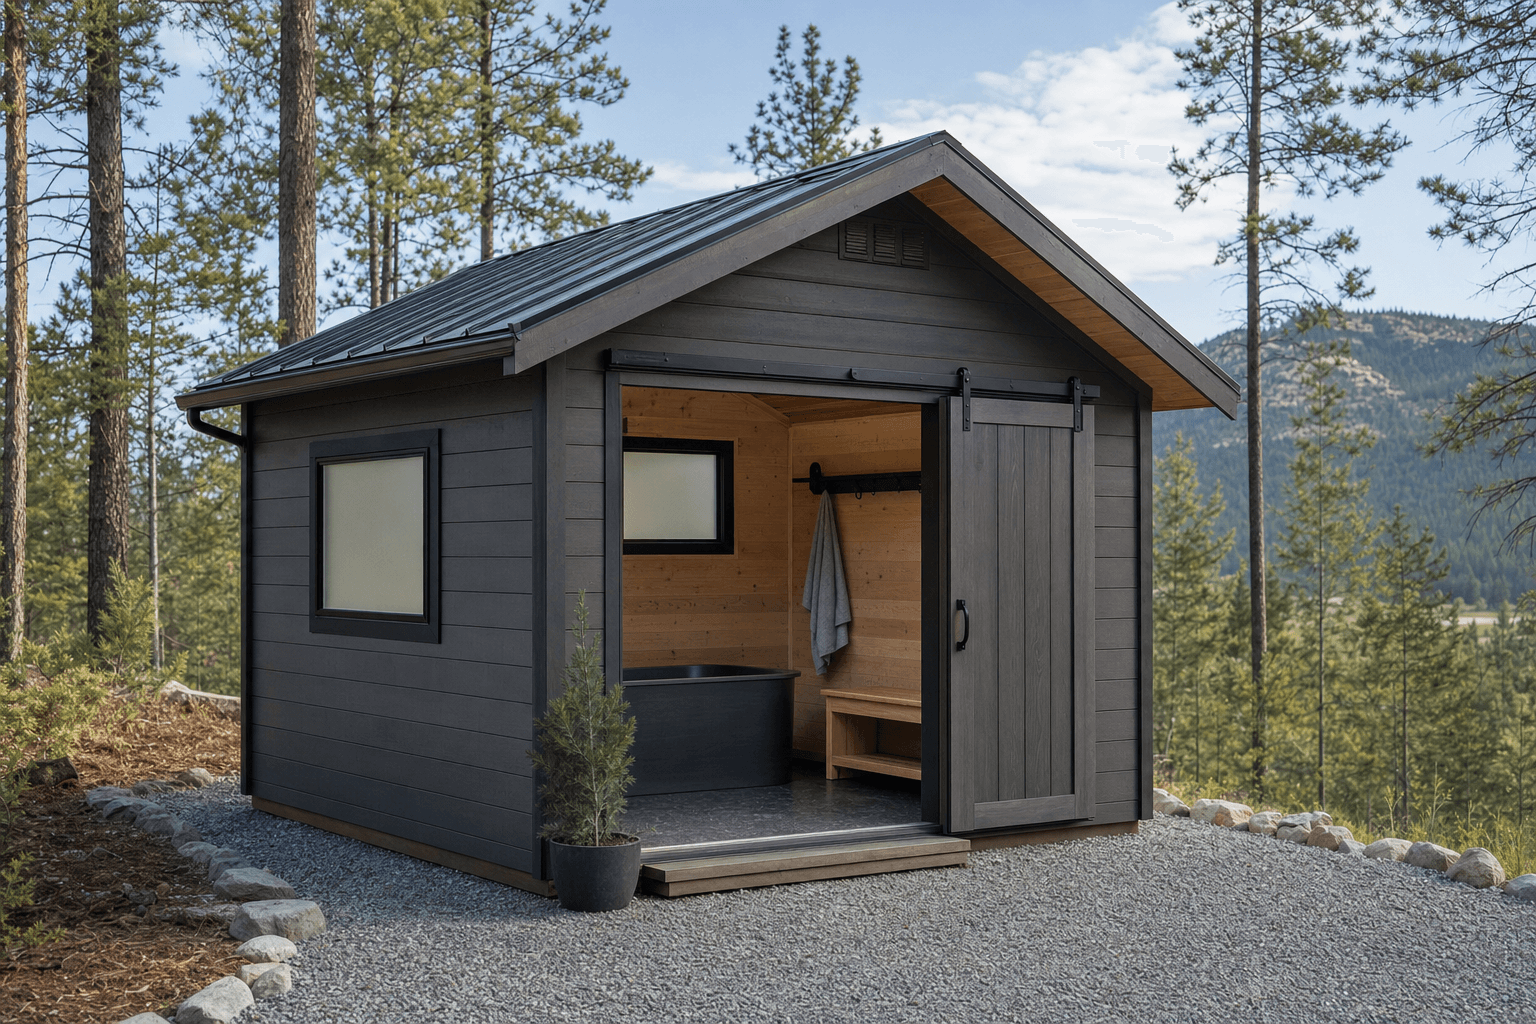
A plunge room built for a daily wet routine: a tub, a chiller, a floor drain, and a dry corner to change, all weather-tight for winter.
Most cold plunge sheds work best as a standard gable, because the straight walls and simple peaked roof give you flat surfaces to mount a waterproof wall panel, a towel rail, and a hose bib, and the roof clears any rising steam or humidity up and out. You don't need much height for a plunge tub, so a compact gable on a small footprint is usually the right call, snug enough to heat-manage in winter yet tall enough to stand and dry off. If you want the building to feel a little more like a recovery studio, a lean-to or single-slope modern roof pairs well with a wide door and a window, and the sloped roof sheds Panhandle snow cleanly toward the back. A small porch overhang at the door is worth considering too, since it gives you a covered spot to step out onto and keeps driving rain off the threshold where you walk in barefoot.
Because the real point of a cold plunge is contrast therapy, the building you'll most often want next to it is a sauna shed, so many people plan the plunge room with a hot-cold pairing in mind from day one, whether that's a shared wall, a covered breezeway between two small buildings, or a single longer building split into a hot side and a cold side. The hot-and-cold cycle is the whole tradition, and planning for it early means you size the pad, the power, and the doors so moving from heat to cold takes three steps and not a walk across the yard. Whatever roofline you choose, plan the building around water hitting the floor every day, with a door wide enough to step through dripping, a threshold that keeps water in, and an interior built to get splashed and wiped down rather than babied.
A single plunge tub or stock tank, the chiller beside it, and just enough room to step in, step out, and towel off. A 6x8 covers a tight, single-person plunge setup.
Once you want a dry bench, hooks, and space to dress without dripping on your clothes, step up to an 8x8 or 8x10 so the wet zone and the dry zone stop overlapping.
If you want the tub, the chiller, a changing area, and room for a small sauna, a yoga mat, or a bench for breath work, an 8x12 gives every zone room to work at once.
Footprint is the decision everything else rides on, so size for the tub plus the chiller plus a dry place to stand, not just the tub you picture first. A 6x8 shed is a solid starting point for a focused, single-person plunge: a tub along one wall, the chiller tucked beside or behind it, and just enough floor to step in and out and dry off, which is plenty if you'll change in the house and only want a weather-tight home for the plunge itself. Move up to an 8x8 shed and the extra width buys you a genuine dry corner with a bench and hooks, so you can undress, plunge, and dress again without your clothes ever touching the wet zone, which is the size most daily users land on once they realize changing in place beats trekking back to the house wet. An 8x10 shed adds enough length for a wider tub, a small storage cabinet for towels and recovery gear, and a comfortable buffer of dry floor between the splash zone and the door. The 8x12 shed is the size to choose when the plunge is half of a contrast-therapy setup, leaving room for the tub and chiller on the wet end, a changing and recovery area on the dry end, and even a compact sauna or an infrared panel so the hot side and the cold side share one roof. As a rule, size for the wet end plus the dry end, because a plunge shed that's all tub and no dry floor leaves you dressing in the cold.
These wet-recovery buildings overlap, and the right one depends on what happens in there most. A cold plunge shed is purpose-built around near-freezing water: a tub, a chiller, aggressive drainage, and waterproof surfaces sized tight so the cold water stays contained and the room dries fast. If heat is the priority, a sauna shed is built the opposite way, around retaining warmth and venting steam, with cedar or hemlock lining, a heater, and benches, and many people pair the two so they can run a true hot-cold cycle. If your backyard centers on a hot tub instead, a dedicated hot tub changing shed sits beside the spa and focuses on quick changes, towel and robe storage, and a rinse, rather than housing the water itself. And if recovery is part of a broader fitness routine, the plunge often lives alongside or inside a gym shed, where the cold tub becomes the post-workout finish to a space built for training. Many buyers choose a true cold plunge shed because it does the cold side properly, the drainage and waterproofing a chiller-fed tub demands, while leaving the door open to add a sauna or tie into a gym later. If you're torn, build for the cold plunge first, since it has the strictest drainage and moisture needs, and let the hot side flex around it.
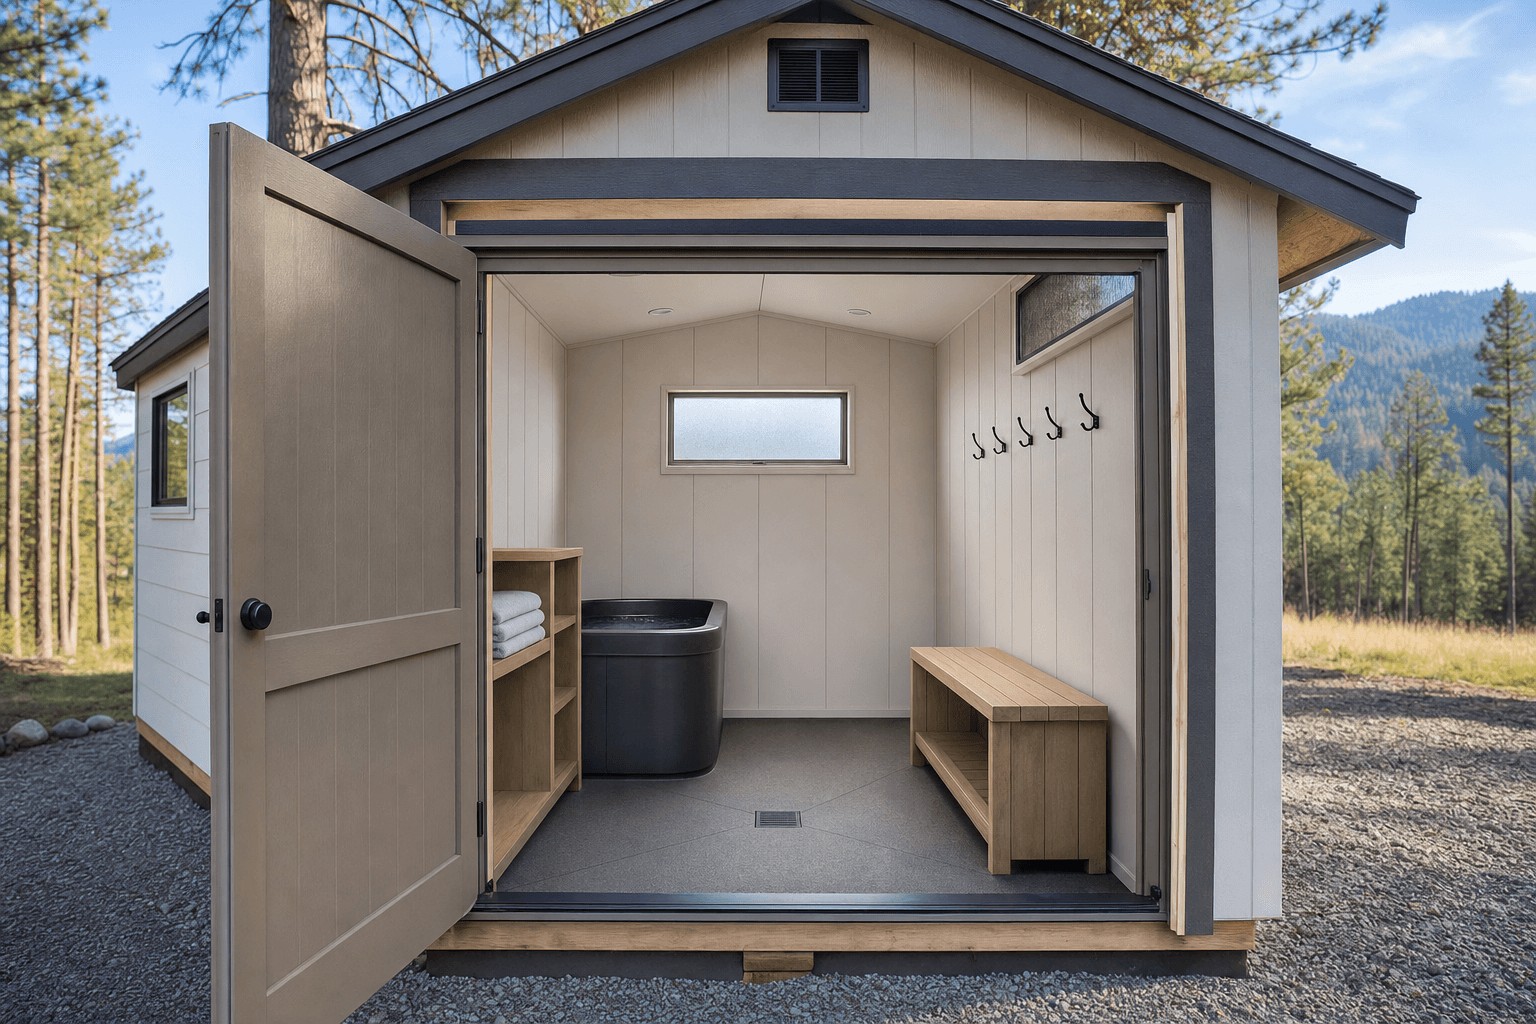
Zoned for a wet routine: the tub and chiller sit over a sloped, drained floor, with the bench and hooks kept on dry ground.
A cold plunge shed works far better when you plan it as a wet end and a dry end instead of one open box, because the whole goal is to keep splashed water moving toward a drain and away from where you stand and change. Start with the plunge zone, the heart of the building: the tub or stock tank set over a floor that slopes to a drain, with a fully waterproof surround on the walls and floor around it, so every splash and every drip runs to one low point instead of pooling under the framing. Put this near the door or on the end where the supply and drain lines come in. Next is the mechanical zone for the chiller and filtration: the chiller needs to sit on solid, level, dry footing with breathing room around it for airflow, ideally a step away from the splash so it isn't getting soaked, with the pump, the filter, and the hoses run cleanly to the tub. Then build the changing and dry zone at the far end on ground that stays dry, with a bench to sit on, hooks for robes and towels, a mat that drains, and a small cabinet for dry clothes and recovery gear, so you're never dressing on a wet floor. If you're pairing hot and cold, reserve the sauna or recovery zone for a partitioned or insulated section, kept separate so the cold side's humidity and the hot side's heat don't fight each other. Sketching these zones on paper before you settle on a footprint is the fastest way to tell whether a 6x8 will do or whether you'll want the length of an 8x12 so the wet, mechanical, and dry areas never compete for the same square foot.
This is the heart of a plunge shed. A floor that slopes to a center or trench drain, a sealed or tiled water-shedding surface, a waterproof membrane under it, and a curb or recessed threshold so daily splashing and the occasional tub drain-down all run to one low point instead of soaking the framing.
The cold side runs on equipment: a water chiller sized to hold your target temperature, a circulation pump and filter, and supply and drain plumbing for filling and emptying the tub. Mount the chiller on dry, level footing with airflow around it, and run the lines and any connections through a licensed electrician and plumber so the wet and powered work is contained and serviceable.
Even cold water raises humidity, so plan an exhaust fan and operable vents or a window on opposite walls for cross-flow that pulls damp air out between sessions. Moving air is the single best defense against the mildew and musty smell that plague closed-up wet buildings, especially one paired with a steamy sauna.
Keep the human side dry: a bench, robe and towel hooks, a draining mat, a small cabinet for dry clothes, and a closet or shelf for recovery gear, all set on the dry end of the floor away from the splash so you change on dry ground and your towels stay where you can reach them.
The keyword for a cold plunge shed is wet room, and the fit-out is everything that keeps the cold water contained, drained, and out of the framing. For the plunge itself: a plunge tub, stock tank, or chest-style cold tub, a fitted lid or cover to hold temperature and keep debris out, a thermometer, and a non-slip mat or duckboard to stand on. For the cold side: a water chiller, a circulation pump and filter, an ozone or sanitation unit if you run the water for weeks, and the supply and drain hoses to fill and empty it. For the floor: a floor or trench drain, a sloped and sealed or tiled surface, a waterproof membrane, and a curb or recessed threshold so water can't escape the wet zone. For drying off and changing: a bench, robe and towel hooks, a draining mat, and a cabinet for dry clothes. For ventilation and comfort: an exhaust fan, operable vents, and a small heater or insulated shell so the room and the pipes don't freeze in a Panhandle winter. If you're pairing hot and cold, add the sauna heater, cedar benches, and a partition. Walk through your own version of this list before you settle on a size, because a plunge room fills up fast once you add the chiller, the pump, a dry changing corner, and somewhere to keep towels, which is exactly why people who change in place are rarely sorry they sized up from a 6x8 to an 8x10 or an 8x12.
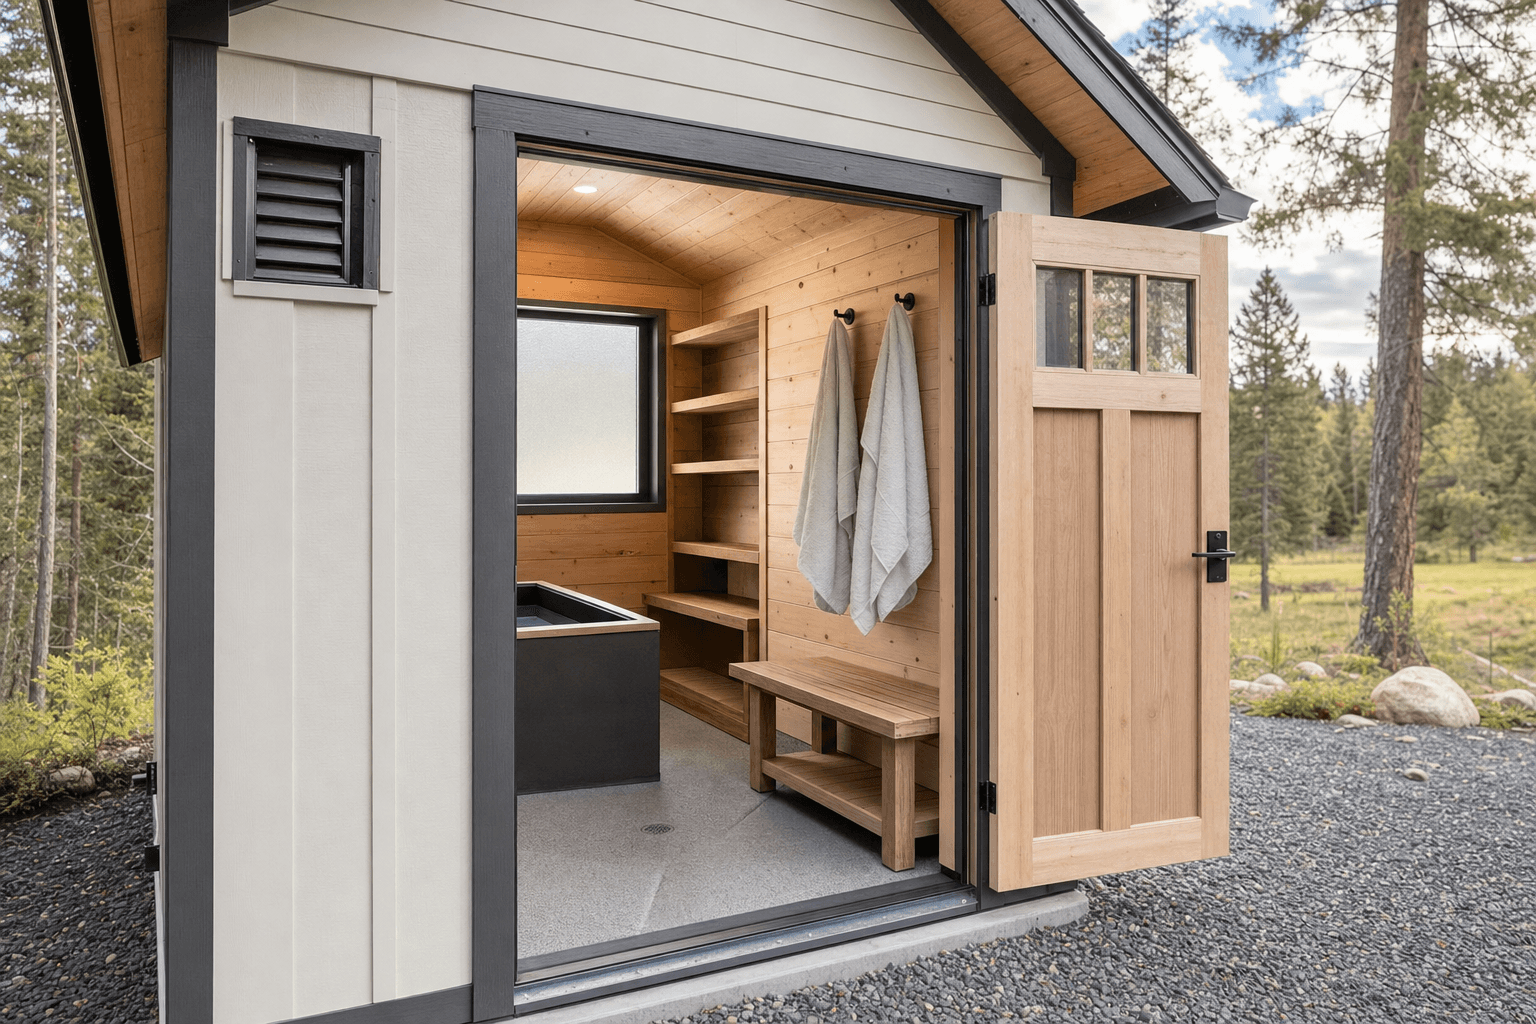
The details that keep a plunge room dry: a sloped floor running to a drain, a non-slip mat, and hooks that keep towels off the wet zone.
| Cold plunge shed planning checklist | |
|---|---|
| Best roofline | Compact standard gable for headroom and venting; single-slope modern for a recovery-studio look that sheds snow off the back |
| Practical sizes | 6x8 for a single tub, 8x8 to 8x10 to add a dry changing corner, 8x12 to pair the plunge with a small sauna or recovery space |
| Floor and drainage | A floor sloped to a center or trench drain, a waterproof membrane, a sealed or tiled water-shedding surface, and a curb or recessed threshold |
| Chiller and plumbing | A water chiller on dry, level footing with airflow, a pump and filter, and fill and drain lines run by a licensed electrician and plumber |
| Ventilation | An exhaust fan plus operable vents or a window on opposite walls for cross-flow, sized up if a sauna shares the building |
| Winter readiness | An insulated shell and a small heater so the room, the tub, and the water lines never freeze through a North Idaho winter |
Three things decide whether a cold plunge shed stays dry and usable or turns into a damp, frozen problem. Power is non-negotiable here, because the chiller runs continuously and draws real current, so plan a dedicated circuit run from your home's panel by a licensed electrician, usually in buried conduit out to the building, and a small subpanel inside makes it easy to add a circuit for a sauna heater or a wall heater later without trenching again. Size the circuit for the chiller's load, put the outlets where the equipment actually sits, and use weather-resistant, outdoor-rated covers and GFCI protection on anything near the water, since this is a wet room with powered equipment and that combination has to be done safely. Ventilation protects the building, so plan it deliberately: an exhaust fan to pull humid air out, operable vents or a window on opposite walls for a cross-breeze that dries the room between plunges, and even more airflow if a steamy sauna shares the structure. Moving air is what keeps the mildew and musty smell out of a building that gets wet every day. Staying dry and unfrozen ties it together: a floor that drains, surfaces that shed water, ventilation that carries humidity out, and an insulated shell with a small heater so neither the room, the tub, nor the supply lines freeze on a hard Panhandle night. Many plunge sheds run year-round precisely because the shell is built tight and warm enough to keep the water side from icing up. We frame and build the shell tight, vented, insulated, and ready on your property so your electrician and plumber can finish their work.
A wet building stays straight, drained, and easy to clean only on a solid, level base, so most cold plunge sheds sit on a concrete slab, which many people prefer here because a slab can be poured with the slope and the floor drain built in and a sealed surface that handles daily splashing and a full tub drain-down cleanly. A compacted gravel pad sized about a foot wider than the building on each side helps water drain away under that slab. North Idaho weather drives the rest of the plan. Design the roof for local snow load so it shrugs off a heavy Panhandle winter, keep the floor up off the ground so spring melt and rain drain away instead of wicking into a building already managing daily water, insulate the shell and plan a heater so the tub and the water lines never freeze solid, and place the building where the gravel driveway or a clear path lets our crew bring materials in to build, ideally a few steps from the house or the sauna for an easy hot-cold cycle. We build with weather-rated framing and finishes suited to pine-country freeze-thaw cycles, and we set the structure to drain and breathe so it lasts and stays dry inside year-round. On permits, the deciding factor is usually how the building is used and how it's serviced, not just how big it is. A small detached shed under your jurisdiction's size threshold often needs no permit, but once a plunge shed is wired for a chiller and plumbed for fill and drain, your county or city may require a building permit, electrical and plumbing permits and inspections, and adherence to setbacks. Requirements vary across Kootenai County and the cities around Coeur d'Alene, so confirm with your local building department before you finalize the size, the power, the plumbing, and where it sits. Once you know what your jurisdiction requires, we plan the build around it so the structure, the rough-in, and the placement all line up.
Drainage and waterproofing are the whole job in a plunge shed, because the floor gets splashed every day and the tub gets drained down periodically. Plan a floor that slopes to a center or trench drain so every drip and splash runs to one low point instead of pooling, and put a waterproof membrane under a sealed or tiled surface so water never reaches the framing. A poured concrete slab is the cleanest way to get this, since the slope and the drain can be built right into the pour. Add a curb or a recessed threshold at the door so water stays in the wet zone, and keep a non-slip mat over the splash area for footing. The goal is a room where every gallon that leaves the tub or hits the floor has somewhere to go and nothing stays wet long enough to rot. We build the shell and set it up so your drained, waterproof floor and the framing above it are protected from the daily water.
A water chiller runs more or less continuously to hold a plunge near freezing, so it draws real, steady current and needs its own properly sized circuit rather than an extension cord or a shared outlet. Plan a dedicated circuit run from your home's panel by a licensed electrician, usually in buried conduit out to the building, sized for the chiller's load, with GFCI protection and weather-rated covers because it's a wet room with powered equipment. Place the chiller itself on dry, level footing with breathing room around it for airflow and heat rejection, a step back from the splash zone so it isn't getting soaked, with the pump, filter, and hoses run cleanly to the tub. A small subpanel inside makes it easy to add a sauna heater or a wall heater circuit later. We frame the building with the equipment location and the power run planned from the start so your electrician's work goes in cleanly.
Because a plunge shed is a wet room used daily, the surfaces have to be chosen for moisture rather than treated like a dry shed. Use moisture-resistant wall panels rather than untreated drywall, a sealed concrete or tiled floor that sheds water toward the drain, and semi-gloss or marine-grade paint that wipes clean and resists mildew instead of a flat finish that holds damp. Choose rust-resistant or stainless hooks, hinges, and hardware so nothing corrodes, and put a waterproof membrane behind and beneath the wet surfaces. Pair those materials with real ventilation so humidity is carried out rather than trapped, since mold needs both moisture and still air, and removing either one keeps it away. We build the shell tight and use a finish package suited to a wet building so the interior stands up to daily splashing instead of staining, swelling, or growing mold.
Even cold water raises the humidity in a small closed room, and if a sauna shares the building the moisture load is higher still, so ventilation is essential. Plan an exhaust fan to pull damp air out, and add operable vents or a window on opposite walls so you get cross-flow that dries the room out between plunges. If you're pairing hot and cold, give the sauna side its own venting and keep the two zones separated so steam and cold humidity don't fight each other. The combination of moisture-resistant surfaces that shed water and good airflow that carries humidity out is what keeps the building fresh instead of musty. Because the room is also sealed and insulated to fight the cold, that same tightness traps moisture without deliberate airflow, so the venting has to be planned in rather than left to a cracked door. We build the shell with ventilation planned from the start so you're not battling trapped moisture in a closed-up wet room.
Yes, and the hot-cold cycle is the reason many people build a plunge shed in the first place. You have a few good options: a single longer building split into a hot side and a cold side with a partition between them, two small buildings set close with a covered breezeway so you cross from heat to cold in a few steps, or a plunge shed sited right next to an existing sauna. The keys are to keep the two climates separated so the sauna's heat and the plunge's humidity don't undermine each other, to vent each side properly, and to size the power and the pad for both the chiller and the sauna heater from the start. An 8x12 has the room to combine a plunge tub and chiller on the wet end with a compact sauna or infrared panel and a changing spot on the other. We can plan the structure around a hot-cold pairing so the layout, the power, and the doors make the cycle quick and easy.
It depends on how much of the routine you want under one roof. If you only need a weather-tight home for the tub and the chiller and you'll change in the house, a 6x8 covers a focused single-person plunge with just enough floor to step in and out and dry off. Once you want a dry changing corner with a bench and hooks so you can undress, plunge, and dress again without standing on a wet floor, step up to an 8x8 or an 8x10, which also gives room for a wider tub and a towel cabinet. If the plunge is half of a contrast-therapy setup and you want a small sauna or recovery space too, plan on an 8x12 so the wet end, the dry end, and the hot side each get real room. The honest advice is to size for the tub plus the chiller plus a dry place to stand and change, because a plunge shed that's all tub and no dry floor leaves you dressing in the cold, and most people are glad they sized up once it becomes part of a daily habit.
A backyard cold plunge shed in Coeur d'Alene or Post Falls is one of the few cases where North Idaho's climate actually works in your favor: a chiller unit runs less hard in a region where shoulder-season temperatures do some of the cooling on their own. Getting the building right is still a real construction task — a plunge tub holds hundreds of gallons of water, the floor needs a working drain, and every surface that gets wet needs to be specified for a wet room, not a dry shed.
Water management is the first design constraint. Floor drains require either a connection to an existing sewer or septic lateral or a French drain to daylight — a site-specific decision that varies by lot. NIOS builds on your property, so the right answer for a Post Falls suburban lot with a municipal sewer tie is different from a Rathdrum rural lot with a septic field. Getting that sorted before the slab or floor system is poured avoids expensive rework.
A dry changing area adjacent to the plunge room is worth planning for at the start, even if a minimal version. Wet feet and a cold floor are the points where a plunge practice loses appeal. A small change bench and a door threshold that keeps water in the wet zone cost very little to frame and finish during construction.
When the layout is worked out, design the cold plunge shed in the builder or get a free estimate. See the cold plunge shed service page for waterproofing and drain options we build in regularly.
Tell us how you plunge and we'll help you size, lay out, and price a wet-room building with the drainage, waterproofing, ventilation, and power your North Idaho recovery routine needs year-round.
Keep planning your build with related North Idaho shed guides.