A backyard music studio gives you the one thing a spare bedroom or a corner of the basement never can: a room you can be loud in, on your own schedule, without the amp bleeding into the rest of the house or a late-night take waking the kids. You cross the yard, close a heavy door, and you're in a space built around sound instead of fighting against it. That separation is the whole point, and it's why a purpose-built music studio beats trying to treat a room inside the house. Indoors, every wall is shared and every floor transmits, so the drums carry through the joists and the neighbors hear the bass through a window. A detached, properly built studio puts distance, mass, and a sealed envelope between your music and everyone else.
The difference between a real recording or rehearsal room and a shed you regret comes down to four things you have to plan from the very start: soundproofing and isolation so sound doesn't leak in or out, acoustic treatment so what you record and hear inside is accurate, dedicated power sized for amps and gear, and a quiet climate plan that holds temperature without humming into every quiet passage. Get those right and you have a room you can track vocals in at midnight, rehearse a full band in on a Saturday, or mix in with confidence that the low end you hear is real. Get them wrong and you have an echo chamber that's freezing in January, a fan you have to switch off to record, and a noise complaint from across the fence. None of it is exotic. It's mass in the walls, decoupled openings, treatment on the right surfaces, dedicated circuits, and a mini-split chosen for low noise. This guide walks through each decision in order, the sizes that actually fit a control room and a live space, and how we build the shell tight and dead on your property so it's ready for your gear. If you'd rather see options priced out first, you can build and price a layout in a few minutes and come back to the details.
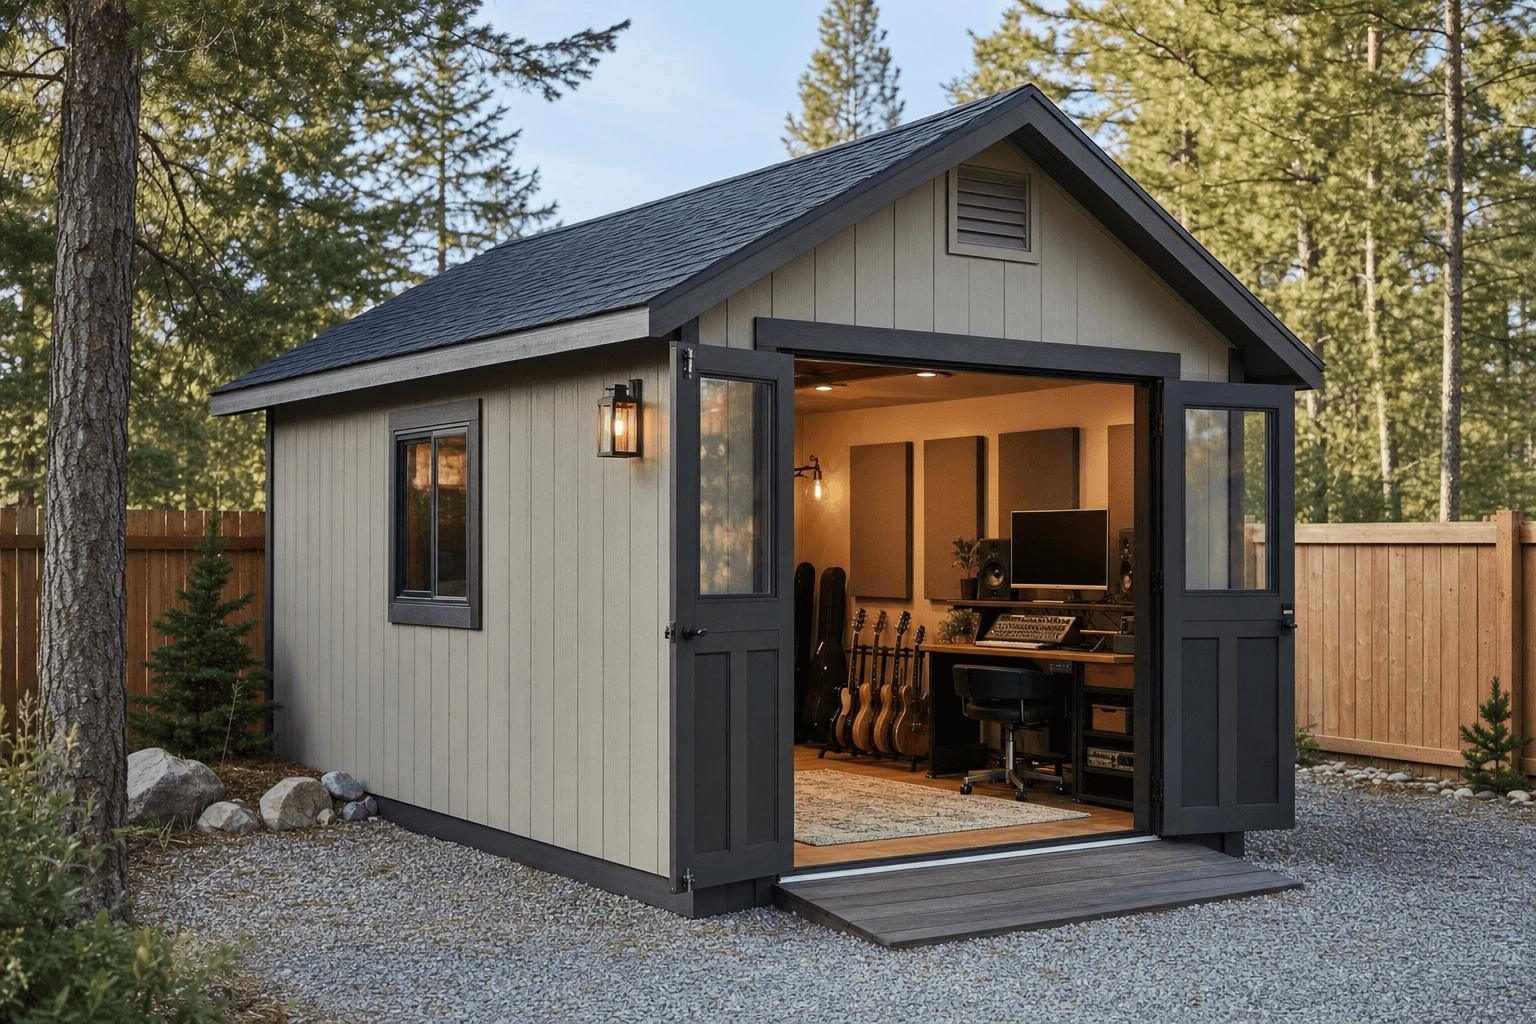
A backyard music studio built for sound: a sealed, insulated shell wired for gear and treated for accurate listening.
Most music studios are happiest in a standard gable. The straight walls and simple roofline give you flat, parallel surfaces you can treat predictably, room to mount a heavy door without fighting a slope, and the easiest shell to add mass and seal tight. Just as important, a gable gives you a clean rectangle to lay out as a control room and a live space, or as one well-treated rehearsal room, without an awkward ceiling angle complicating your acoustics.
If you want more volume of air, which genuinely helps low-frequency behavior and lets a drum kit breathe, a lofted barn (gambrel) roof adds height and a small loft you can use for storage, a tape or amp library, or an iso booth platform. A lean-to or modern single-slope roof reads contemporary and gives you a tall wall for a window into a separate booth, though any sloped ceiling needs a little more thought so reflections don't focus where you sit. A model with a covered porch gives you a place to load gear in out of the weather and a spot to step out between takes. A music studio shares most of its DNA with the other quiet, isolated rooms we build, so it's worth seeing how we approach a podcast and creator studio when you're weighing rooflines, because the sealed envelope, the quiet HVAC, and the acoustic priorities overlap almost completely, just with more sound isolation here for loud sources.
Whatever the roofline, a music studio is a sealed, treated, conditioned room, not a tool shed. That means a heavy continuous shell, a door and windows built to block sound rather than just weather, and an interior finished for accurate listening and comfortable sessions year-round.
A desk with monitors, an interface, a guitar or two, and room for a single vocal or amp source. A 10x12 covers a focused solo room, though tight on parallel-wall buildup.
Room for a mixing desk on one side and a small isolation booth or live corner on the other. A 12x16 lets the two zones coexist without bleed fighting your monitors.
Drums, amps, and a few players standing comfortably with space to move. Step up to a 12x20 so the kit isn't jammed in a corner and the low end has air to develop.
Footprint is the decision everything else rides on, because room size and shape drive both your acoustics and how loud a source you can record well. A 10x12 shed is the practical floor for a solo studio: 120 square feet holds a mixing desk, near-field monitors, an interface, and a chair, plus a corner to track vocals or a single amp, though at this size the parallel walls need careful treatment so they don't ring. Move up to a 10x16 shed and the extra length lets you separate a listening position from a tracking end of the room, which keeps your monitor field cleaner and gives a guitar cab somewhere to live that isn't right on top of your ears. A 12x16 shed is the sweet spot for most home producers: 192 square feet is enough to build a real control room on one side and a small isolation booth or live corner on the other, so you can monitor while a mic captures a separate space. A 12x20 shed is the size you want for full-band rehearsal or live drum tracking, with room for the kit, amps, and players to stand without elbowing each other, and enough cubic volume that the low frequencies behave instead of piling up in the corners. Whatever you pick, size for the loudest, biggest thing you'll record or rehearse, plus the listening position, not for the average overdub, because a drum kit and a couple of amps claim floor and air faster than people expect.
These quiet, separated rooms overlap, and the right build depends on what you'll put in it and how loud it gets. A music studio is optimized for loud, full-range sources and accurate monitoring: it needs the most sound isolation, the most acoustic treatment, and the most power because amps and gear add up. A podcast and creator studio is built around a quiet spoken voice and a camera, so it leans on a dead, treated room and a sealed envelope but needs far less low-frequency isolation than a kick drum demands. If the room is really about hanging out and listening loud rather than recording, with a big system, a bar, and seating, that's closer to a man cave, where comfort and a screen matter more than a flat frequency response. And if it's a creative production space for visual work, an art studio trades acoustic treatment for north light and wash-up space. Many buyers land on a music studio because it flexes the hardest of the four: built right, it can track, mix, and rehearse, and the same isolation that keeps your drums off the neighbors also keeps their lawnmower off your recordings. If you're torn, decide whether the loudest source is a voice, a band, or a stereo, and build the isolation and treatment around that.
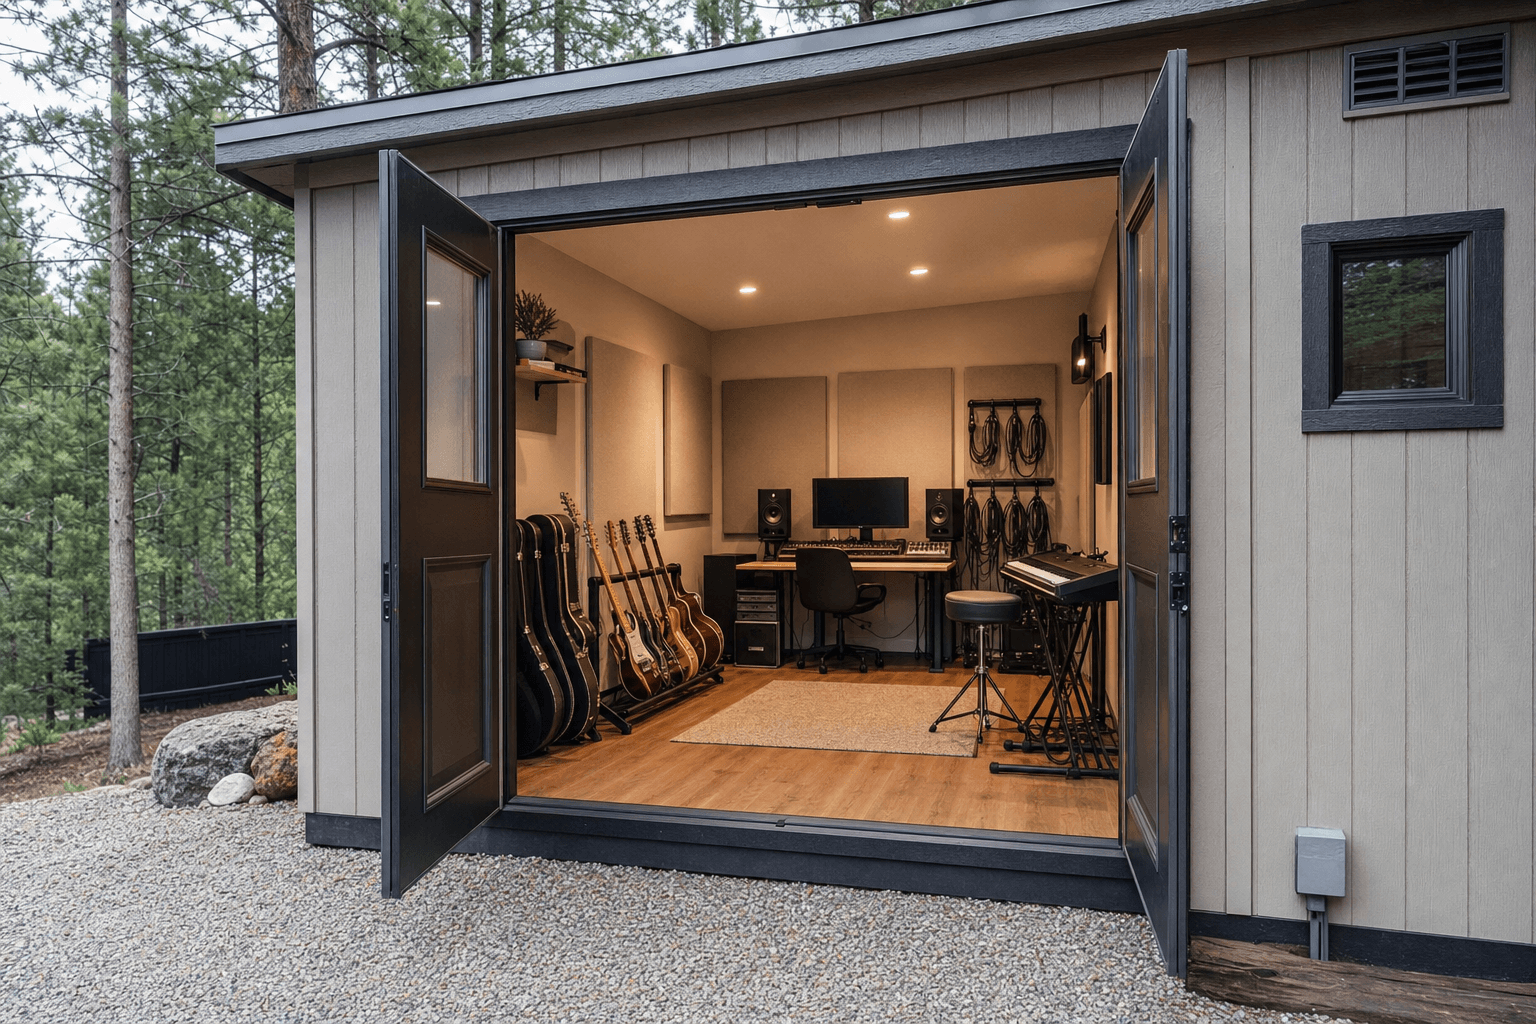
Zoned for sound: a treated listening position, bass traps in the corners, and quiet climate control overhead.
Even a single-room studio works better when you plan it as zones rather than one open box, because where the desk sits and where the loud source lives determines what you hear. The listening zone is the anchor: set the mixing desk and monitors on the short wall, centered left to right, with your head and the speakers forming an equal triangle and the tweeters at ear height, so the stereo image is honest and the wall behind you isn't slapping sound back at you. The tracking zone is where the loud source goes, a vocal spot, an amp, or a drum riser, ideally at the opposite end or in a separate booth so the mic isn't picking up your monitors and the bleed isn't smearing what you mix. Reserve a gear and power wall for the rack, the patchbay, the interface, and the outlet clusters, so cable runs stay short and the warm, fan-cooled equipment sits away from microphones. Put the climate equipment where its head and any airflow won't blow across a mic or sit right above the listening position, because moving air and a vent right over your ears both color what you hear. Leave a small load-in zone at the door with clear floor for cases, stands, and a guitar rack so you're not climbing over gear every session. Sketching these zones on paper before you pick a footprint is the fastest way to tell whether a control room and a booth fit in a smaller building or whether you'll want the extra length of a larger one.
Sound leakage is about mass, air-tightness, and decoupling, so plan a heavy wall and ceiling assembly, a solid-core or dedicated studio door with full perimeter seals and a drop seal at the floor, and as few, and as well-sealed, openings as possible. A second layer of dense drywall and sealed penetrations do more to stop bleed than any foam ever will. We build the shell tight so your isolation starts at the structure.
Treatment makes the inside accurate: thick bass traps straddling the corners to tame low-end buildup, broadband absorption at the first reflection points beside and above the desk, and a little diffusion or scatter on the back wall so the room isn't dead-flat lifeless. Treat the corners first, then the reflection points, then tune by ear.
Plan dedicated circuits run from a small subpanel: one for amps and backline, one for the console, computer, and rack, and a separate run for the mini-split so a compressor cycling on never ticks into a take. Outlets at the desk, along the gear wall, and where amps land, all on the same electrical phase where possible, keep ground hum and buzz down.
A low-noise ductless mini-split heats and cools without the roar of a window unit, and choosing a quiet indoor head and siting it away from mics keeps it out of your recordings. Add a small dehumidifier for damp shoulder seasons to protect instruments and electronics, and weatherstripped, sealed openings so conditioned air and sound both stay where you want them.
The keyword for a music studio is signal chain, and the fit-out is everything from the source to the speakers plus the room that wraps around it. For capture: a vocal or instrument microphone or two and a kick and overhead set for drums, mic stands and a reflection filter, an audio interface or a console, a preamp, and a headphone amp with a few sets of closed-back cans for tracking. For monitoring and mixing: near-field studio monitors on isolation pads or stands, a subwoofer if you mix low end, an acoustically treated listening position, and a comfortable chair at a desk built for a controller and a keyboard. For the gear wall: a rack for outboard, a patchbay, a power conditioner, and a computer with the storage and screens your session demands. For the instruments and backline: guitar and bass amps and cabs, a guitar rack or wall hangers, a drum kit and a riser, a keyboard or synth on a stand, and cases and stands that store flat. For the room itself, the real long-tail of a studio build: corner bass traps, broadband absorption panels, a cloud panel over the desk, diffusers for the rear wall, acoustic door seals, monitor isolation pads, cable trays, and a quiet mini-split. Walk through your own chain like this before you settle on a size, because a drum kit, two amps, a desk, and a booth claim floor and air faster than almost anything else we build. A full setup rarely fits in a 10x12 shed once a live source and a clean listening position both have to live there, which is exactly why most serious tracking rooms land at 12x16 or larger.
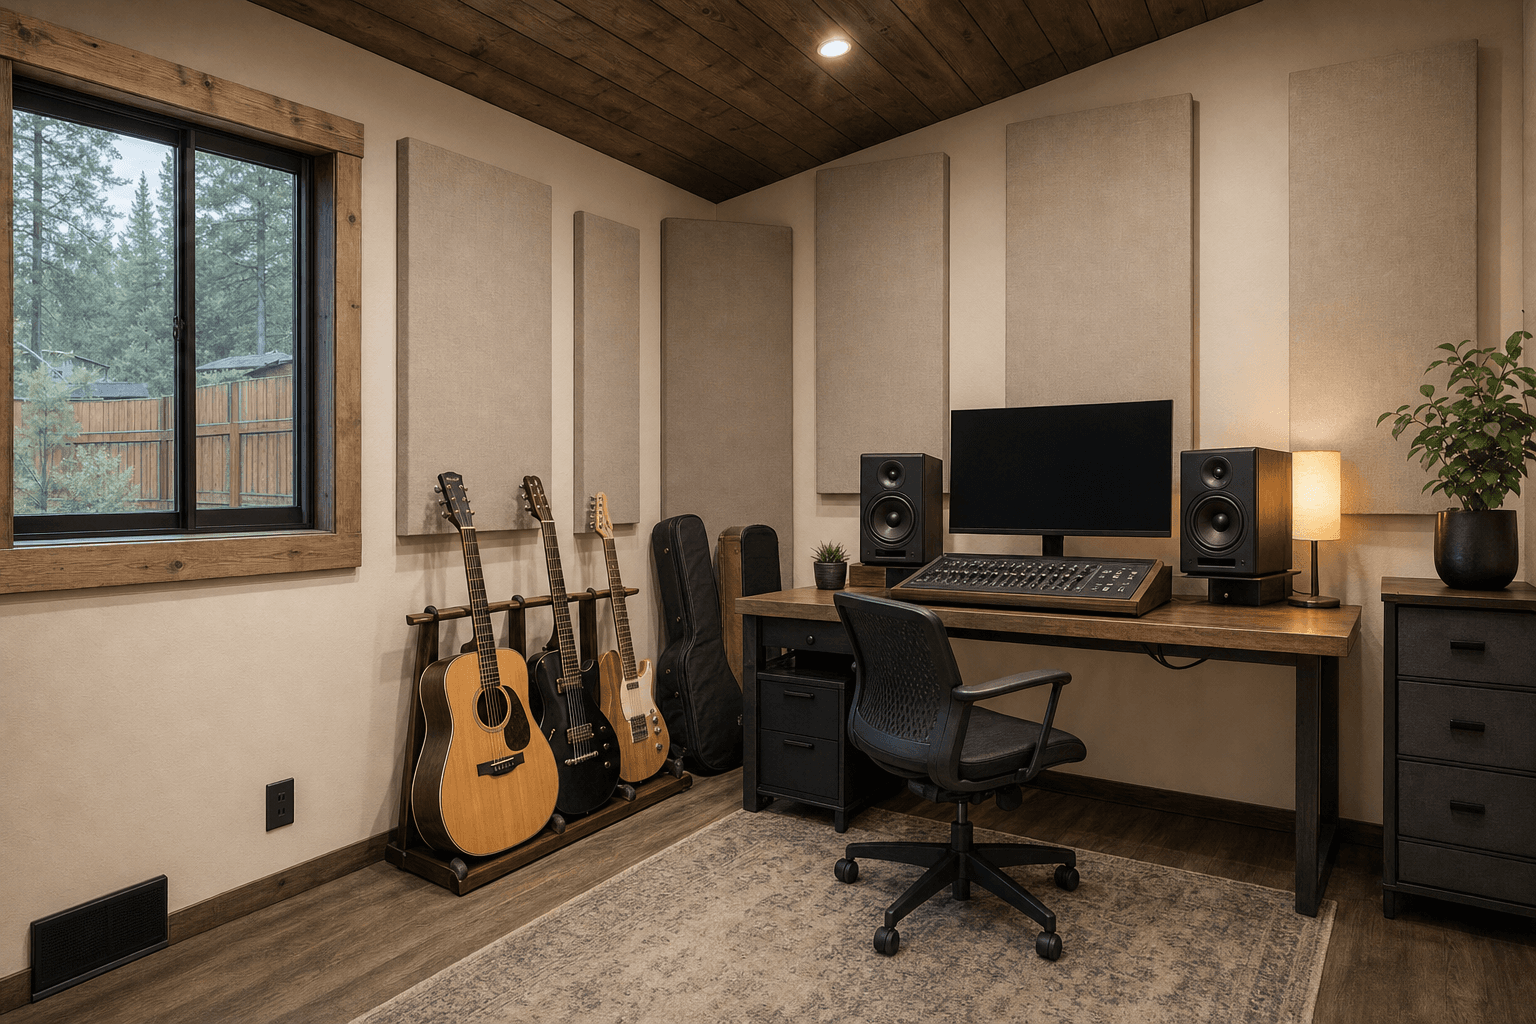
Detail that makes it a real studio: corner bass trapping, treated reflection points, and dedicated power on the gear wall.
| Music studio planning checklist | |
|---|---|
| Best roofline | Standard gable for flat, treatable walls; lofted barn for more air volume and a loft; single-slope for a window booth |
| Practical sizes | 10x12 solo minimum, 10x16 to 12x16 for a control room plus a booth, 12x20 for full-band rehearsal or live drums |
| Soundproofing | Mass in walls and ceiling, decoupled and sealed openings, a heavy studio door with full perimeter and floor seals |
| Acoustics | Corner bass traps, broadband panels at first reflection points, light diffusion on the back wall; avoid bare parallel walls |
| Power | Subpanel with dedicated circuits for backline, console and rack, and a separate run for the mini-split to avoid hum |
| Climate | Low-noise ductless mini-split sited away from mics; dehumidifier to protect instruments and gear in damp seasons |
Three systems decide whether your studio works at full volume in February as well as it does in September. Soundproofing is the headline, and it is not the same thing as acoustic treatment: foam on the walls shapes the sound you hear inside but does almost nothing to stop sound getting out, while isolation is about mass, air-tightness, and decoupling. The practical wins are a heavy, dense wall and ceiling assembly, a dedicated studio door, or even two doors with an air gap, fully gasketed with a drop seal at the threshold, and ruthless sealing of every penetration where an outlet, a cable, or a vent passes through, because sound leaks through gaps the way water does. Detaching the building from the house already buys you distance the neighbors will appreciate. Power comes from dedicated circuits run from your home's panel by a licensed electrician, ideally feeding a small subpanel in the studio so you can add circuits later without re-trenching, with backline, the console and computer, and the mini-split each on their own run so a fridge-like compressor or a big amp never bleeds noise into the signal, and outlets kept on the same phase to keep ground hum down. Winter readiness ties it together: a fully insulated, sealed envelope and a properly sized, quiet mini-split hold a steady temperature through North Idaho cold snaps so the room is just as usable for a January session as a summer one, the same insulation keeps it cool and quiet in July, and a dehumidifier protects wood instruments and electronics through damp stretches. We frame and build the shell tight, dead, and dry on your property so it's ready for your electrician and your gear.
A studio shell stays straight, sealed, and dry only on a solid, level base, so most sit on a compacted gravel pad sized about a foot wider than the building on each side for drainage, or on a concrete slab if you want a perfectly flat, sealed floor and the extra mass underfoot that helps with low-end isolation for a drum room. North Idaho weather drives the rest of the plan: design for local snow load so the roof shrugs off a heavy Panhandle winter, keep the floor up off the ground so spring melt and rain drain away instead of wicking into your gear, and place the building where the gravel driveway or a clear path lets our crew get materials in to build it and lets you load amps and a drum kit without hauling them across the lawn. We build with weather-rated framing and finishes suited to pine-country freeze-thaw cycles, and we set the structure to drain and breathe so the shell, and the instruments inside, last. On permits, the rule of thumb is the use: a plain storage shed under a size threshold often needs no permit, but the moment a building is conditioned and finished with power and climate control, your county or city may treat it differently and require a permit, an electrical inspection, and adherence to setbacks, and a few jurisdictions also have noise considerations worth checking if you intend to rehearse loud at night. Rules vary across Kootenai County and the cities around Coeur d'Alene, so confirm with your local building department before you finalize size and placement. We can plan the build around whatever your jurisdiction requires once you know the answer.
They solve two different problems and you need both. Soundproofing, or isolation, controls how much sound passes through the structure, in or out, and it depends on mass, air-tightness, and decoupling: heavy, dense walls and ceiling, a sealed studio door, and no unsealed gaps. Acoustic treatment controls how the room sounds on the inside, by absorbing and scattering reflections so what you record and hear through your monitors is accurate. The common mistake is sticking foam on the walls and expecting it to stop the drums from reaching the neighbors. Foam is treatment, not isolation, and it does almost nothing for leakage. If you want to be loud without bothering anyone, you isolate with mass and sealing; if you want your mixes to translate, you treat with bass traps and broadband panels. We build the shell with the mass and tight sealing that isolation depends on, and you add the treatment inside to tune the room.
Isolation comes from three things working together: mass, air-tightness, and decoupling. Start with a heavy wall and ceiling assembly, because dense, layered construction blocks far more low-frequency energy, the kick drum and bass, than any single thin wall. Then seal the leaks: a dedicated studio door, or two doors with an air gap, fully gasketed with a drop seal at the floor, and every penetration for outlets, cables, and the HVAC carefully sealed, since sound escapes through gaps like water through a crack. Decoupling, breaking the direct path sound travels through the structure, helps the most for the lowest frequencies. The fact that the studio is a detached building out in the yard already puts helpful distance between your music and the property line, which a shared interior wall never gives you. We build the shell tight and dense so your isolation starts at the structure, and for serious late-night drum levels we can talk through heavier assemblies and a double-door airlock.
Plan it before the walls close up, because retrofitting circuits is expensive. Run power from your home's panel to a small subpanel in the studio so you can add circuits later without re-trenching, then split the load deliberately: one dedicated circuit for amps and backline, one for the console, computer, and outboard rack, and a separate run for the mini-split so a compressor cycling on never ticks into a quiet take. Put outlets at the desk, along the gear wall, and wherever amps land, and keep audio gear on the same electrical phase where possible, since mixing phases is a common source of ground hum and buzz. A power conditioner at the rack cleans things up further. If you want a hardwired internet line for collaboration or backups, pull Ethernet in conduit from the house rather than fighting Wi-Fi across the yard. We build the shell tight and dry so your electrician can run and terminate everything cleanly.
A window air conditioner or a forced-air furnace with vents is usually too loud to record around, which is why most backyard studios use a ductless mini-split heat pump. A mini-split keeps the noisy compressor outside and runs a quiet indoor head that heats and cools efficiently, and choosing a low-noise model and siting the head away from your microphones and listening position keeps it out of your recordings and out of your monitor field. Because the head is so quiet, you can usually leave it running through a session instead of switching it off and watching the room heat up. Add a small dehumidifier for damp shoulder seasons to protect wood instruments and electronics. The combination of a sealed, insulated envelope and a quiet mini-split is what lets the room stay comfortable through a North Idaho winter and a July heat wave without a fan roaring under every take.
Two things matter most: enough cubic volume and avoiding problem proportions. More volume, which a taller ceiling like a lofted barn roof helps provide, gives low frequencies room to develop instead of piling up, so a slightly larger or taller room is almost always easier to make sound good than a tiny one. On shape, avoid a perfect cube and avoid dimensions that are simple multiples of each other, because identical or proportional wall spacings reinforce the same resonant frequencies and create boomy, uneven low end. A rectangle with walls of clearly different lengths spreads those room modes out. Bare parallel walls also cause flutter echo, the metallic ring you hear when you clap, so plan to treat them. In practice, a 12x16 or 12x20 room is far more forgiving than a 10x12, and treating the corners with bass traps and the first reflection points with absorption does the rest. We build a clean rectangle you can treat predictably, and you tune it by ear from there.
The layout follows the primary job, and a flexible room can serve all three with the right zones. For mixing, the listening position is everything: center the desk and monitors on the short wall, form an equal triangle between your head and the speakers with tweeters at ear height, and treat the wall behind you and the first reflection points so the stereo image is honest. For tracking, you want the loud source, a vocal spot, an amp, or a drum riser, separated from the monitors, ideally in a small isolation booth or at the far end, so the mic isn't capturing your speakers and you can monitor on headphones while recording. For full-band rehearsal, you prioritize floor space and air volume so the kit, the amps, and the players fit comfortably and the low end isn't crammed into a corner, and you lean harder on isolation since rehearsal is the loudest, longest use. A 12x16 handles a control room plus a booth, while a 12x20 is the call if rehearsal or live drum tracking is the main event. Plan the zones on paper first, because the right footprint depends on which job comes first.
A backyard music studio shed in Coeur d'Alene or Post Falls solves a problem a home recording space never fully can: isolation. When the walls are yours alone — not shared with a living room or a neighbor — you can track loud without headphones and mix at real monitoring levels. NIOS builds each studio shed on site, so the wall mass, decoupling details, and framing depth are part of the construction plan from day one, not a retrofit layered onto a prefab box.
North Idaho winters add a layer of planning that warmer-climate guides skip. Insulation for thermal performance and insulation for sound transmission partially overlap, but they don't solve each other. A thick batt in the stud bay helps with both; the weak point is usually the ceiling, where a cold attic and an adjacent room compete for the same framing. Getting the ceiling assembly right during the build — rather than patching it after — is where on-site framing pays off.
Quiet HVAC is not optional for a tracking room. A correctly sized mini-split with a low-velocity head produces background noise that's inaudible during a vocal take. Plan the outdoor condenser location early, because Sandpoint and Rathdrum properties with wooded lots sometimes have only one realistic run for the line set, and finding that out late adds cost.
When you're ready to move forward, design the studio footprint in the shed builder or get a free estimate. The music studio service page has build details on wall assemblies and electrical options.
Tell us what you'll track, mix, or rehearse and we'll help you size, lay out, and price an isolated, treatment-ready music studio shed for your North Idaho property.
Keep planning your build with related North Idaho shed guides.