A snowmobile shed has to work on the worst day of the season, not just when the machine is clean. In North Idaho, that means enough door width, a plow-friendly approach, durable threshold planning, and a layout that keeps helmets, boots, tools, belts, covers, oil, and fuel from fighting for the same corner.
The best sled shops are simple and deliberate. The machine path stays open, wet gear has a drop zone, maintenance tools stay close to the bench, and off-season storage does not bury the sled behind summer gear. North Idaho On Site Sheds can build the shell around that workflow on your site, then leave specialized mechanical, fuel, and electrical details to the right trades and equipment instructions.
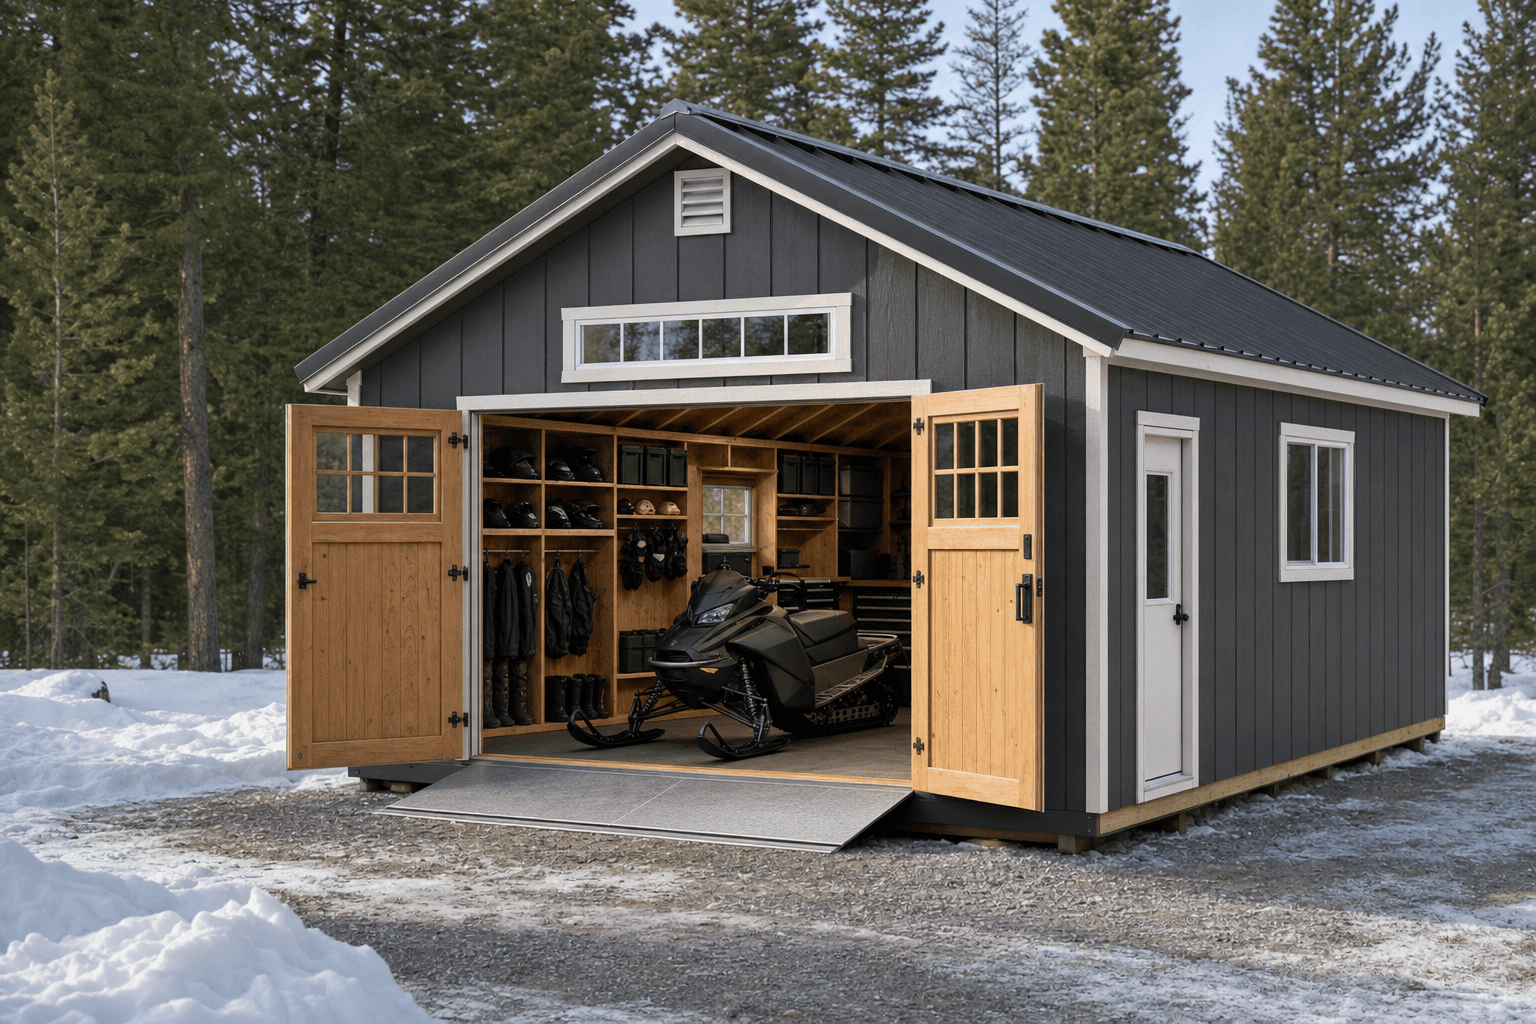
Wide winter access, durable threshold planning, ventilation, and organized gear zones make a sled shed easier to use through North Idaho snow season.
Plan the door around the sled, skis, handlebars, dollies, and trailer loading routine. A wide opening is easier to use when the gravel pad and plowed approach line up with it.
A compact bench, tool wall, and clear aisle let you inspect wear items, dry the machine, and prep for the next ride without blocking the door.
Helmets, gloves, boots, covers, belts, oil, and fuel-related items should have defined zones so clean gear is not stored under damp or odor-prone supplies.
Most snowmobile shed mistakes happen before the walls go up. A shed can have enough square footage on paper and still be frustrating if the door faces the wrong direction, the approach catches plowed snow, or the machine has to turn sharply as soon as it crosses the threshold. For a sled shop, the site plan matters as much as the footprint.
Think through how the machine arrives. Some owners ride from a trail-access property. Others unload from a trailer, use dollies, or stage the sled near a garage or shop. The shed should support that routine with a straight shot into the bay, room to step around the track, and a floor surface that can handle meltwater and grit.
If the shed also stores off-season gear, keep that storage high, along the side wall, or in a rear zone that does not interrupt winter access. Covers, spare belts, oil, tools, boots, helmets, avalanche packs, and trail shovels all need a home, but none of them should turn the machine path into an obstacle course.
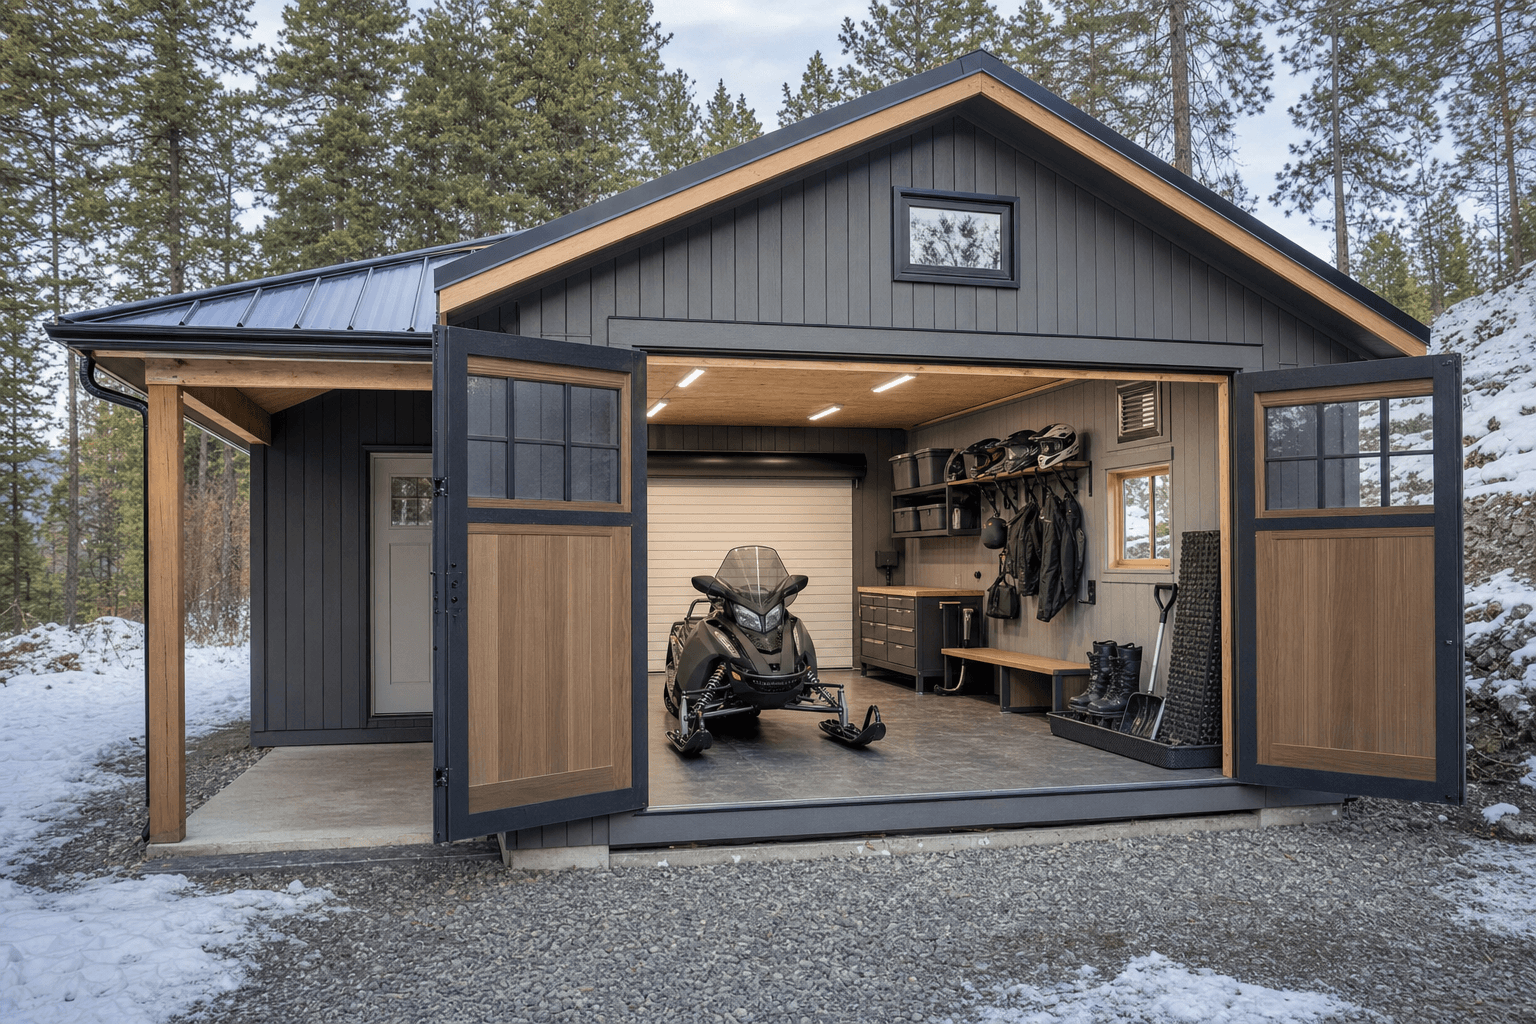
A clear aisle, workbench, helmet shelves, boot storage, and blank gear bins keep maintenance and trip prep from crowding the sled path.
| Feature | Basic storage shed | Dedicated sled shop layout |
|---|---|---|
| Door planning | Sized for occasional access and seasonal parking. | Aligned with trailer, dolly, or ride-in workflow and winter snow clearing. |
| Interior flow | Open floor with shelves where they fit. | Clear machine aisle, bench zone, boot/helmet storage, and tool access. |
| Wet gear | Usually ends up on the floor or nearest shelf. | Dedicated boot trays, hooks, ventilation cues, and drip-tolerant surfaces. |
| Off-season use | Can become a mixed storage pile. | Separates covers, tires, summer gear, and sled supplies from the winter bay. |
A good sled shed respects snow, freeze-thaw, and the way local riders stage gear before a trail day.
Roofline, overhang, door direction, and pad placement should be discussed around drifting, roof shedding, and where plowed snow will actually go.
Practical siding, trim, threshold, and flooring choices help the shed handle snowmelt, gravel, boots, and repeated winter access.
Vents and operable windows can help with air movement, but fuel, oil, heat, and mechanical work still need common-sense handling and qualified guidance where required.
A snowmobile shed should not make unsafe promises about fuel or chemical storage. The practical goal is separation and planning: keep clean riding gear away from odor-prone supplies, avoid storing containers where they can be kicked or buried, and leave room for manufacturer instructions and local requirements to guide the final setup.
Ventilation is useful because sled sheds collect wet boots, damp covers, thawing snow, and small-engine odors. Passive vents, operable windows, and a layout that does not trap everything in one corner can make the shed easier to live with. If heat, fuel transfer, electrical service, or mechanical work is part of the plan, those details should be discussed before construction and handled by qualified trades where needed.
Off-season storage deserves its own map. A sled that sits behind lake gear all summer is harder to inspect before the first storm. Put covers, dollies, chargers, tools, and riding gear where they can be reached without pulling the whole shed apart in November.
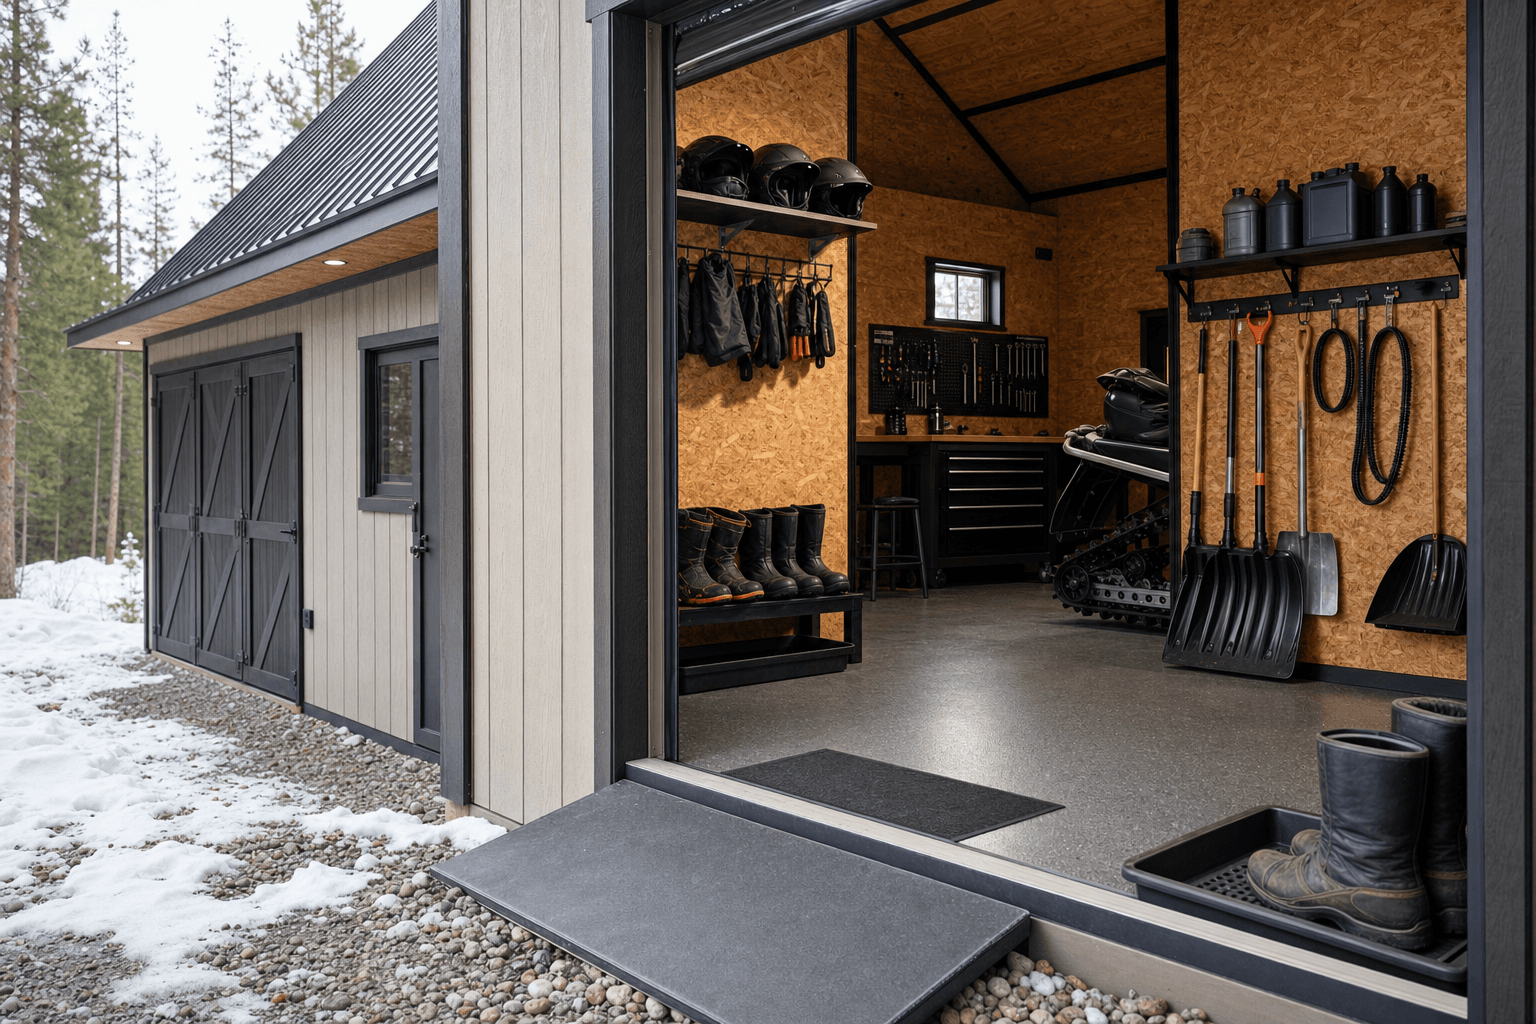
Threshold, floor, ventilation, and storage planning matter when wet boots, helmets, tools, and sled supplies all need a practical winter workflow.
| Access and shell | |
|---|---|
| Common footprints | 10x16 for a tight single-sled storage plan; 12x20, 12x24, 14x20, or 16x24 when a bench, gear wall, and trailer workflow matter. |
| Door direction | Face the most reliable winter approach, not the prettiest view, and leave room for plowed snow piles. |
| Threshold | Plan a durable, low transition that can handle dollies, skis, track mats, and meltwater cleanup. |
| Interior zones | |
| Clean gear | Helmet, glove, boot, and pack storage should stay away from fuel and oil-related supplies. |
| Maintenance | Keep bench depth modest so tools are useful without narrowing the machine aisle. |
| Off-season | Use upper shelves or rear-wall zones for covers, spare parts, summer gear, and seasonal bins. |
A tight single-sled storage plan may start around 10x16, but many North Idaho owners prefer 12x20 or larger when they want a bench, gear wall, and room to walk around the machine. If trailer loading, dollies, or two machines are part of the routine, plan the footprint around that movement first.
Both can work. Double shed doors fit many storage plans and keep the building simple. A roll-up door can make sense when the sled shop needs frequent machine access, but the final choice should account for width, winter clearance, weather exposure, and how the door behaves around snow buildup.
The shed can be planned with a separated shelf or cabinet zone, but fuel and oil storage should follow container instructions, local requirements, and common-sense separation from clean gear, heat sources, and exits. We avoid unsafe promises and design the layout so those items are not mixed into helmet and boot storage.
Start with a durable threshold, a floor plan that leaves room for mats or trays, and ventilation cues such as vents or operable windows. Good site drainage and a gravel approach also matter because the mess often starts before the sled reaches the door.
Yes. Off-season storage works best when covers, spare parts, chargers, tools, and summer gear have defined zones that do not bury the sled. Upper shelving, side-wall hooks, and a rear storage wall can keep the winter bay ready for inspection before the first ride.
Decide how the machine enters, whether a trailer is involved, where plowed snow will go, how much bench space you need, and what clean gear should stay separate from fuel or oil supplies. Those decisions shape the door, pad, roofline, window, vent, and interior storage plan.
Tell us how you load in, what gear needs to stay dry, and where the shed will sit. We will help plan a practical shell around your North Idaho sled routine.
Every shed we make is built on site in North Idaho. Explore other uses we build for.
